Facebook sends a security code to your saved mobile number or email inbox to let you access the account. There are many factors at play here. Let’s go through them and get the Facebook authentication code. Before we start, here are the possible reasons why Facebook asks for a security code to verify your account.
You are trying to sign in from a new device. Facebook detects sign-in attempts from a different region (location). You are signing into your Facebook account from a different IP address. Someone else is breaching your Facebook account.
1. Wait for Some Time
Due to an absurd number of user requests, Facebook servers get jammed often and delay sending a verification code. You might want to wait for some time (for around five minutes) and check your messages or email inbox again.
2. Check Network Connection
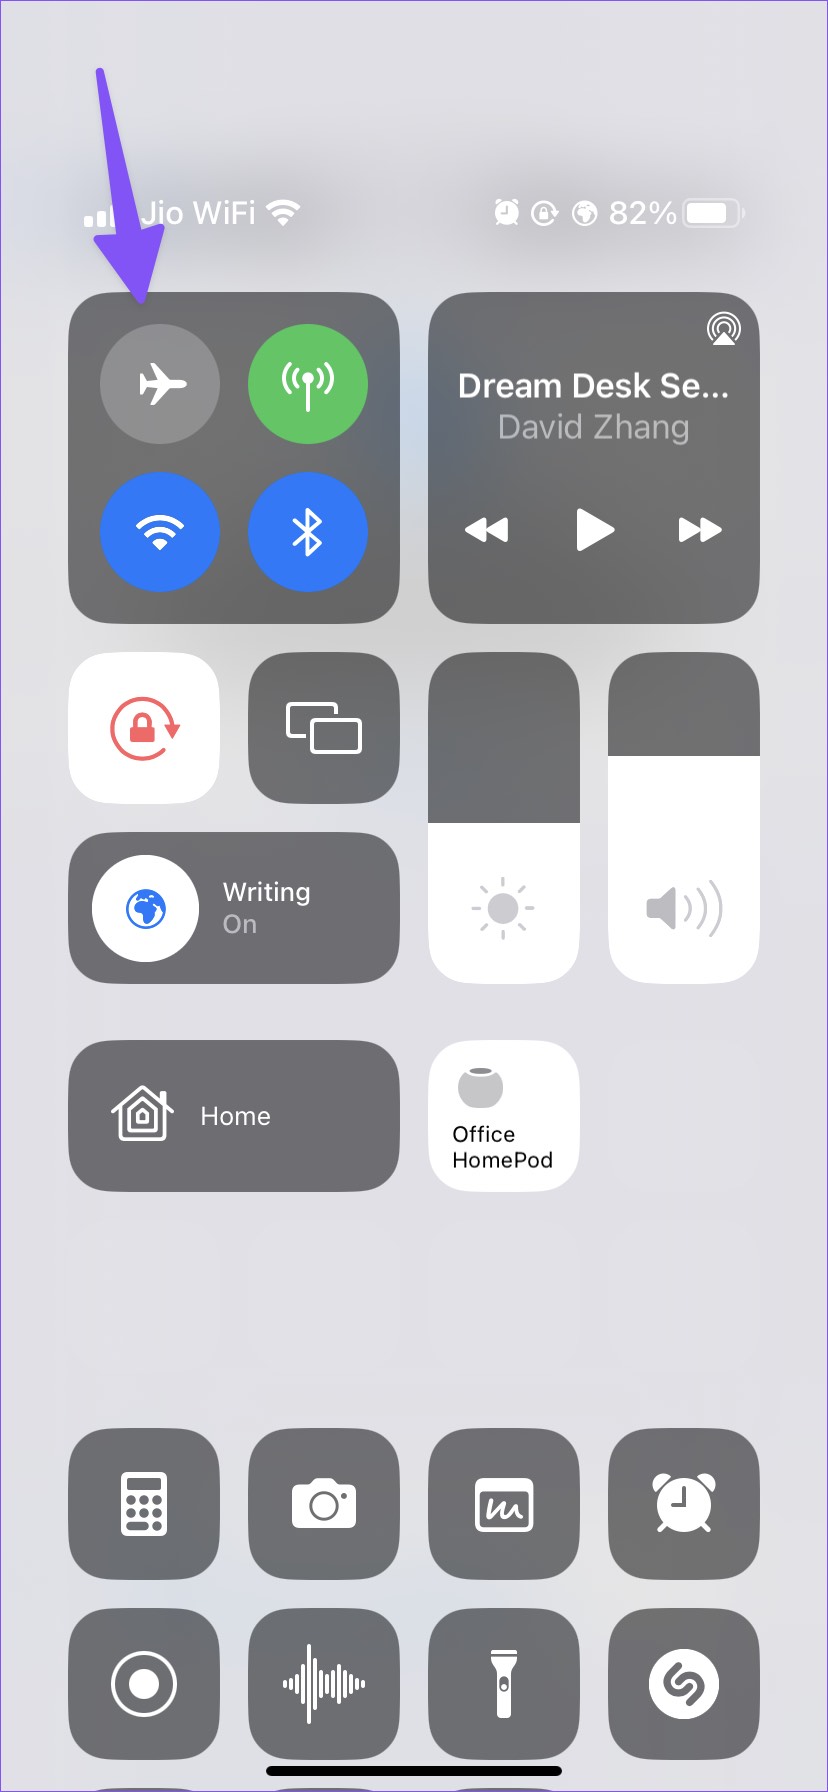
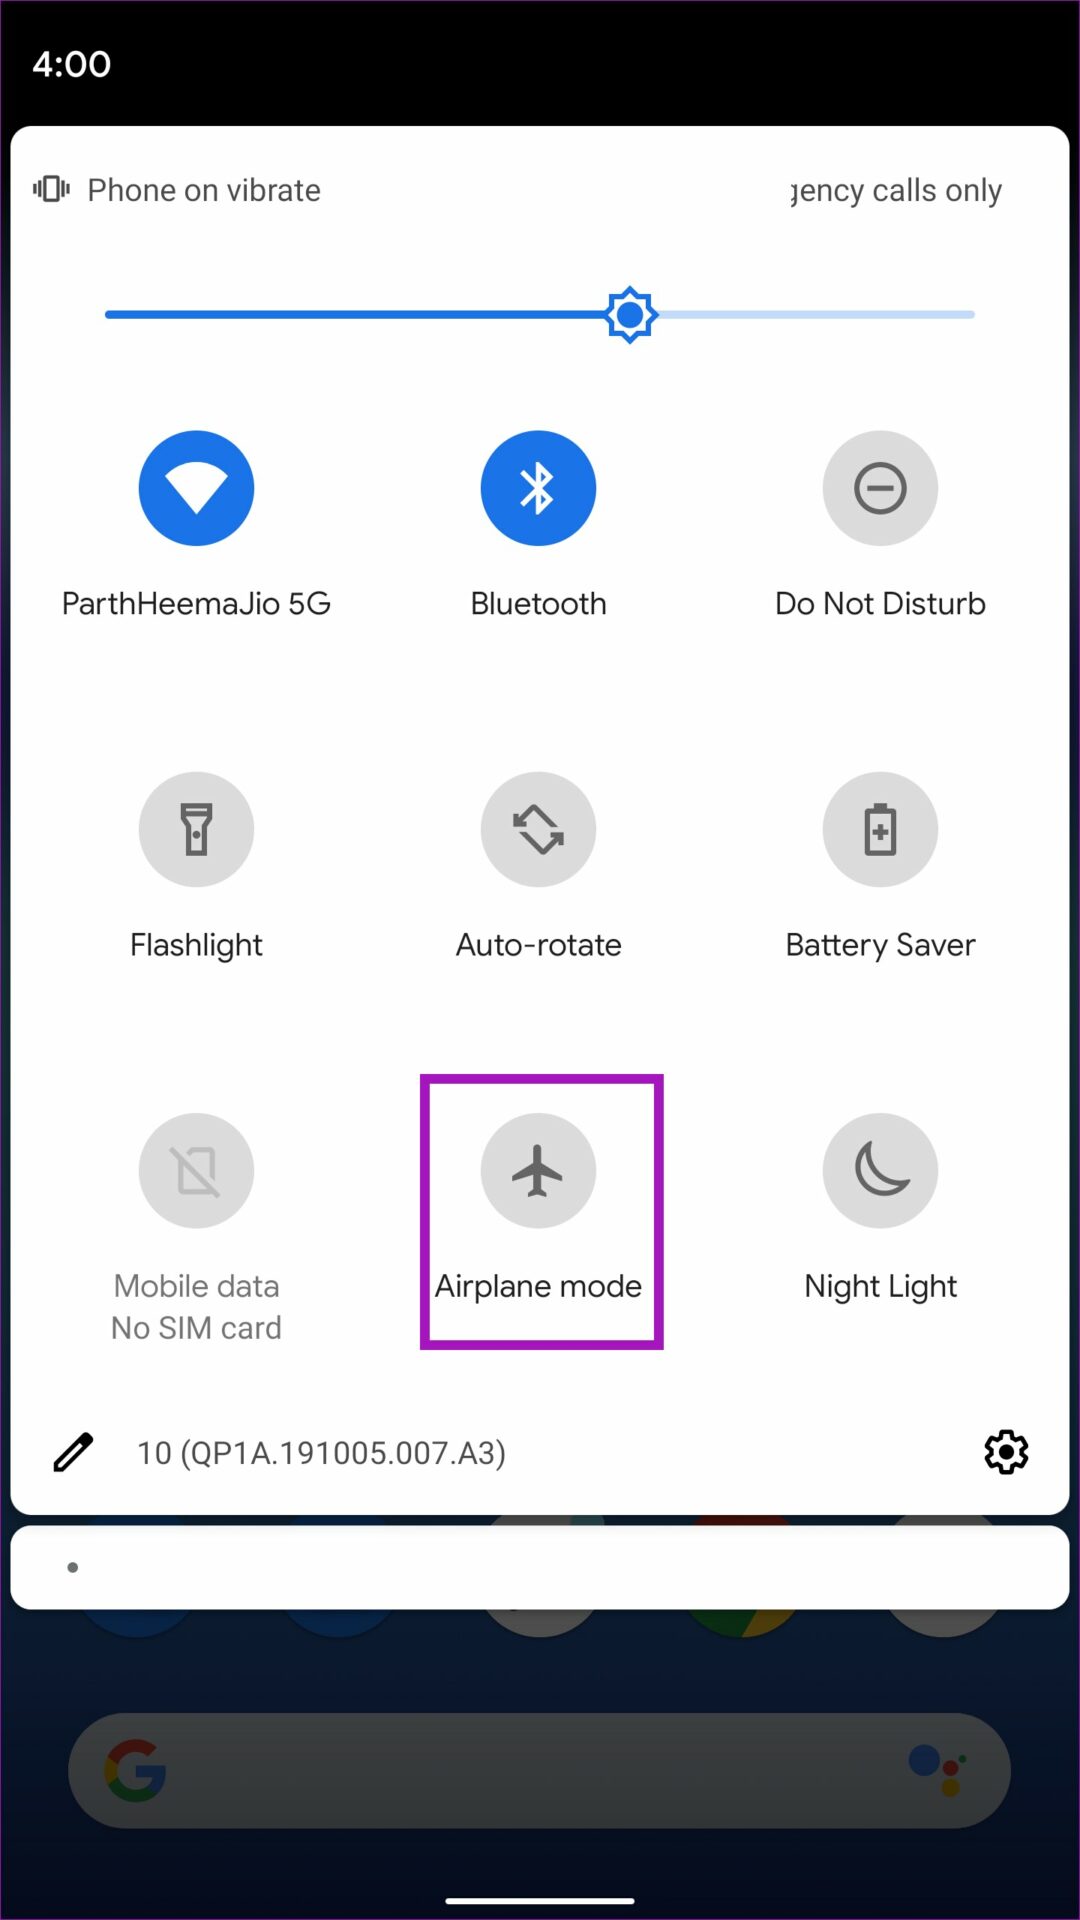
You might face issues getting a security code on a sketchy internet connection. You can reset the network connection using the Airplane mode trick. On iPhone, swipe down from the top right corner and enable Airplane mode. Disable it after a few seconds and check if the Facebook security code has arrived or not. Android users can swipe down from the top and enable Airplane mode from the quick toggles menu. If you still face issues with your carrier network connectivity, it’s time to reset network settings on your iPhone or Android.
3. Check Spam or Archive Folder
Did Facebook send you a security code over email? Sometimes, Gmail and Outlook algorithms can be mistakenly send Facebook emails to the Spam or Archive folder. Step 1: Visit Gmail on the web and log in with your account details. Step 2: Open Spam inbox from the left sidebar.
Step 3: Check if you have any Facebook emails pending with a security code. If your primary email is Outlook (associated with Facebook), you can navigate to Outlook on the web and check the Archive or Junk email folder.
4. Disable VPN
An active VPN connection allows you to modify your IP address and let you access content and services not available in your region. Even though you are at your home or office, Facebook detects another IP location and might ask for a verification code to confirm your identity. You should disconnect a VPN connection on your phone or desktop and try signing into your Facebook account again. Step 1: Open the VPN app on your phone or desktop. Step 2: You can disconnect VPN and try again.
Some VPN services also allow you pause VPN connection for a few minutes. You can pause the connection, sign in with your Facebook as usual, and the app will enable it again.
5. Check Facebook Servers
Facebook uses in-house service (and doesn’t rely on third-party companies like Twilio) to send security codes. If Facebook servers are having a rough day, you won’t receive any verification code. You can visit Downdetector and search for Facebook. If others face the same, you may notice high outage graphs and user complaints in the comments. You’ll need to wait for Facebook to fix the server issues and log in with your account details.
6. Contact Facebook
If Facebook is still not sending security code, it’s time to contact the company. Head to the Facebook Help Center on the web and select Login and password.
7. Enable and Modify Two-Factor Authentication Settings
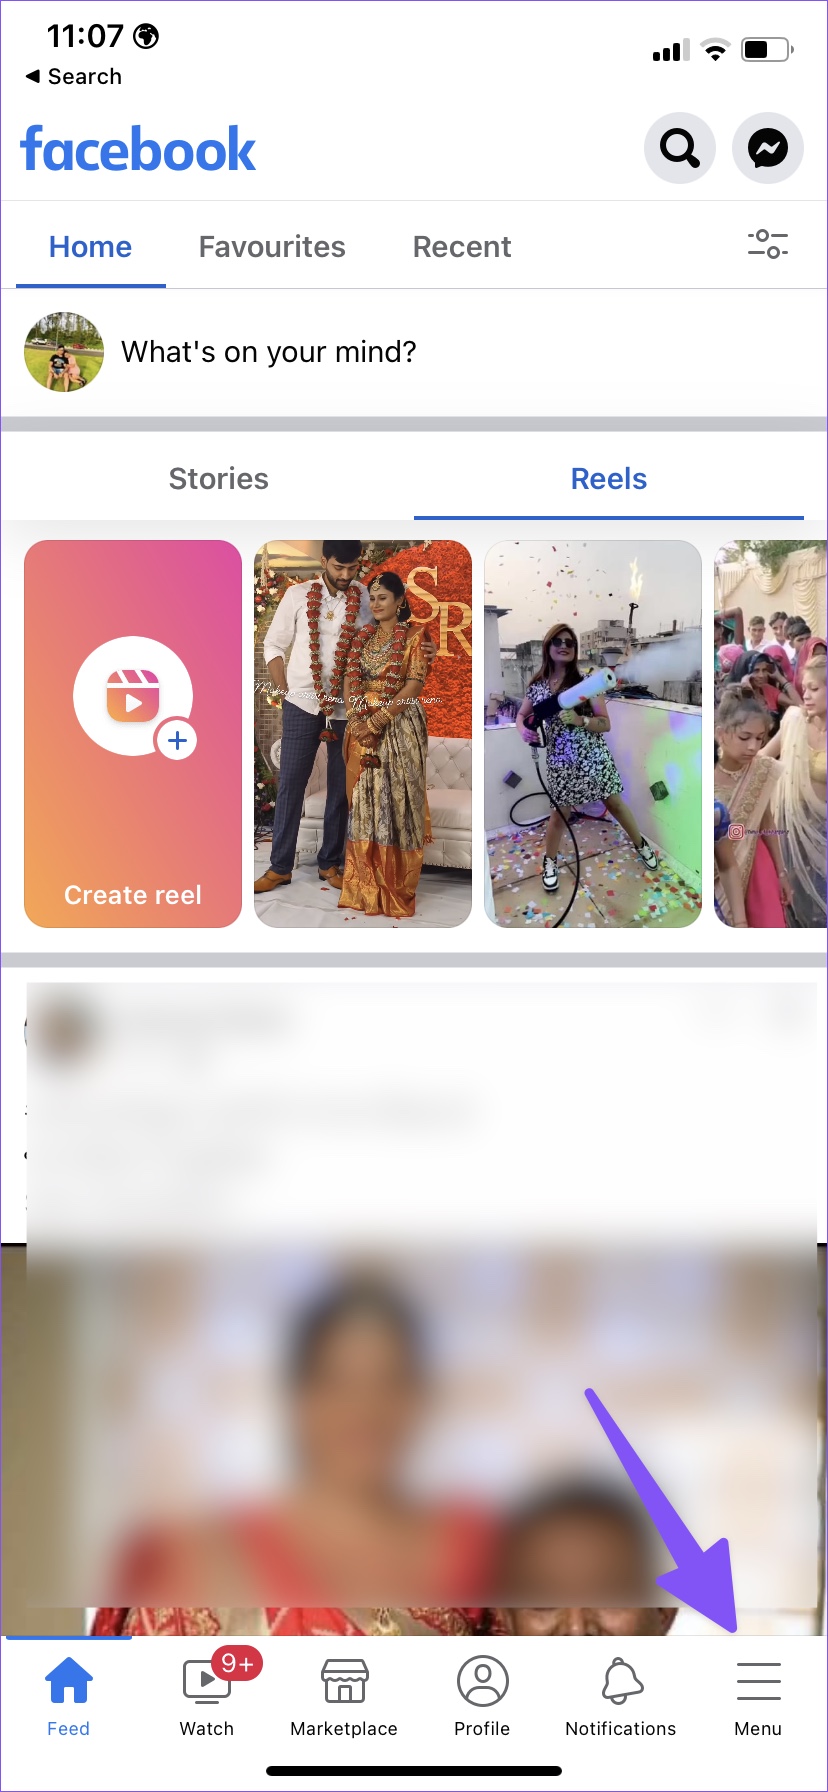
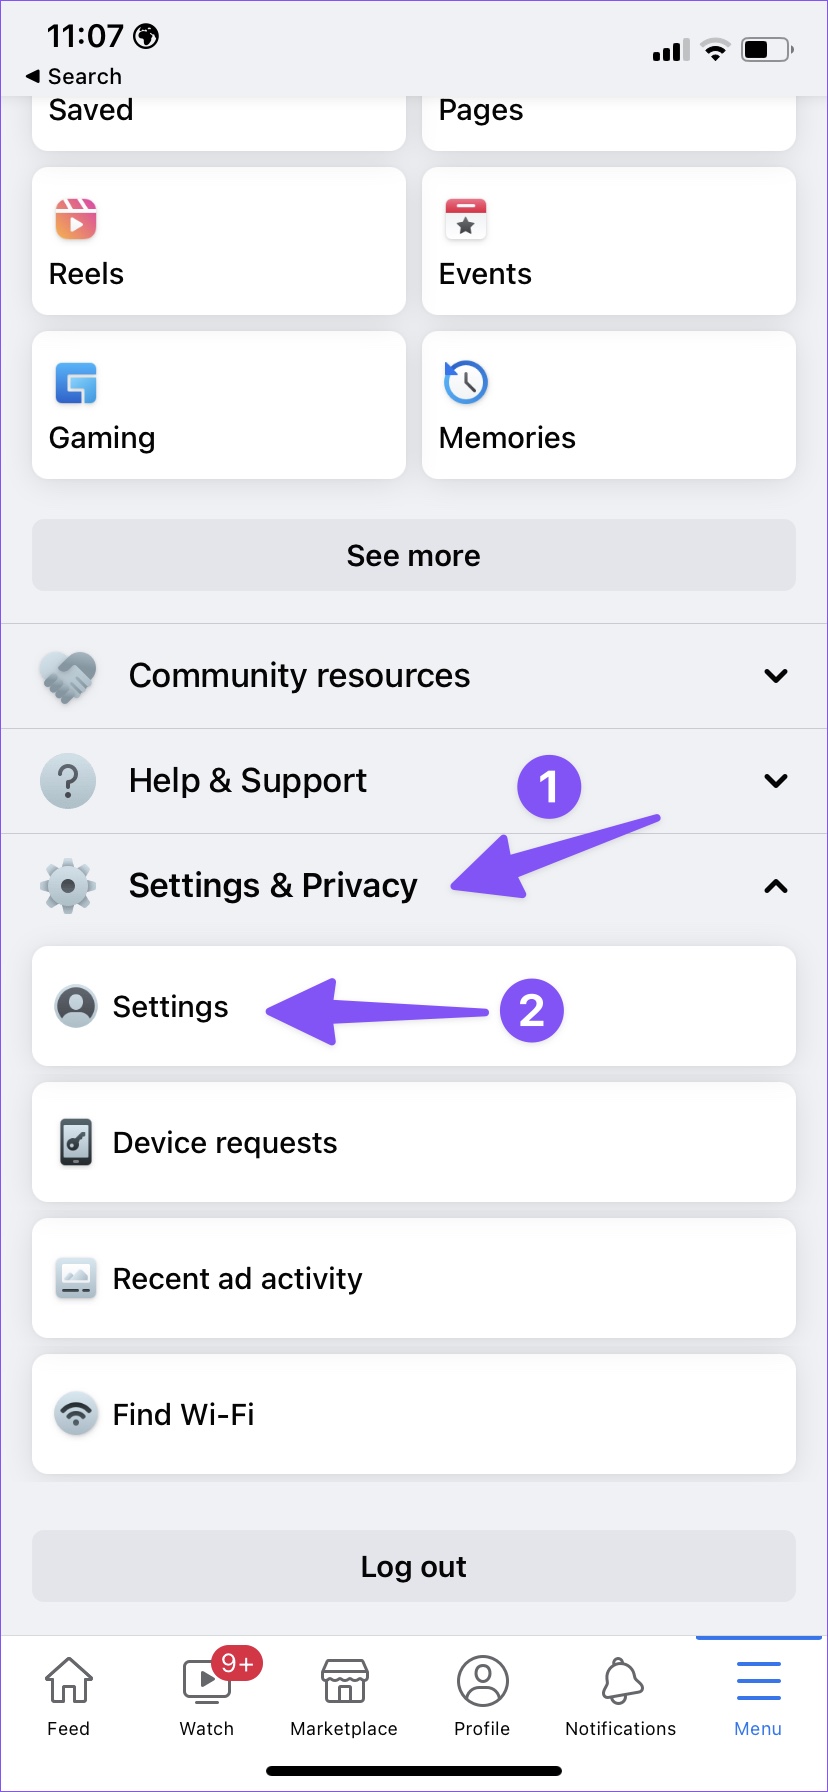
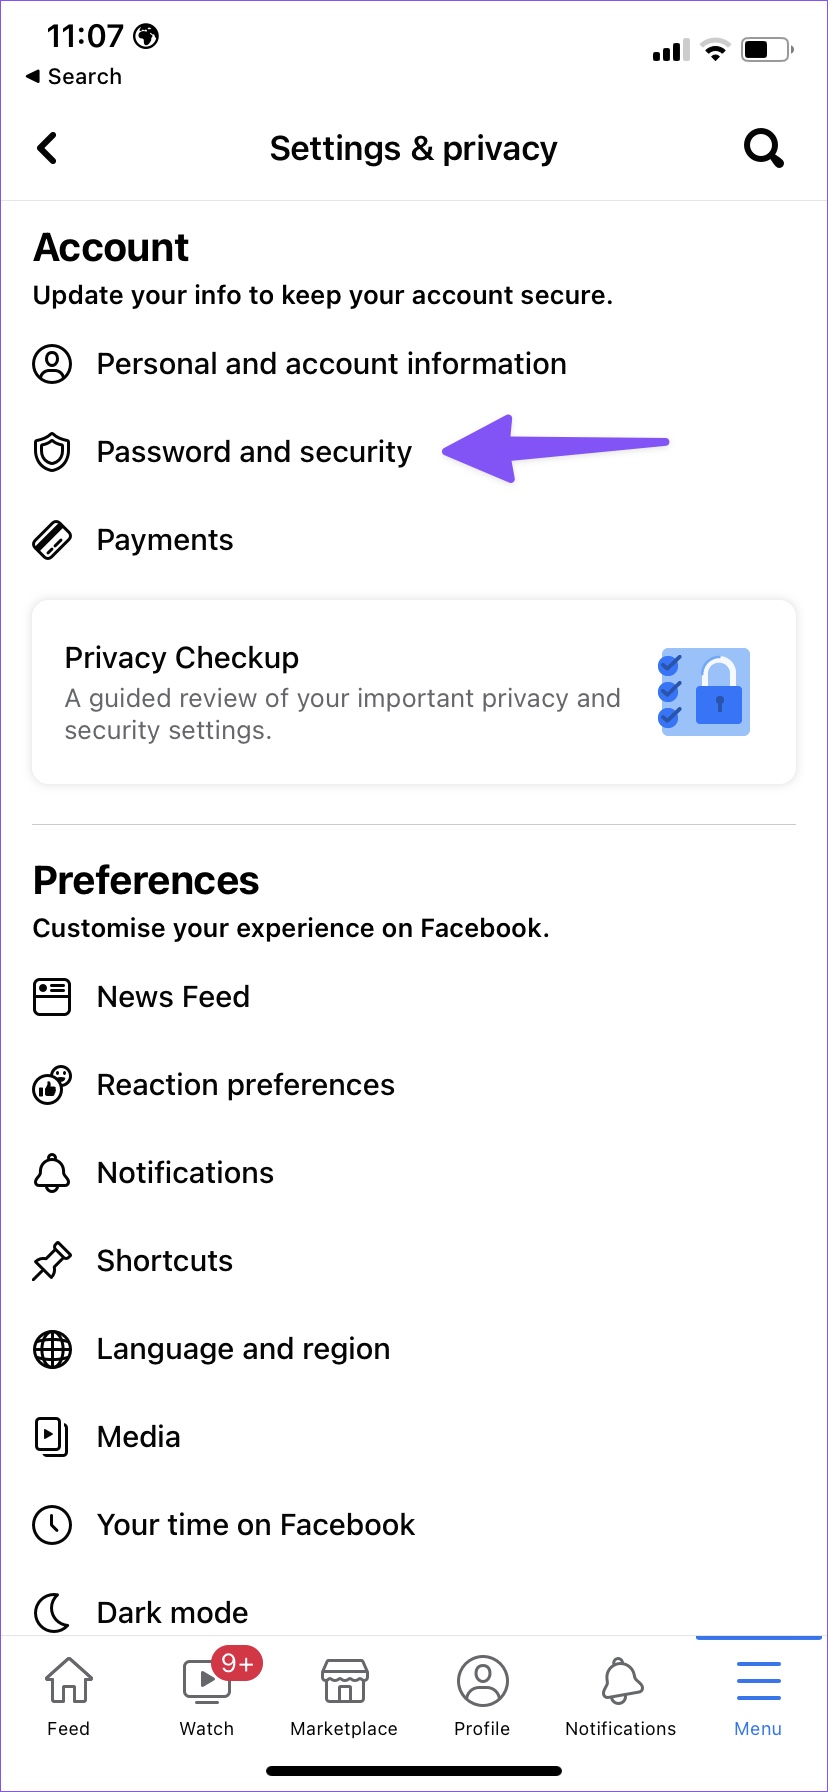
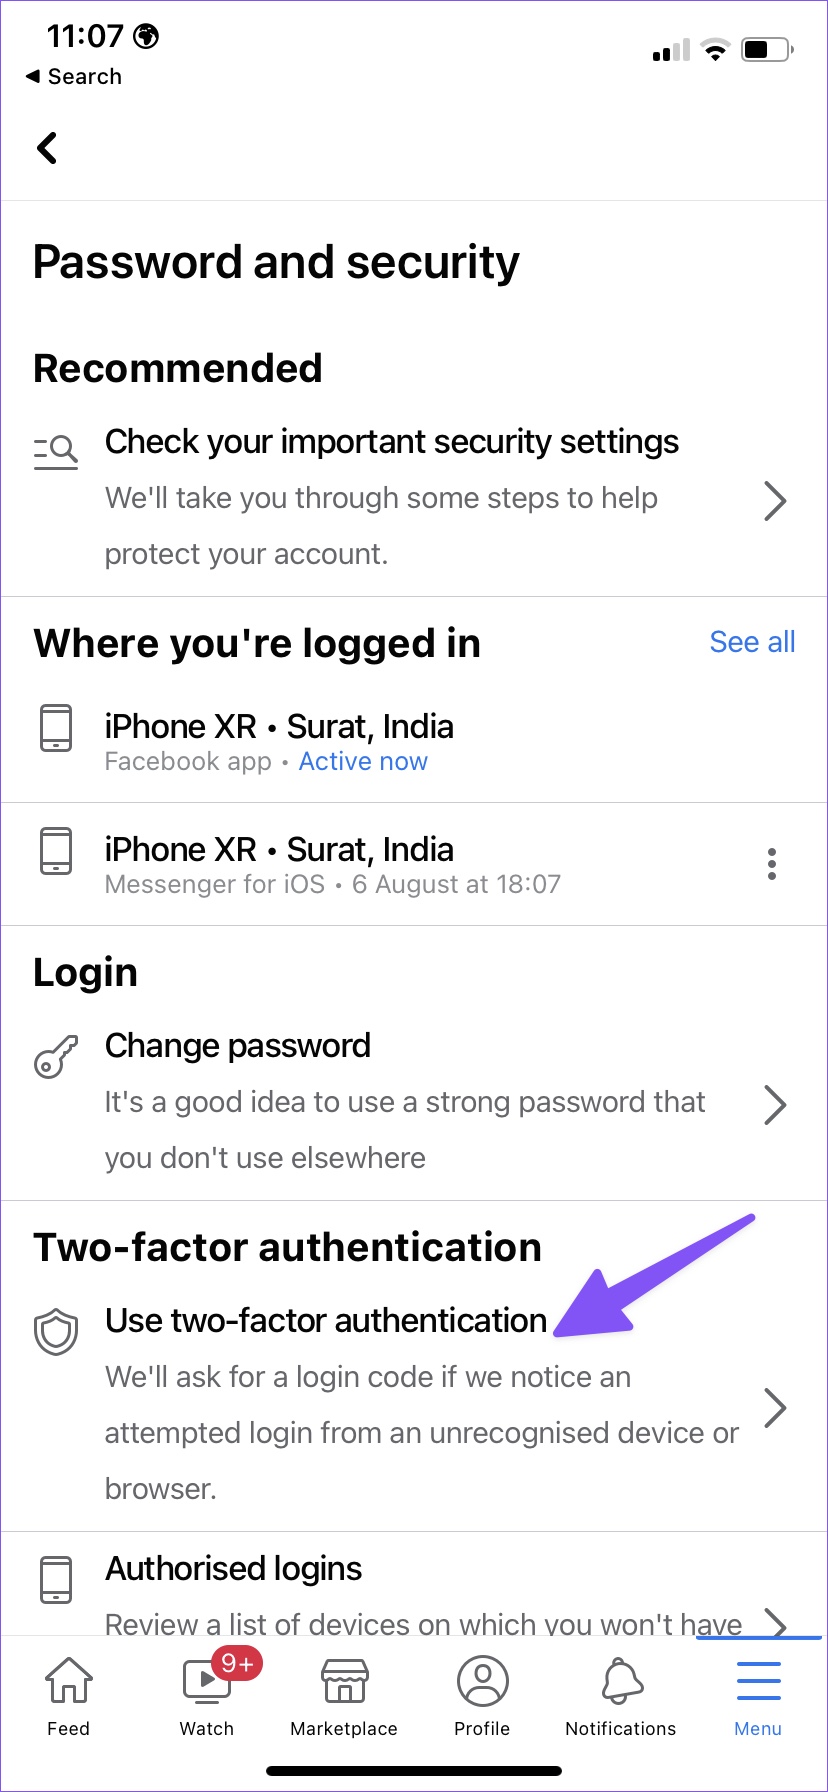
Once you get a security code and access your Facebook account, you should set up 2FA (two-factor authentication) for Facebook via the authentication app. Here’s how. Step 1: Open Facebook on your mobile. Step 2: Select Menu in the bottom right corner. Step 3: Expand Settings & Privacy and open the Settings menu. Step 4: Tap Password and security. Step 5: Select two-factor authentication. Step 6: Select the radio button beside the Authentication app and hit Continue. Follow the on-screen instructions to set up 2FA via a third-party authenticator. You can use any third-party 2FA app to secure your Facebook account. Once you set up 2FA on Facebook, the company won’t ask for an SMS security code. You can confirm your identity via a six-digit code from the 2FA app.
Get Back Facebook Access
Facebook not sending security codes can leave you in confusion. You can use the tricks above and fix the issue in no time. Which trick worked for you? Share your experience with our readers in the comments below. The above article may contain affiliate links which help support Guiding Tech. However, it does not affect our editorial integrity. The content remains unbiased and authentic.
