Thankfully, Windows 11 comes with a few handy audio enhancements and tweaks that can help you improve the audio quality. In this post, we’ll walk you through all of them. So, let’s start.
1. Enable Audio Enhancements
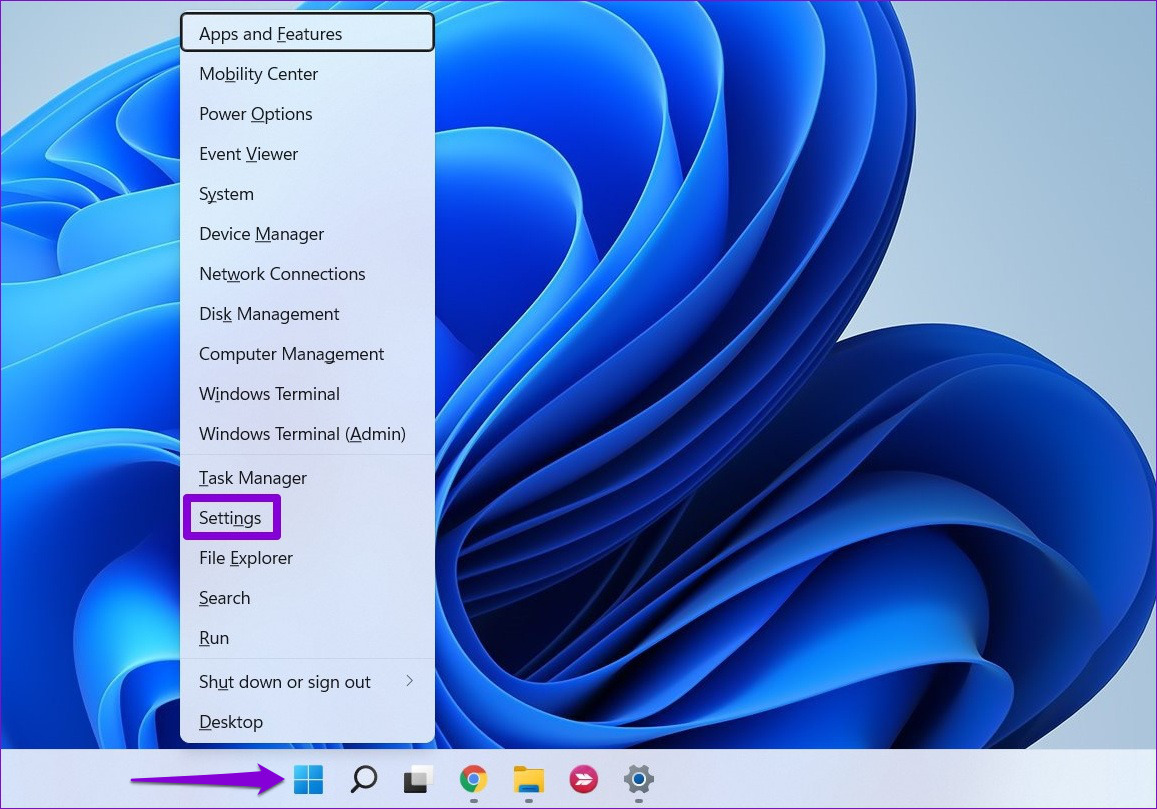
Your Windows 11 PC ships with a handy audio enhancements feature that can automatically improve the sound quality. Hence, this is the first thing you should enable if you’re looking to get better audio quality. Step 1: Right-click on the Start menu icon and select Settings from the list.
Step 2: In the System tab, click on Sound.
Step 3: Scroll down to the Advanced section and click on All sound devices.
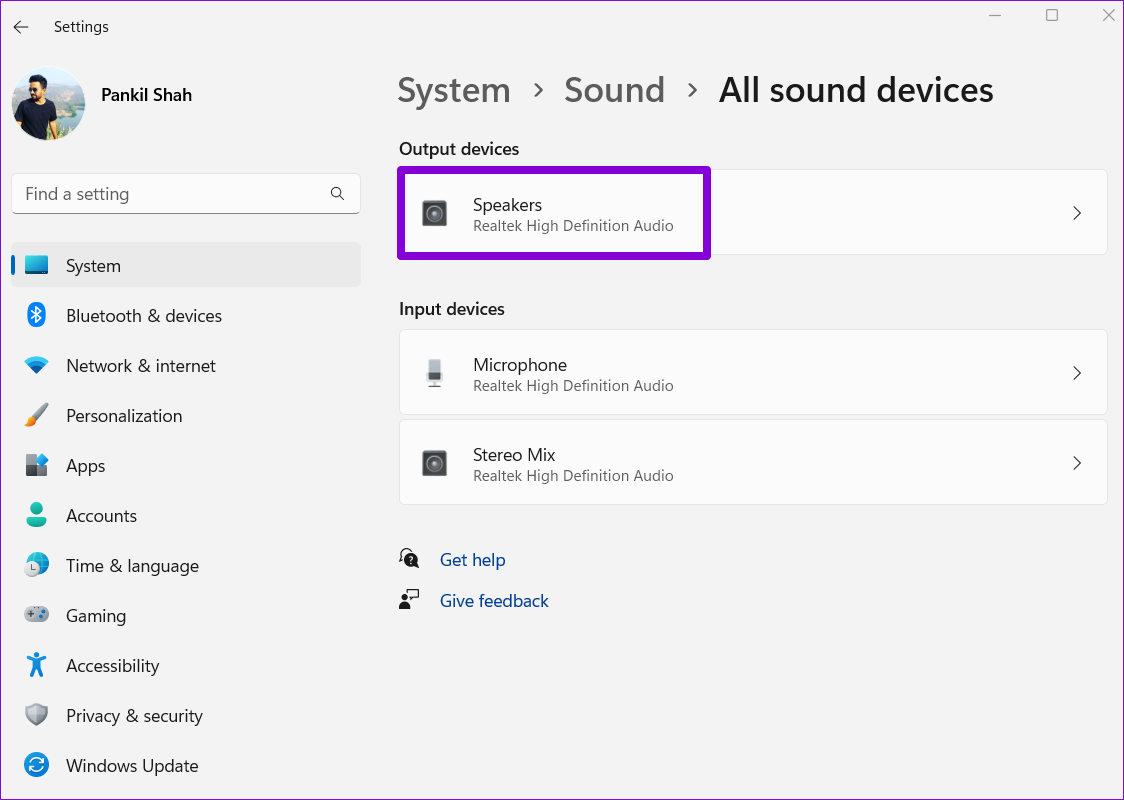
Step 4: Select your audio device from the list.
Step 5: Use the drop-down menu next to Audio enhancements to select Device Default Effects.
You’ll have to repeat the steps above for the audio input and output devices separately.
2. Enable Spatial Sound
Spatial sound on Windows offers an immersive audio experience by simulating a surround sound setup. It’s similar to a three-dimension audio experience where the sound comes in from all directions. If you’re looking to enhance your movie or gaming experience on Windows, enabling spatial sound would help. Step 1: Right-click on the speaker icon on the Taskbar and open Sound settings.
Step 2: Next, select your audio device.
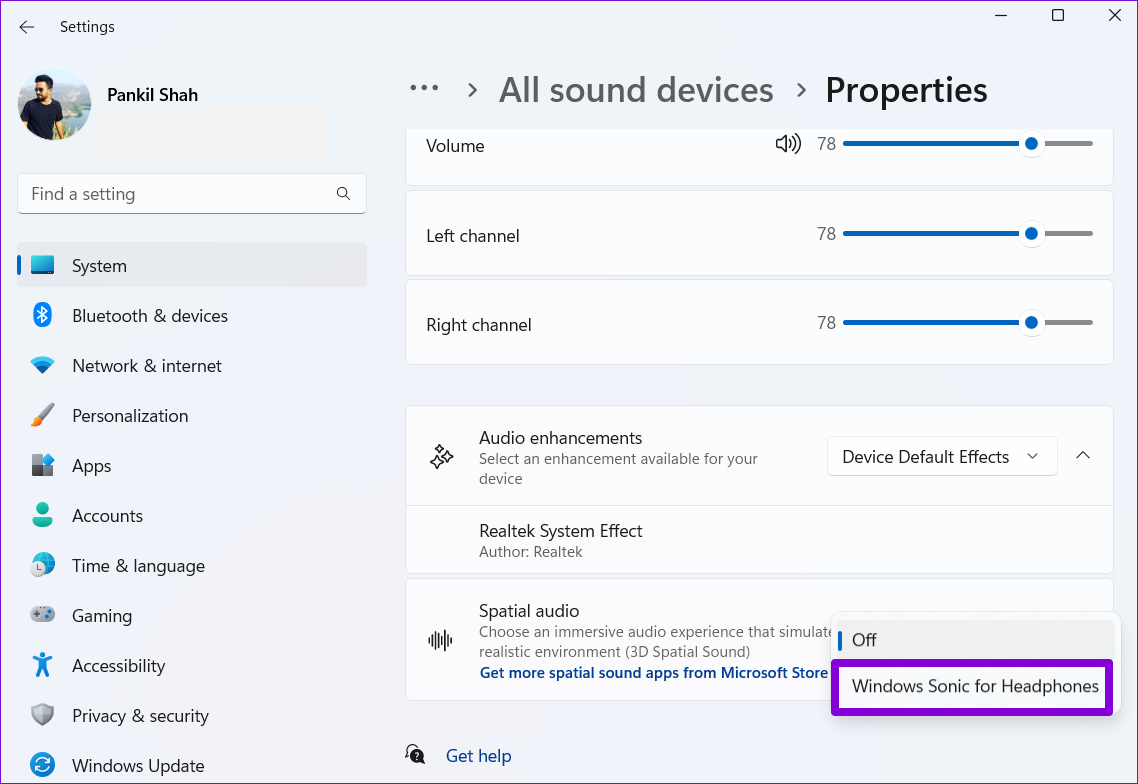
Step 3: Use the drop-down menu next to Spatial audio to select Windows Sonic for Headphones.
You can also try out different spatial audio formats such as DTS Sound Unbound, Dolby Access, and more by downloading them from the Microsoft Store.
3. Set Higher Sample Rate and Bit Depth
Another thing you can do to improve the sound quality on Windows is to bump up the sample rate and bit depth. This can also be useful if the audio is coming out distorted from Windows. Plus, you can test different sample rates and bit depth on Windows right from the Settings app itself. Here’s how. Step 1: Press the Windows key + I to open the Settings app. Then go to Sound.
Step 2: Click on your audio device to open its properties.
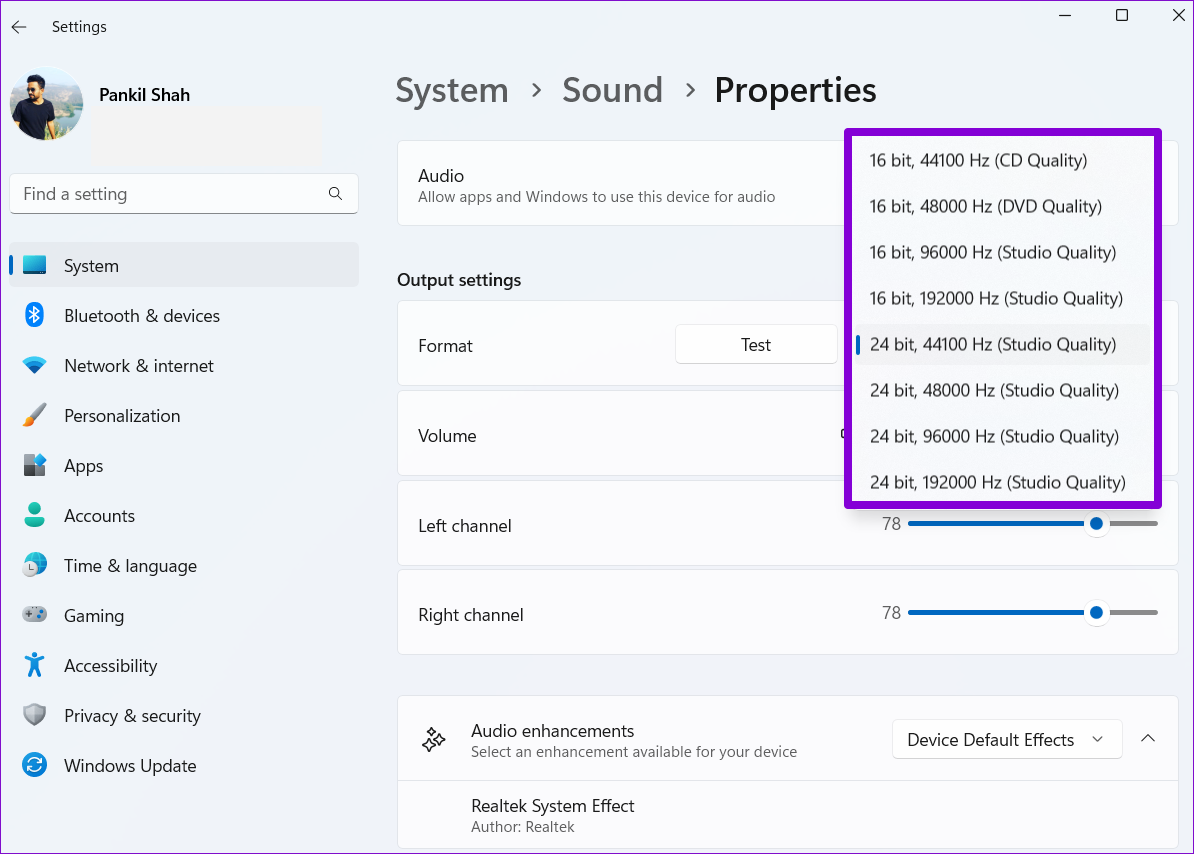
Step 3: Under Output settings, use the drop-down menu next to Format to set a higher sample rate and bit depth.
Step 4: Next, click on the Test button to hear sample audio.
4. Change Audio Profile Preset
Windows 11 also offers a few audio presets such as Bass Boost, Loudness Equalization, Virtual Surround, etc. You can go through different audio presets to achieve the best sound output possible. Read on to learn how. Step 1: Click on the Search icon on the Taskbar, type in sound settings, and press Enter.
Step 2: Scroll down to Advanced and click on More sound settings.
Step 3: Double click on your audio device to open its properties.
Step 4: Switch to the Enhancements tab and find all the available sound effects with descriptions.
Step 5: Select your preferred sound effects and click on Apply.
5. Try Out Different Equalizer Settings
Aside from the audio presets, Windows also offers a sound equalizer. Although it’s quite basic, you can use it to adjust the sound effect and emulate the frequency to your liking. Here’s how. Step 1: Right-click on the speaker icon on the Taskbar and open Sound settings.
Step 2: Scroll down to Advanced and click on More sound settings.
Step 3: Double-click on your audio device to open its properties.
Step 4: Under the Enhancements tab, select Equalizer. Then, click on the three-dot menu icon next to Settings to adjust the bands yourself.
Alternatively, you can use the drop-down menu next to Settings to select from the available presets.
Step 5: After tweaking the equalizer, click on Save. Then enter a name for your preset, and click on OK.
Step 6: Lastly, click on Apply to save changes.
6. Update Audio Drivers
Lastly, keep the audio drivers on your PC. Besides improving audio quality, updating drivers will keep you from running into any audio issues on Windows 11. To update the audio drivers on Windows, follow the steps below. Step 1: Press the Windows key + X to open the Quick Links menu and select Device Manager from the list.
Step 2: Double-click on ‘Sound, video, and game controllers’ to expand it. Right-click on your device and select Update driver.
From there, follow the on-screen prompts to finish updating the drivers.
Sounds Good
Implementing the above tips should help you improve the audio quality on Windows 11. Although we only talked about Windows 11, you can employ all the above tips to improve sound quality on Windows 10. The above article may contain affiliate links which help support Guiding Tech. However, it does not affect our editorial integrity. The content remains unbiased and authentic.


