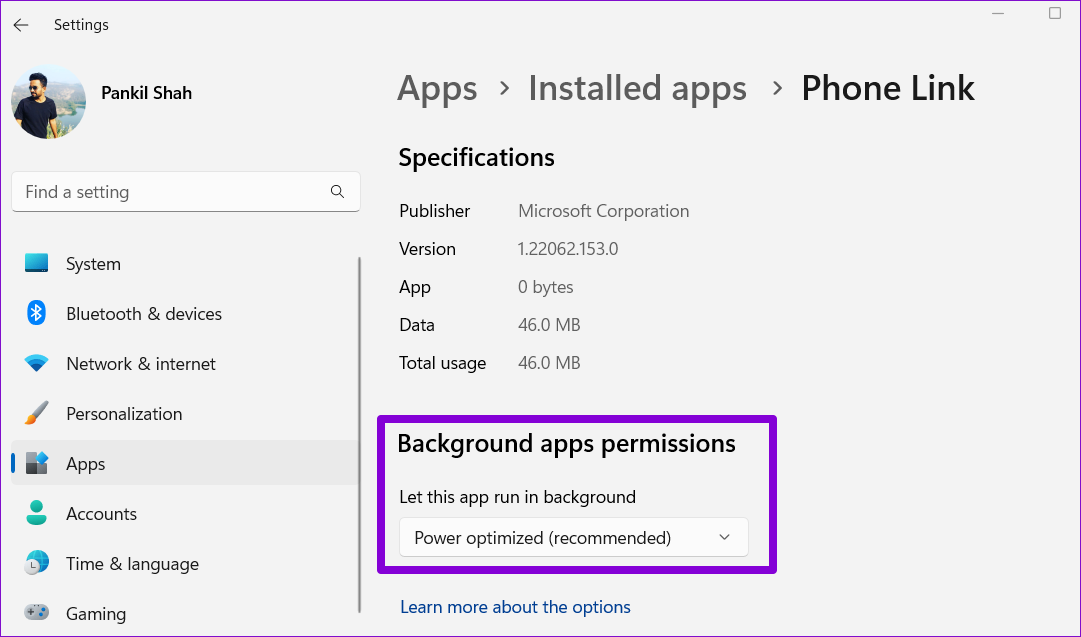
There can be several reasons behind this. In this article, we’ll share some troubleshooting tips you can try if the background apps permissions option is missing from your Windows 11 computer. So, let’s get right to it.
1. Configure Background App Permissions via Battery Settings (For Laptops)
You can manage background app permissions in various ways in Windows 11. So if the usual method does not work, you can access background app permissions through Power and Battery settings on Windows. Here’s how. Step 1: Press the Windows key + I to open the Settings app. Select the System tab from the left column and, click on Power & battery on the right pane.
Step 2: Click on Battery usage to expand it.
Step 3: Locate the app for which you want to change the background permissions. Tap the three-dot menu icon next to it and select Manage background activity.
Step 4: Use the drop-down menu to manage background permissions for the app.
2. Use Task Manager (For Desktop Apps)
It’s important to note that Windows 11 only provides the background apps permissions option for Windows Store apps. So, you won’t see this option for traditional desktop apps. You can use Task Manager to enable or disable the program as a startup app. Here’s how. Step 1: Press Ctrl + Shift + Esc to open the Task Manager. Switch to the Startup apps tab and locate your desktop program on the list.
Step 2: You can enable the program as a startup app, allowing it to launch automatically when your computer boots. The app will continue to run in the background until you close it. Alternatively, disabling the program will prevent it from running on boot.
3. Enable Background Apps Permissions From Group Policy
Another reason you may not see the background apps permissions option is if the feature is disabled from the Group Policy. You can enable the feature by using the Group Policy Editor. The Group Policy Editor is only available for Windows 11 Professional, Enterprise, and Education editions. If your computer runs Windows Home edition, you’ll need to use the Registry Editor and skip to the next method for that. Step 1: Press the Windows key + R to open the Run dialog. Type in gpedit.msc and press Enter.
Step 2: In the Group Policy window, use the left pane to navigate to the following folder.
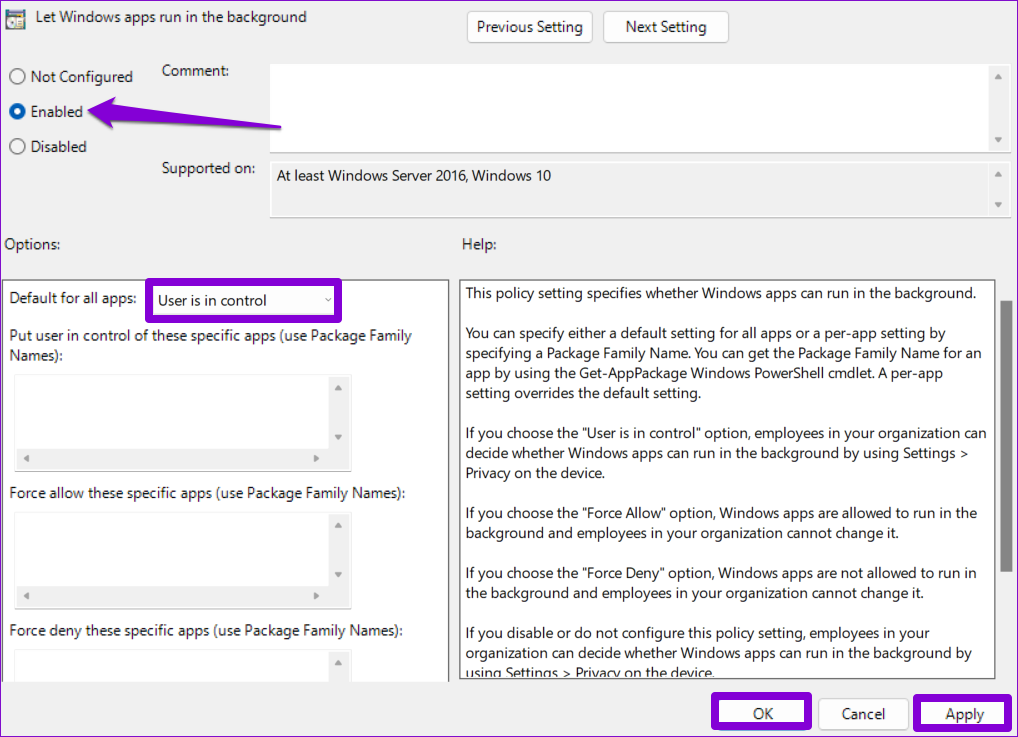
Step 3: Double click the ‘Let Windows apps run in the background’ policy from the right pane.
Step 4: Select Enabled and use the drop-down menu under Options to select ‘User is in control.’ Then, hit Apply followed by OK.
Restart your PC and see if you can find the background apps permissions option in the Settings app.
4. Enable Background Apps Permissions From Registry Editor
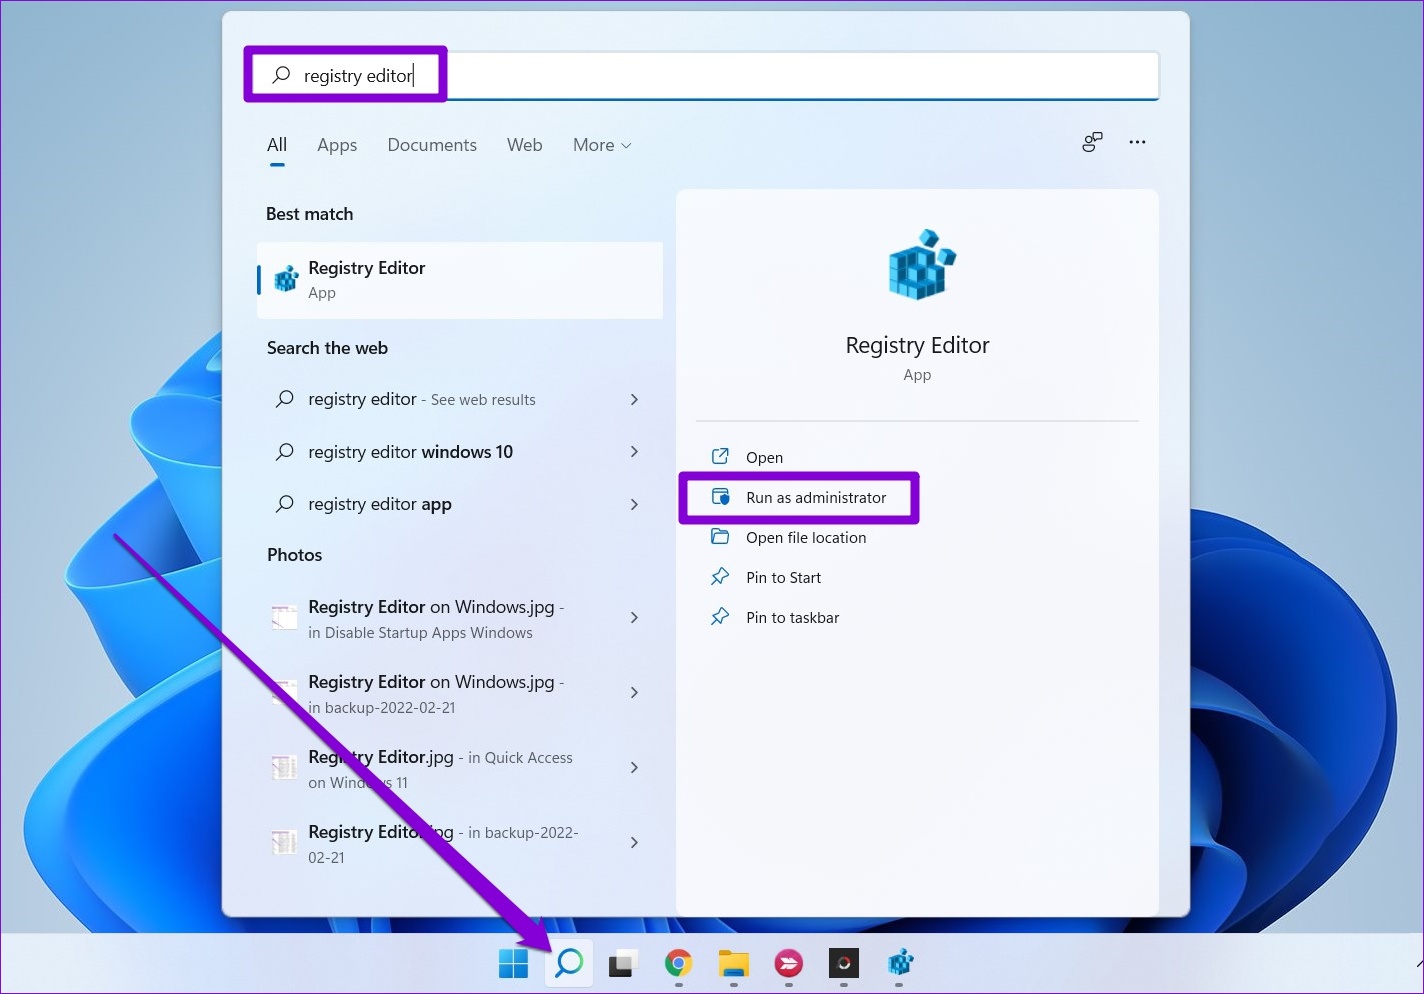
If you don’t have access to the Group Policy Editor, you can restore the missing background apps permissions option using the registry trick below. Since the Registry Editor holds important settings for Windows, it’s always a good idea to backup all registry files or create a restore point before you proceed. Step 1: Click the search icon on the Taskbar, type registry editor, and select Run as administrator.
Step 2: Use the address bar at the top to quickly navigate to the following key:
Step 3: Locate a sub-key named AppPrivacy within the Windows key folder. If such a key does not exist, right-click on the Windows key, choose New, and select Key. Name it AppPrivacy.
Step 4: Inside the AppPrivacy key, right-click anywhere on the empty space, go to New and select DWORD (32-bit) Value. Name it LetAppsRunInBackground.
Step 5: Double click on the newly created key and change its value to 0. Then, click OK.
Restart your PC and you should see the background apps permissions option in the Settings app.
5. Run the SFC and DISM Scans
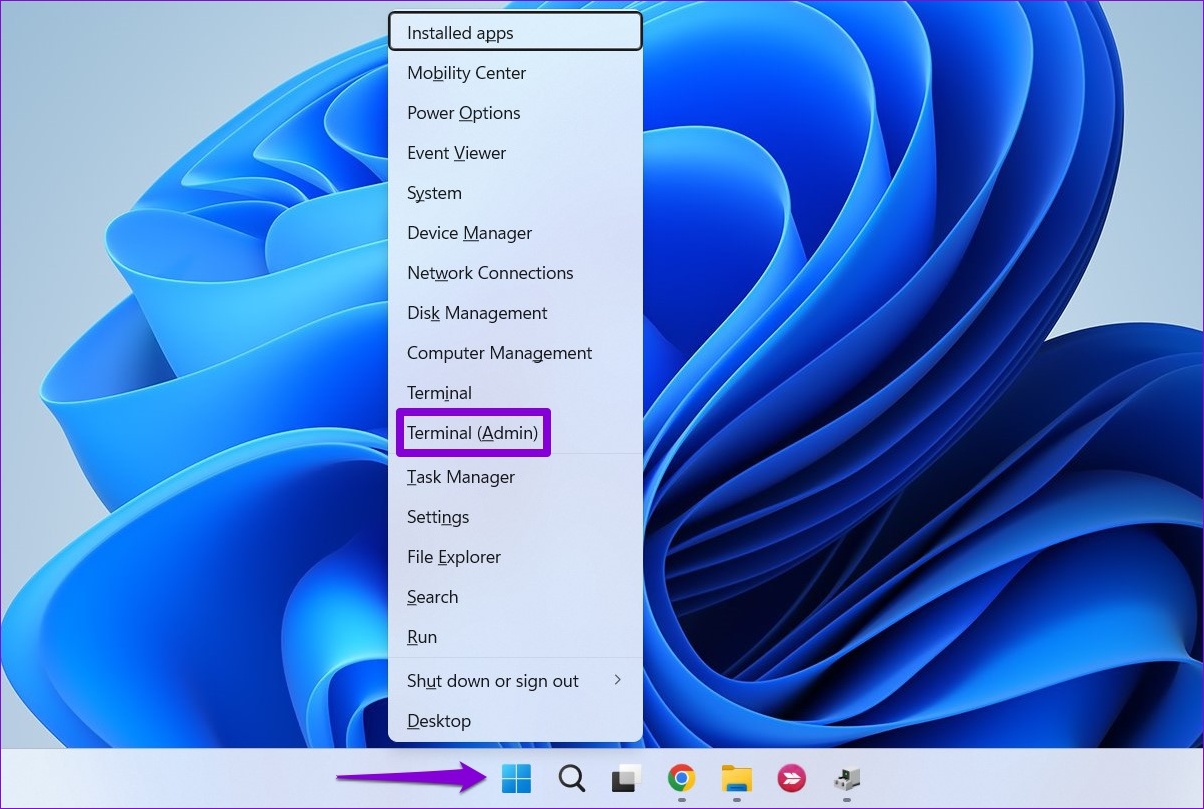
Damaged system files on your PC can also cause such anomalies. You can run the SFC (System File Checker) scan on your PC to scan and repair any corrupted or missing system files. Step 1: Right-click on the Start icon and select Terminal (Admin) from the list.
Step 2: In the console, type the following command and press Enter.
Wait for the process to complete and check if the SFC scan fixed any issues. After that, run the DISM (Deployment Image Servicing and Management) scan by running the following commands individually and hitting Enter after each one:
DISM may connect to Windows update online to download the missing files if necessary. After the scan completes, restart your PC and see if the issue exists.
6. Repair or Reset the Settings App
Problems with the Windows 11 Settings app can also cause the background apps permissions option to disappear. If that seems to be the case, you can repair the Settings by following the steps below. Step 1: Open the search menu, type in settings, and select the App settings option.
Step 2: Scroll down to the Reset section and click the Repair button.
If the issue persists after you repair the app, you can try resetting the Settings app from the same menu. Following that, you should see the background apps permissions option as before.
Manage Background App Activities
Tweaking background permissions for apps allows you to manage system resources effectively. Hopefully, one of the fixes above has helped you get back the missing background app permission option, and you are in control. The above article may contain affiliate links which help support Guiding Tech. However, it does not affect our editorial integrity. The content remains unbiased and authentic.


