Besides, the Voice Memos app offers a lot more than just recording and saving your audio. You can increase the audio’s speed, enhance the quality, skip silent parts, and do much more. This comprehensive guide will focus on exploring all the features so that you can make the best out of the Voice Memos app. Let us get started by learning how to record audio.
How to Record an Audio on iPhone
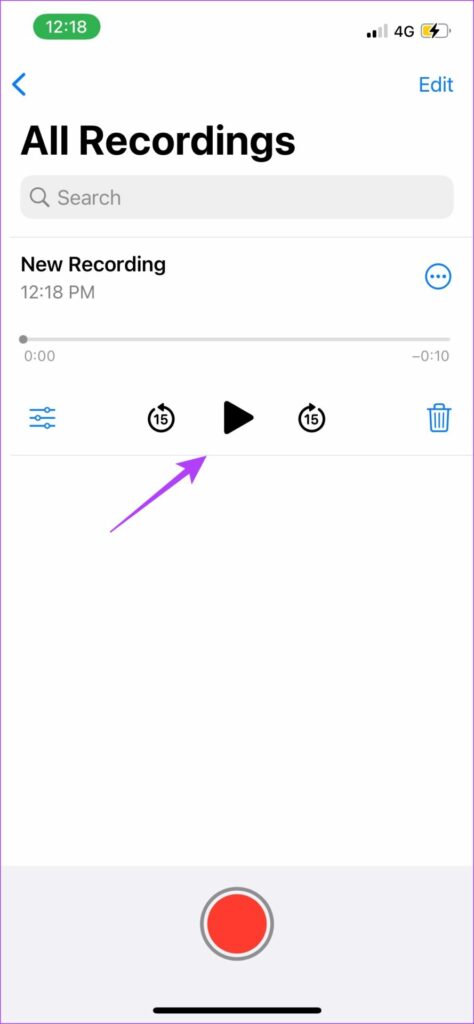
Step 1: Open the Voice Memos app on iPhone. It is present in the Utilities folder in your App Library. Step 2: Click on the red button at the bottom to record the audio. Step 3: To pause the recording, touch the black line at the bottom, and drag it up. Finally, hit the pause button to temporarily stop the recording. Step 4: To resume the recording, tap on the Resume option. Step 5: Once you’re done recording, click on the red icon as shown to stop the recording. This is all you need to do to record audio on the Voice Memos app. Your audio will now be saved. We’re sure you would want to listen to it once you finish recording. The next section will show you how.
How to Play a Voice Memo
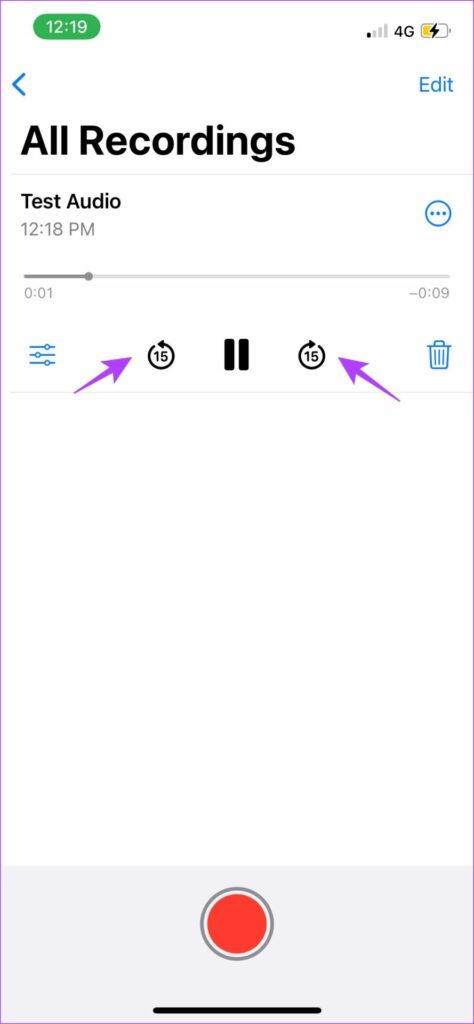
Step 1: Launch the Voice Memos app. Step 2: Under All Recordings, tap on any recording and press the play button. Step 3: If you want to skip forward or go back, tap on the circular icon on either side of the play/pause option. It is quite simple to listen to recorded audio on the Voice Memos app. Further, the audio files recorded on your iPhone are named ‘New Recording’, ‘New Recording 1’, ‘New Recording 2’, and so on by default. You can rename the voice memo so that it gets easier for you to find the one you’re looking for.
How to Rename a Voice Memo
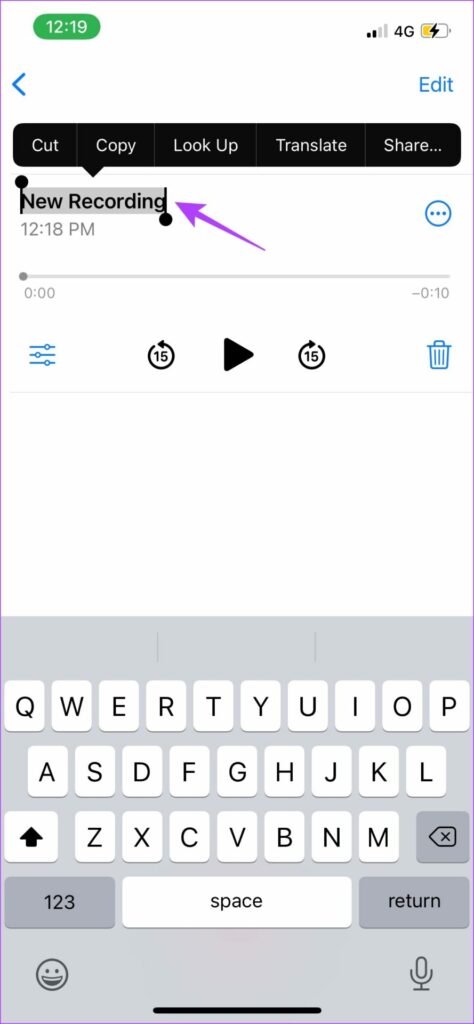
Renaming audio files is quite easy. All you need to do is open Voice Memos on iPhone and long-press on the existing audio’s name. This will make the name editable. Now, rename the recording. Well, that’s how you can rename the audio. But what if it consists of some unwanted part that’s preventing you to share it with someone? Well, you can easily trim the audio. Read the next section to know how.
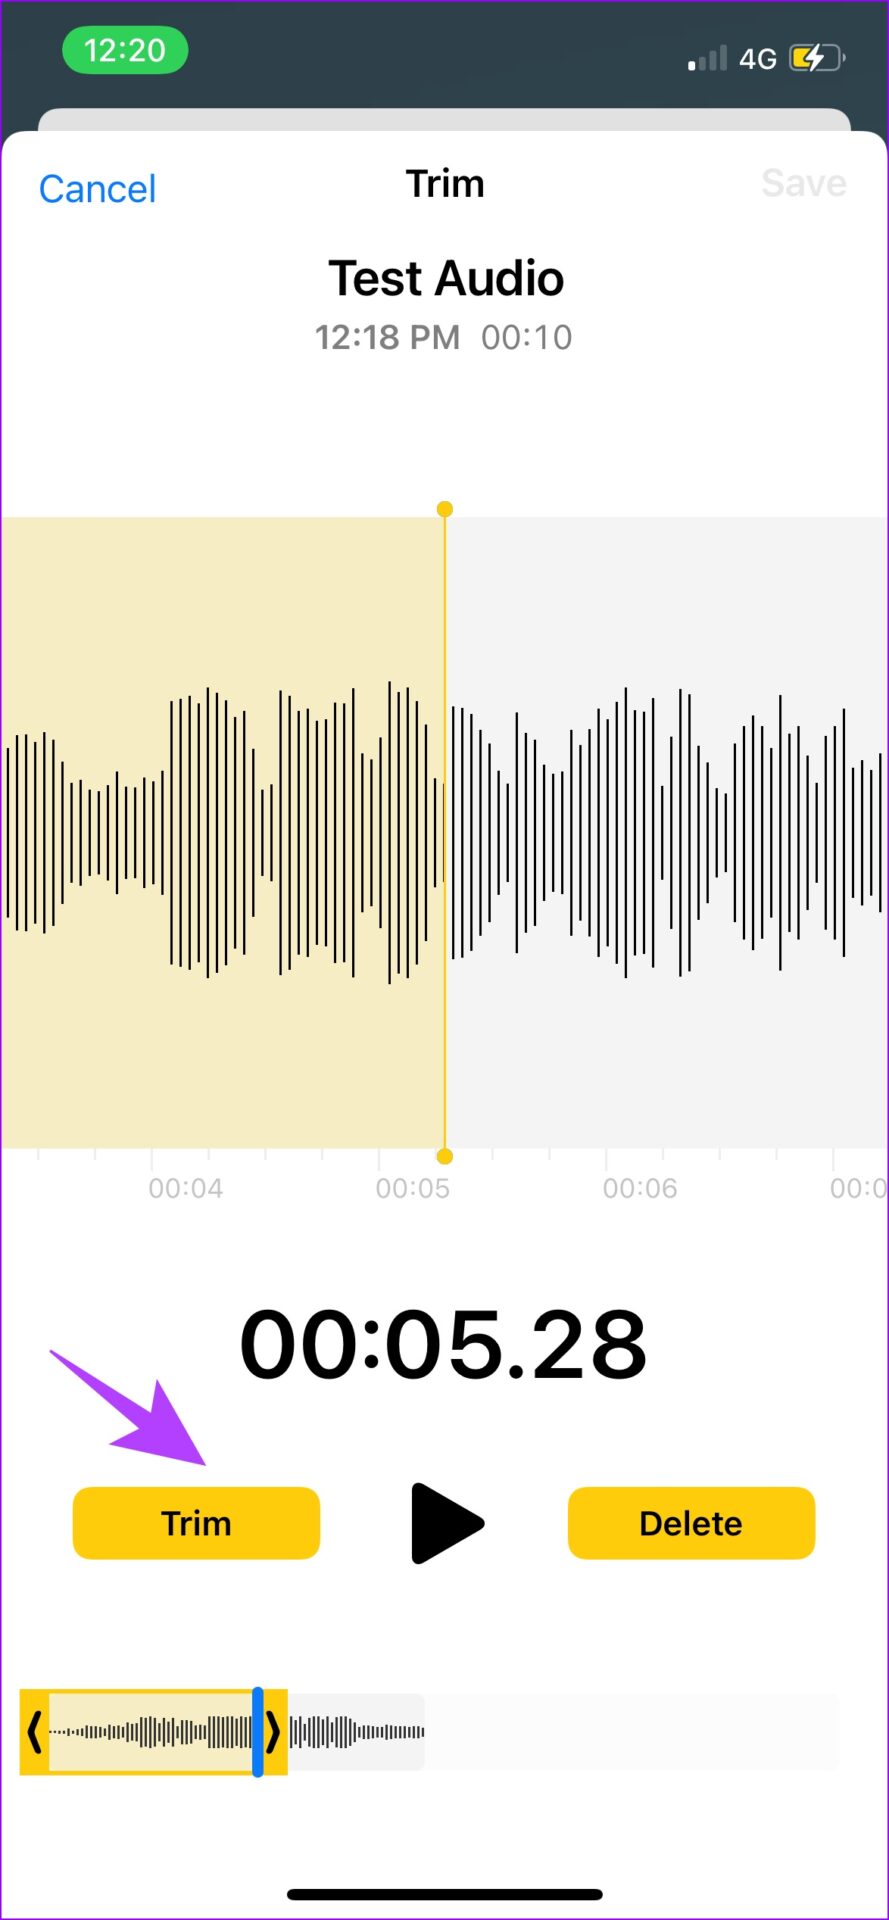
How to Trim or Delete Parts of the Recorded Audio
Trimming the audio is a great way to remove unwanted parts from a recording. The way it can be done on the Voice Memos app on iPhone is quite simple. Step 1: Launch the Voice Memos app. Step 2: Tap on the audio you want to trim and tap on the Equalizer icon on the left. Step 3: Now, tap on the crop icon and use the yellow-colored slider to select the part you want to edit. Step 4: If you want the selected part of the audio to be saved, tap on Trim. Alternatively, tap on Delete to remove the selected part. By using the above tools, you can trim or remove parts of the audio. But instead of doing this, what if you wanted to replace the unwanted part of the audio instead? There is an option called Replace and here’s how you can use it.
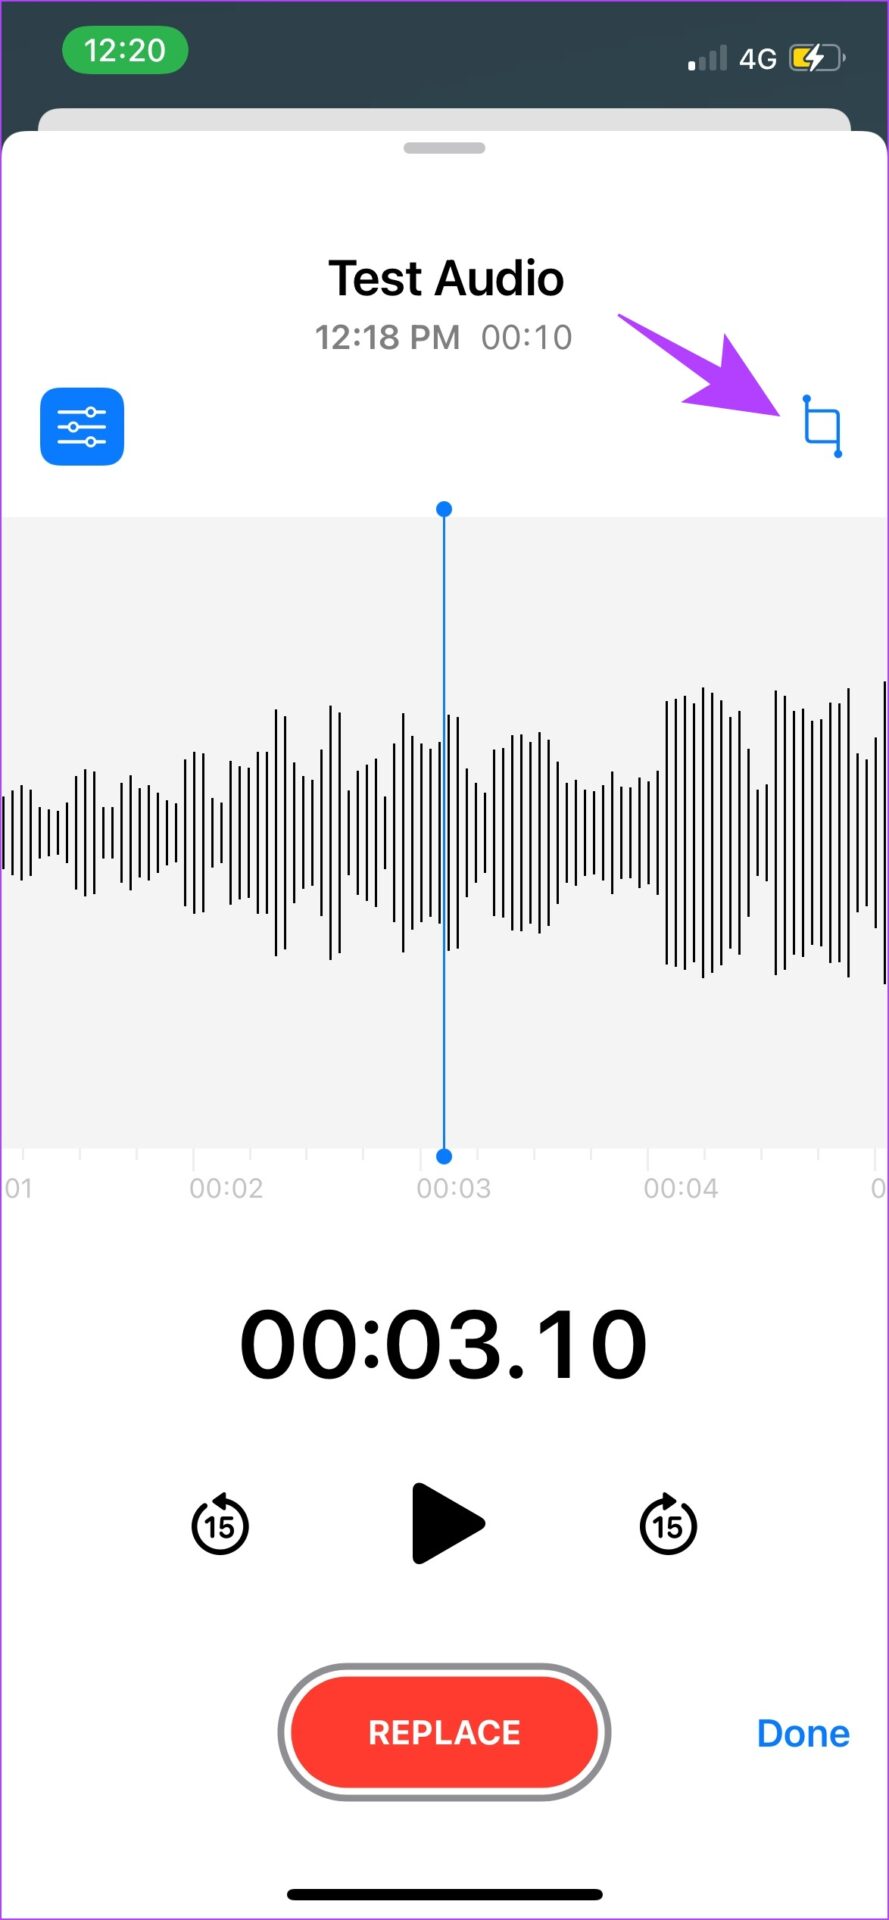
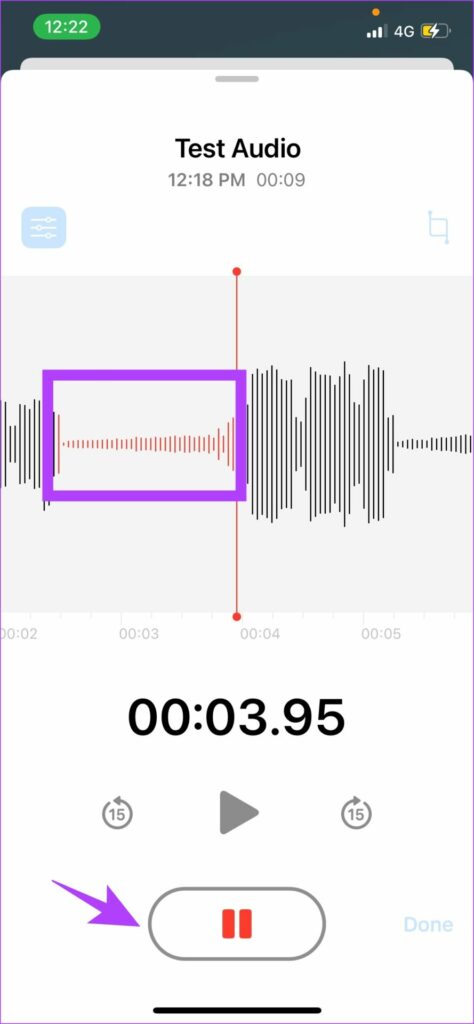
How to Replace Parts of the Recorded Audio
Step 1: Launch the Voice Memos app and tap on the audio you want to edit. Step 2: Now, tap on the equalizer icon. Step 3: Play the audio until the part that has to be replaced begins and then, tap on Replace. Step 4: You can now record the audio for the replacement and hit the pause button once it has been added. This is how you can edit out parts of the audio in the recording. Next up, you have the tools to edit the quality of the audio. These can help you compress or even better the sound quality.
How to Edit the Audio Quality on iPhone
Step 1: Go to the Settings app on iPhone and tap on Voice Memos. Step 2: Now, click on Audio Quality. Step 3: You have two options – Lossless and Compressed. Select the Compressed option to ensure your audio recording stays minimal in size. On the other hand, you can select Lossless for top-notch recording quality. However, this would increase the file size. Now that you have compressed the audio, you might feel the need to improve the quality. The enhanced playback options will help you do so without increasing the file size. Read the next section to know more.
Use Enhanced Playback Options on iPhone
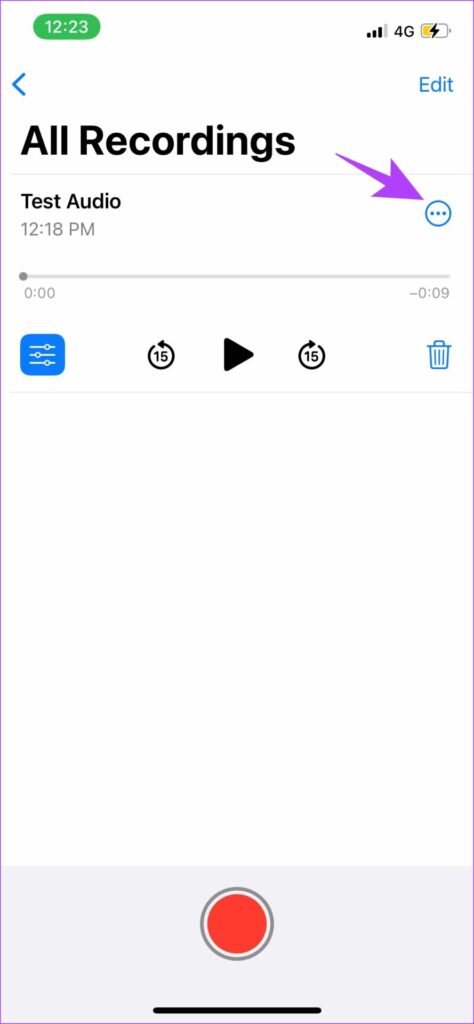
Step 1: Launch the Voice Memos app on iPhone and tap on the audio recording you wish to edit. Step 2: Click on the three dots icon. Step 3: In the pop-up menu, tap on Edit Recording. You will find multiple options in this section. Let’s look at them one by one.
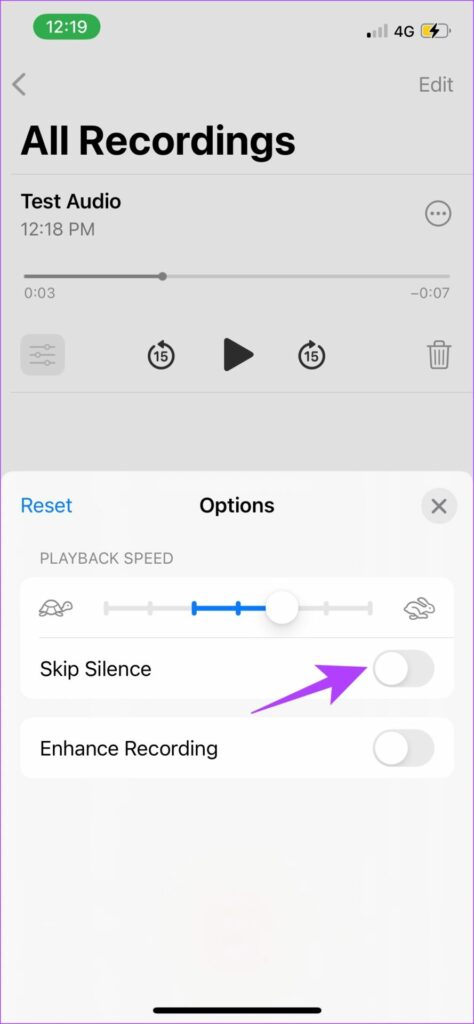
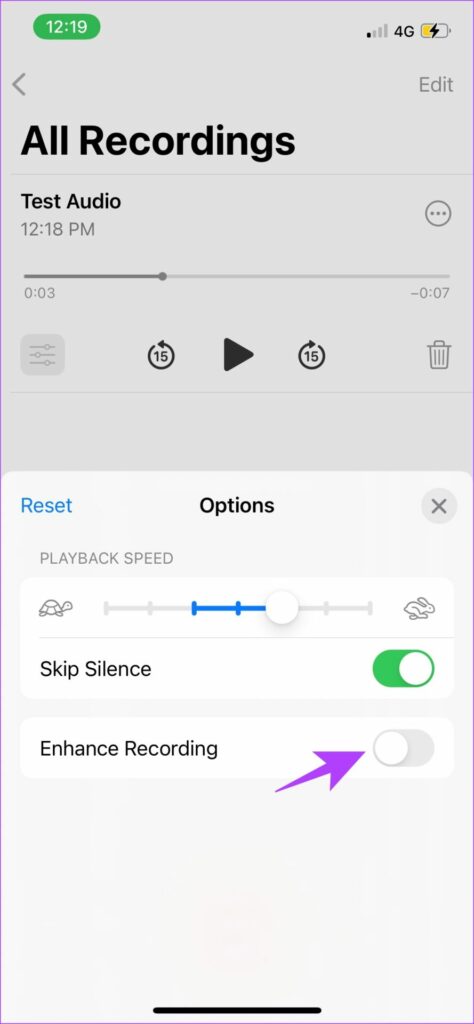
1. Skip Silence
Toggle on skip silence to skip or remove all the silent parts in your audio recording. This means that your audio will remain continuous and without any breaks if there were any while recording.
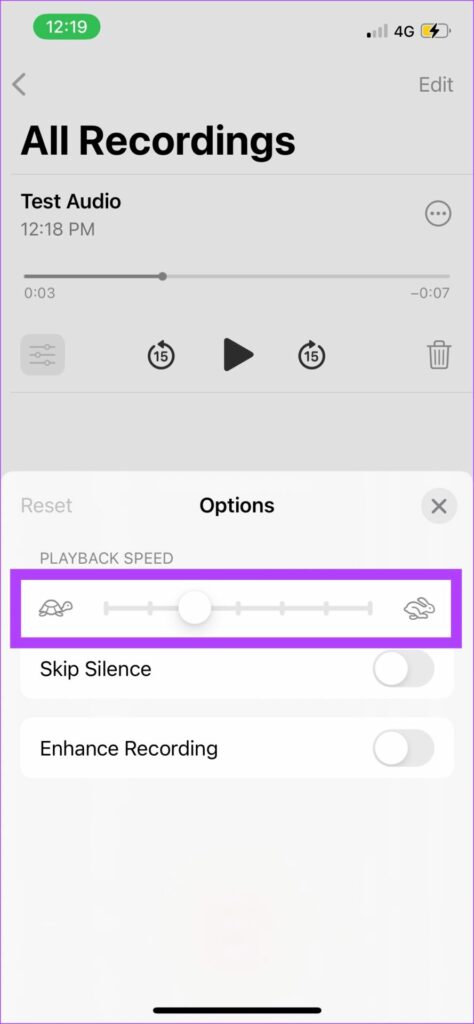
2. Increase Speed
If you want to increase the playback speed, the Voice Memos app provides you with an easy-to-use slider. Funnily enough, they have a hare and a tortoise to indicate the increase and decrease of the speed. Drag the slider to effectively increase or decrease the playback speed.
3. Enhance recording
If you want to improve the audio quality and remove the background noise, toggle on Enhance Recording. We were quite impressed with how this option significantly improved the quality of the audio recording. The above options will help you to enhance the audio recording. Once you use these features, here’s how you can manage the audio recording. This involves saving, sharing, and deleting the file.
How to Save the Voice Recording on iPhone
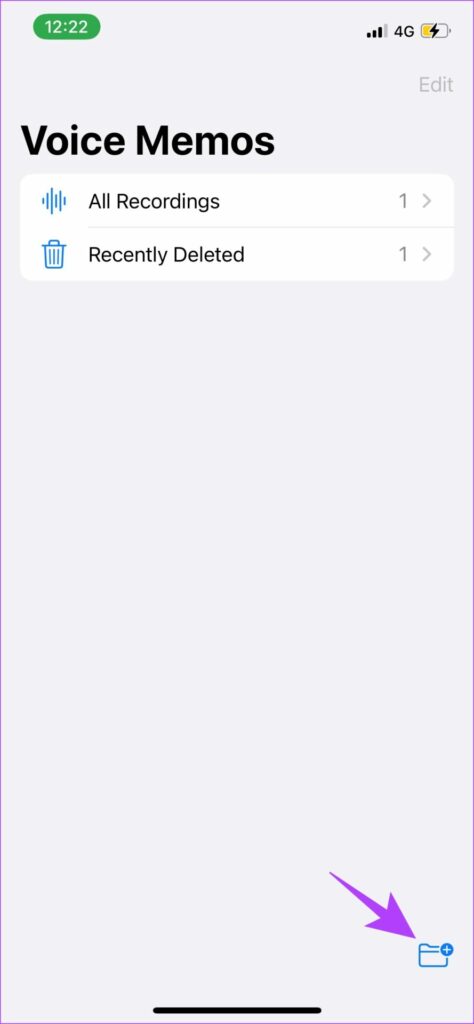
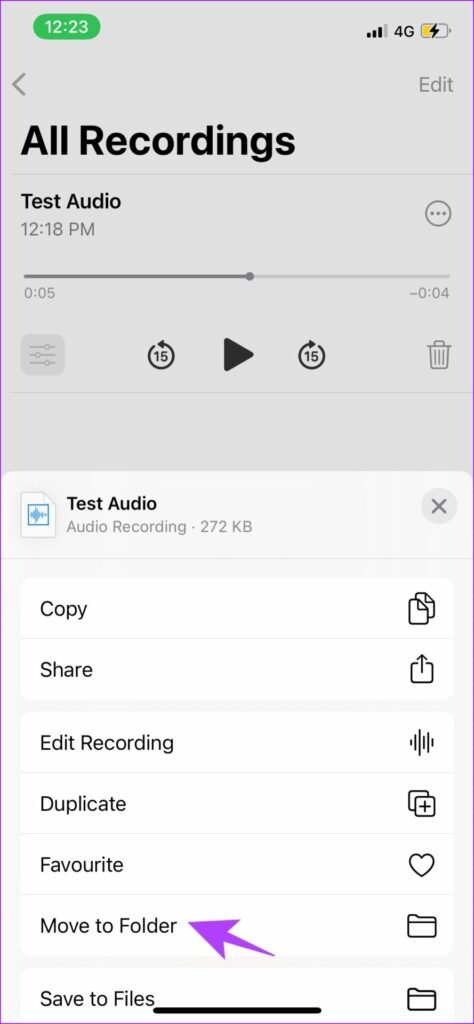
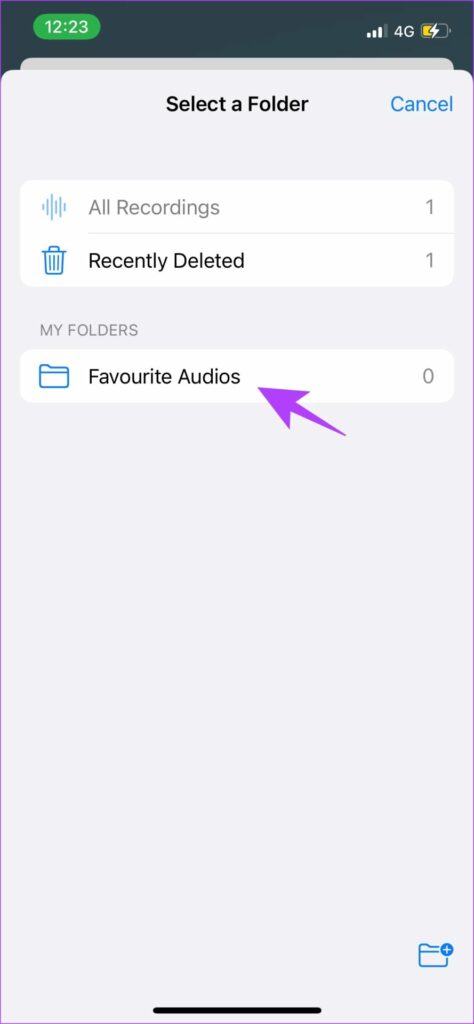
Once you stop the audio recording, the file will be automatically saved in the Voice Memos app. But if you want to save the audio to your files, or segregate them into folders, here’s how you can do it. Step 1: Launch the Voice Memos app. Step 2: Tap on the audio recording you wish to save and hit the three dots icon. Step 3: Click on ‘Save to Files.’ This will save the recording to Files. To segregate the audio recordings into different folders within the app, you can create new folders. Step 4: Open the Voice Memos app, and click on the back icon. This will take you to the main screen of the app. Step 5: Now, click on the add folder icon in the bottom right corner. Step 6: Name the folder and click on Save. We have created a folder called Favourite Audios. Step 7: To move recorded audio to this new folder, hit the audio you wish to move and tap on the three-dot icon. Step 8: Select ‘Move to Folder.’ Step 9: Select the folder that you created to move the audio there. This is how you can save the audio to Files on iPhone and even move them to different folders within the Voice Memos app to easily sort the audio files. Once you’ve edited and saved your audio files, you can even share them. There are options within the app itself for ease.
How to Send a Voice Memo on iPhone
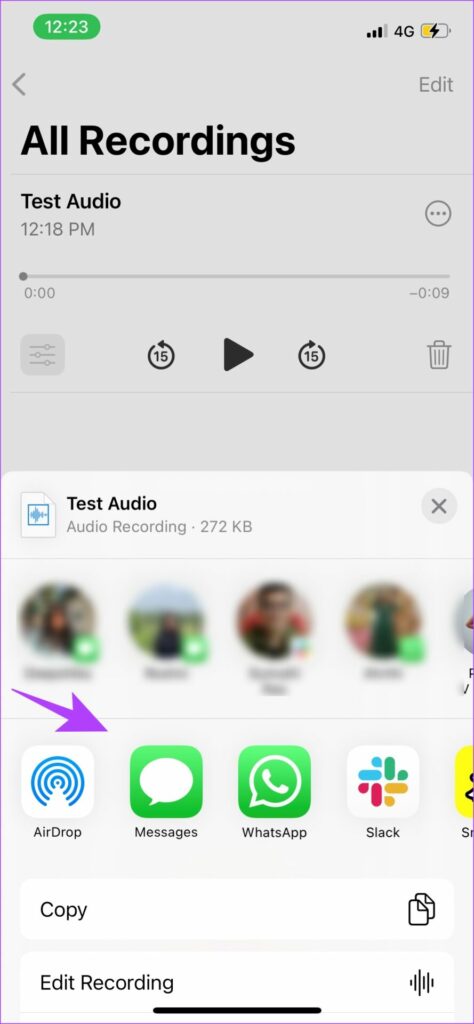
Step 1: Launch the Voice Memos app. Step 2: Click on the three dots icon in the audio recording that you want to share. Step 3: Now, you have all the options to share the audio in different apps. As you slide across, you can choose the app using which you want to send the audio file. This is how you share the audio file with other users. After you share the file, you might not feel the need to have the file on your iPhone. In that case, you can easily use the delete option to remove recordings from the Voice Memos app.
How to Delete a Voice Memo
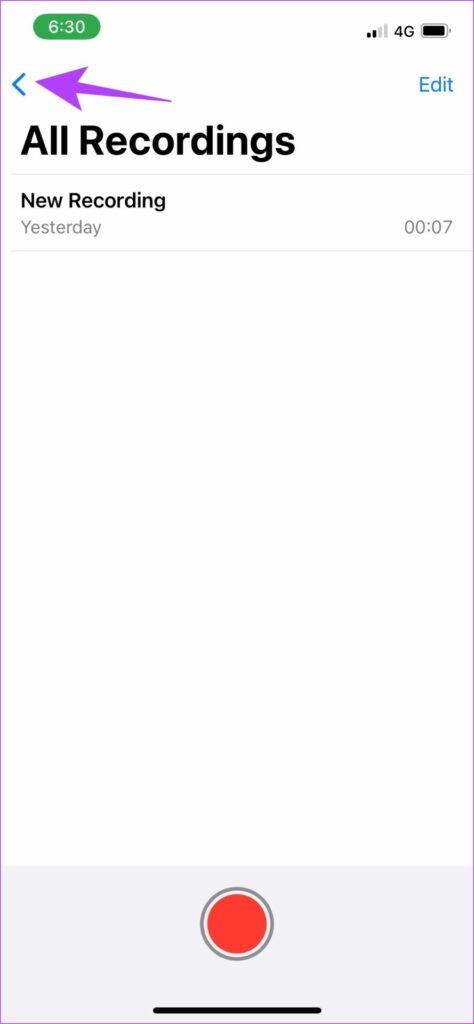
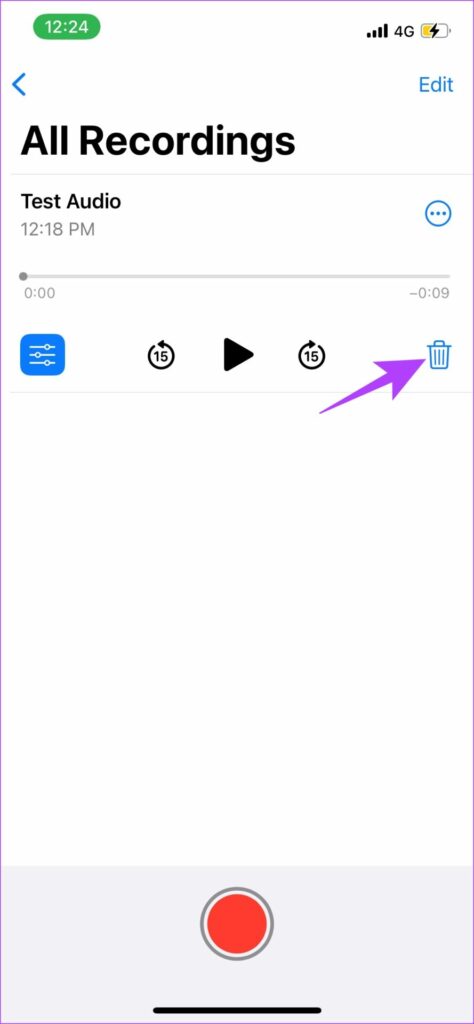
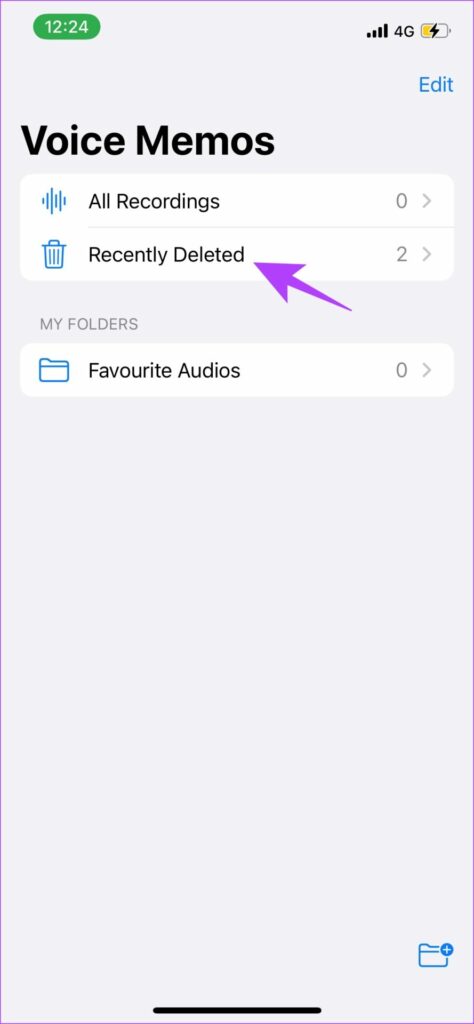
Step 1: Launch the Voice Memos app. Step 2: To delete an audio recording, click on the trash bin icon in the recording menu. This is all you need to do to delete the voice memo. Step 3: If you accidentally deleted the audio recording, fret not. Firstly, go to the main screen of the Voice Memos app. Step 4: There is a recently deleted folder. Using this folder, you can easily restore the deleted audio file.
Record Audio on Your iPhone With Ease!
This is how to use Voice Memos on iPhone to record high-quality audio. We felt the need to write a guide for this app, as we regularly use this app and it is indeed handy. And all the features in this guide will make you a pro in recording voice notes on your iPhone. If you want to explore other apps for more functionality, check out our list of the best audio recording apps for iPhone. Happy Recording! The above article may contain affiliate links which help support Guiding Tech. However, it does not affect our editorial integrity. The content remains unbiased and authentic.