While some apps like Instagram natively offer the option to remove sound, not all apps have this feature. You don’t have to worry though, as we’ll tell you how to remove sound from videos on your iPhone and iPad for free by following a few simple steps. Note: This article uses built-in methods to remove audio from video on iPhone and iPad. We have an explainer that lists the best apps to remove audio if wish to use third-party apps instead.
Delete Background Noise or Music From iPhone Videos Using the Photos App
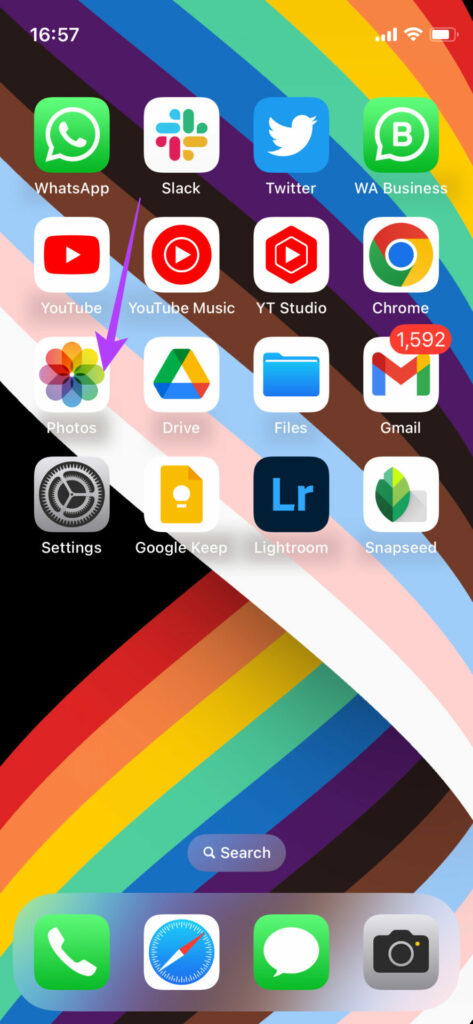
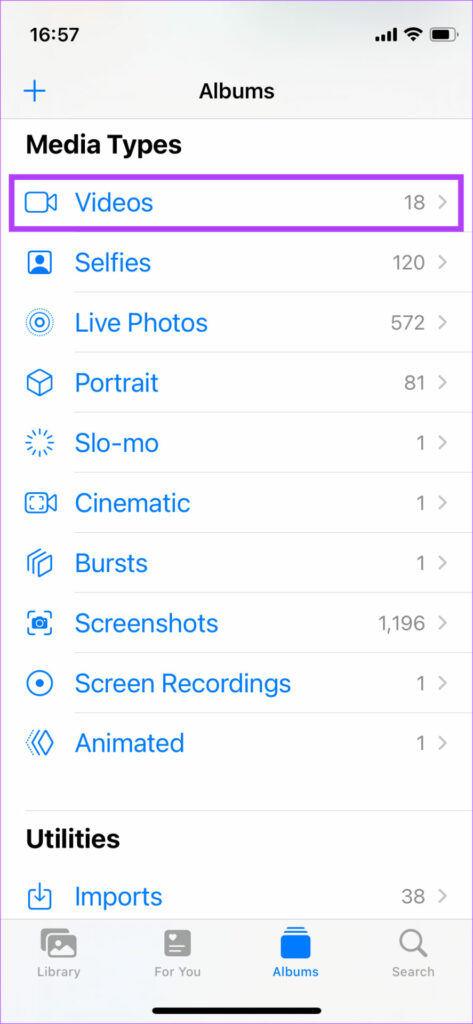
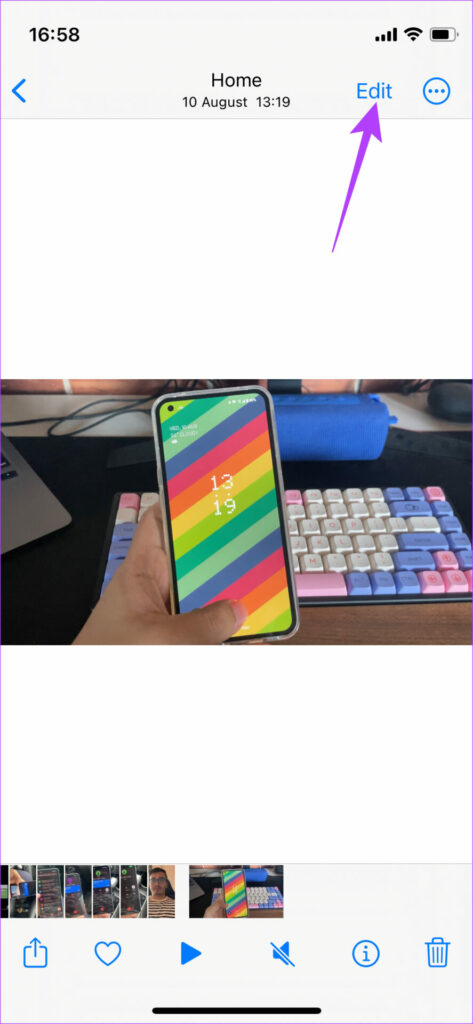
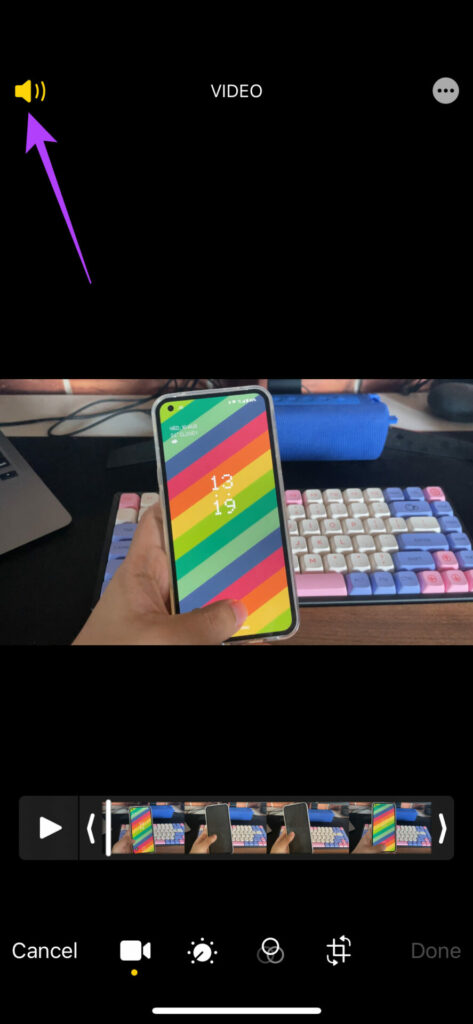
If your video has loud music playing or if there is some sort of noise in the background, it’s best to remove the sound before posting the video online. Thankfully, the Photos app in the iPhone has a native feature that lets you do this. Here’s how it works. Step 1: Open the Photos app on your iPhone. Step 2: Navigate to the video you want to remove the sound from. Step 3: Tap on the Edit option in the top-right corner. Step 4: Now, tap on the speaker icon in the top-left corner. This will mute the sound in your video. Step 5: Select Done in the bottom-right corner. This will remove the sound from the video. You can now upload it to any platform you want!
How to Remove Audio From Videos on iPhone Using iMovie
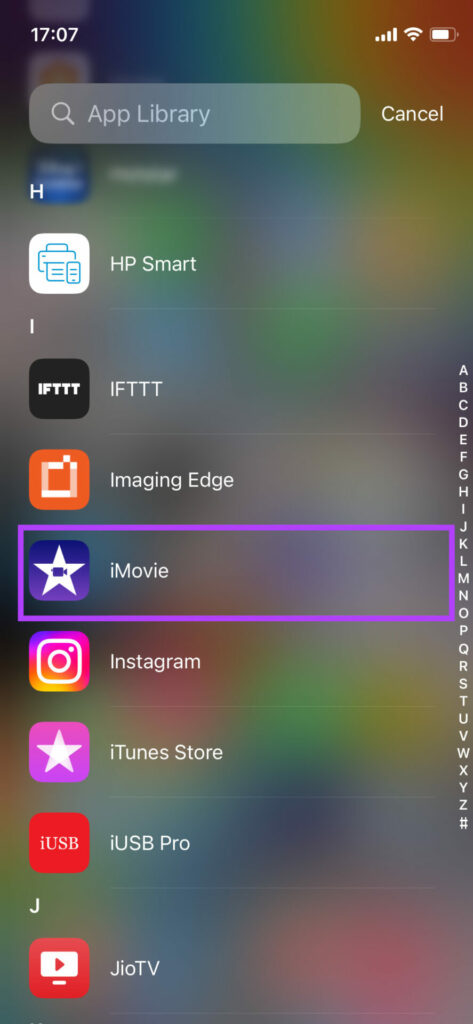
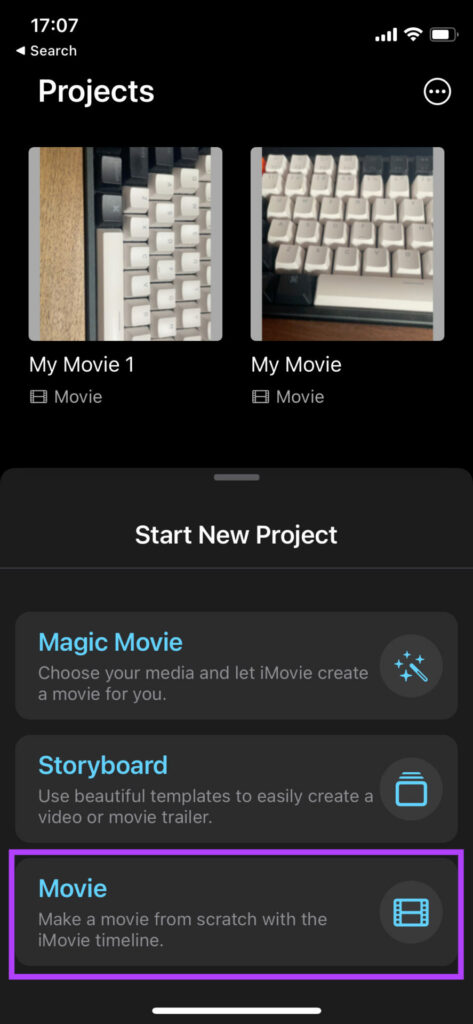
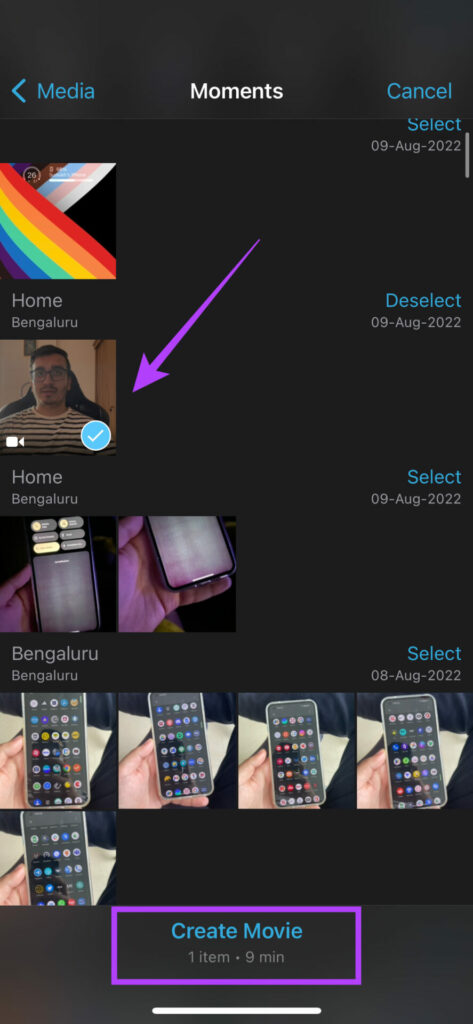
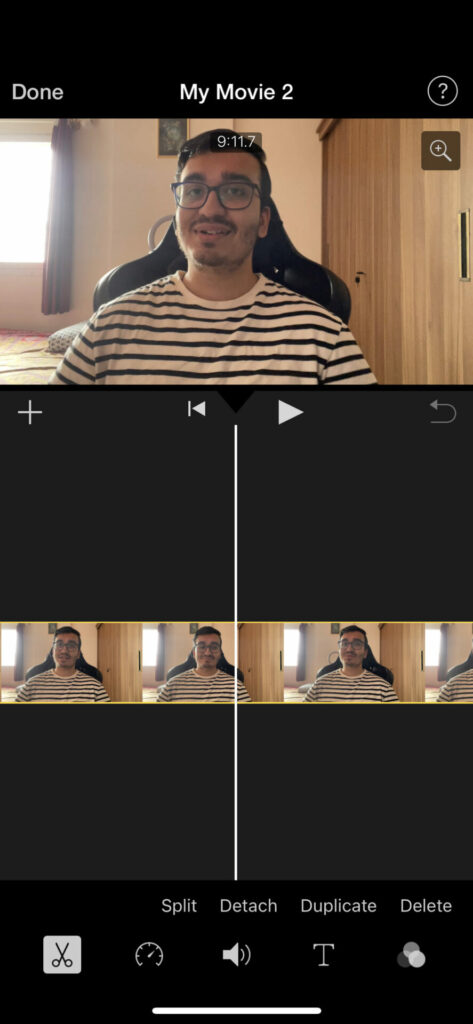
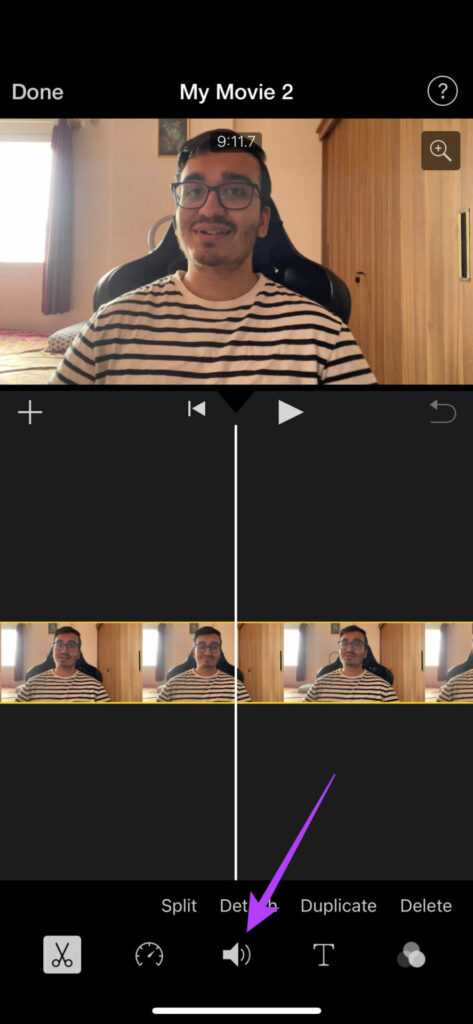
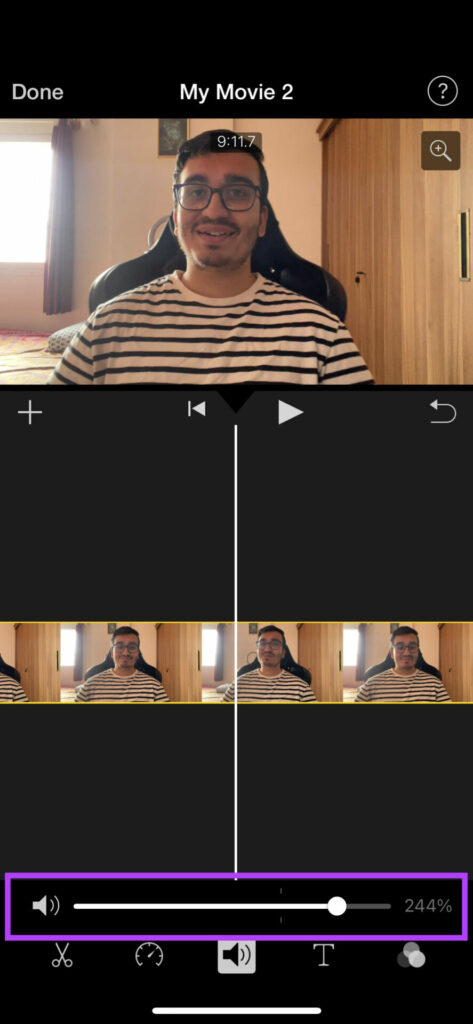
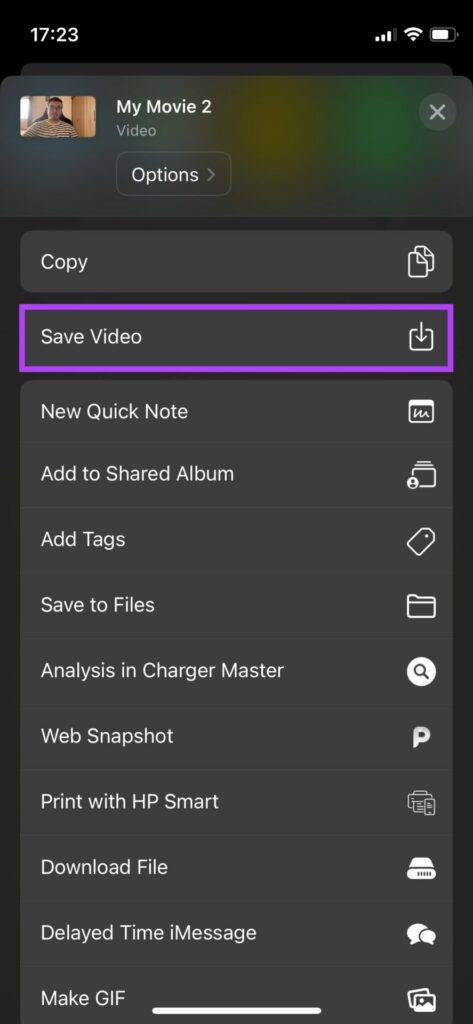
iMovie is an advanced video editor that comes pre-installed on all iPhone and iPad devices. It has an option to delete sound from videos on your iPhone. Apart from completely removing the sound, you can also increase or decrease the volume of the audio. Here’s how to do it. Step 1: Open the iMovie app on your iPhone. Step 2: Under Start new project, select the Movie option. Step 3: Select the video file you want to edit and tap on Create Movie at the bottom. You will see your video loaded onto the timeline in iMovie. Step 4: Tap on the video to select it in order to make changes. There will be a yellow outline around the video clip once it’s selected. Step 5: Tap on the speaker icon at the bottom. Step 6: You will see a volume slider set to 100%. Slide it to the left to 0%. This will completely mute the sound. However, if you want to reduce the volume but not completely mute the video, drag the slider to the left until you reach the desired level of volume. You can also play the video to check the volume level. Additionally, you can also make the sound louder. Just drag the slider to the right. Step 7: Once you’re satisfied with the audio levels, tap on Done in the top-left corner. Step 8: Now, it’s time to render and save the video onto your iPhone. Select the Share icon in the middle. Step 9: Scroll down and select Save Video. Now, wait for the video to export. Once done, it will be saved on your iPhone’s local storage. You can access it via the Photos app. But what if you want the sound back? We have you covered.
How to Add Back the Sound You Removed From the iPhone Video
If you’ve removed the sound from a video using the Photos app, you can add it back in a few easy steps. Here’s how. Step 1: Open the Photos app on your iPhone. Step 2: Navigate to the video for which you want to add the sound back. Step 3: Tap on the Edit option in the top-right corner. Step 4: Tap on the greyed-out speaker icon in the top-left corner. This will restore the audio and the speaker icon will turn yellow. Step 5: Tap on Done in the bottom-right corner. That’s it! This will save your videos with the original audio.
Share Your Moments
Whether you’ve said something embarrassing in a video that you don’t want your friends to hear or if something’s playing in the background that you’re afraid will create copyright issues when shared on a public platform, all you have to do is follow these simple steps to remove sound from your iPhone video. The above article may contain affiliate links which help support Guiding Tech. However, it does not affect our editorial integrity. The content remains unbiased and authentic.
