If you have a Samsung Galaxy smartphone, One UI offers a plethora of built-in customization options that can help you change the look of the software on your device. One of those features is the ability to change and customize the navigation bar and gestures on the smartphone. If you too want to change the look and the placement of buttons on the navigation bar of your Samsung Galaxy smartphone, here’s how to do it.
Customize the Navigation Bar
Over the past few years, the navigation gestures are quietly getting the lead on the navigation bar on Android phones. However, you can still use the navigation bar if you find it more convenient. If you are one of those people, here’s how to customize the navigation bar on your Samsung Galaxy phone.
Changing Button Positions
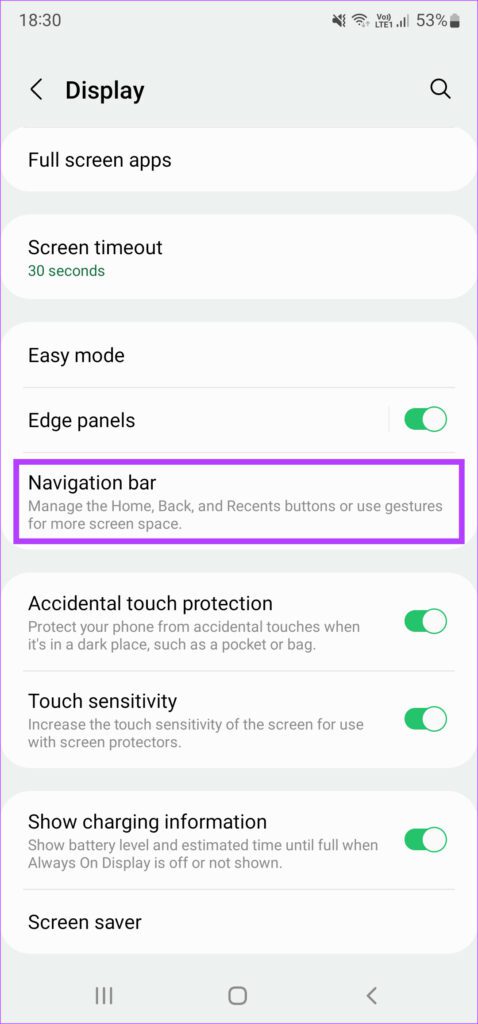
If you wish to change the position of the buttons on the navigation bar, here’s how to do it. Step 1: Open the Settings app on your Samsung Galaxy phone. Navigate to the Display section.
Step 2: Scroll down and select Navigation bar.
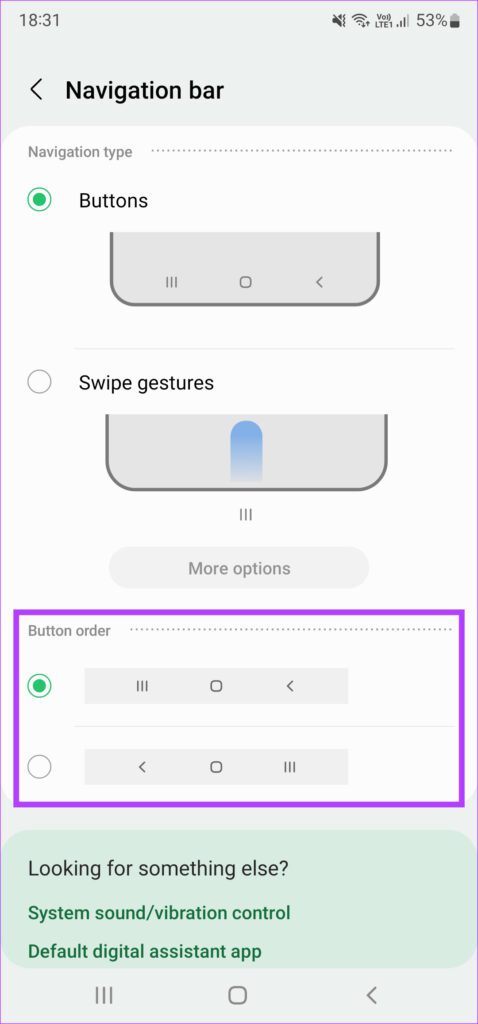
Step 3: Under Button order section, select the configuration you want. You can choose to have the back button on the left and the multitasking button on the right or vice versa.
Changing Button Shapes With Good Lock
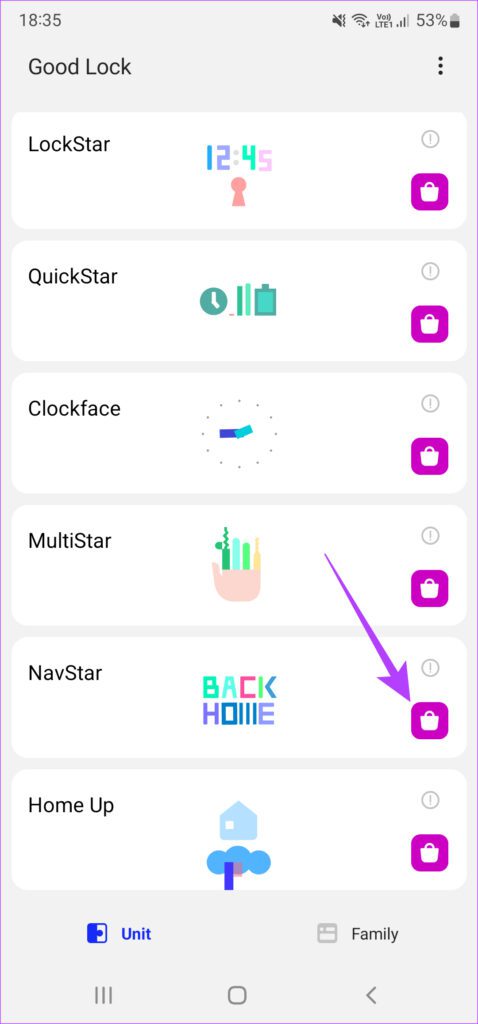
While the default Settings app only gives you the option to change the position of the buttons, there is an in-house app called Good Lock that you can get from the Galaxy Store to customize the navigation bar further. Here’s how it works. Step 1: Download the Good Lock app from the Galaxy Store on your Samsung smartphone. Step 2: Open the app and tap on the install button next to NavStar to install the module from the Galaxy Store.
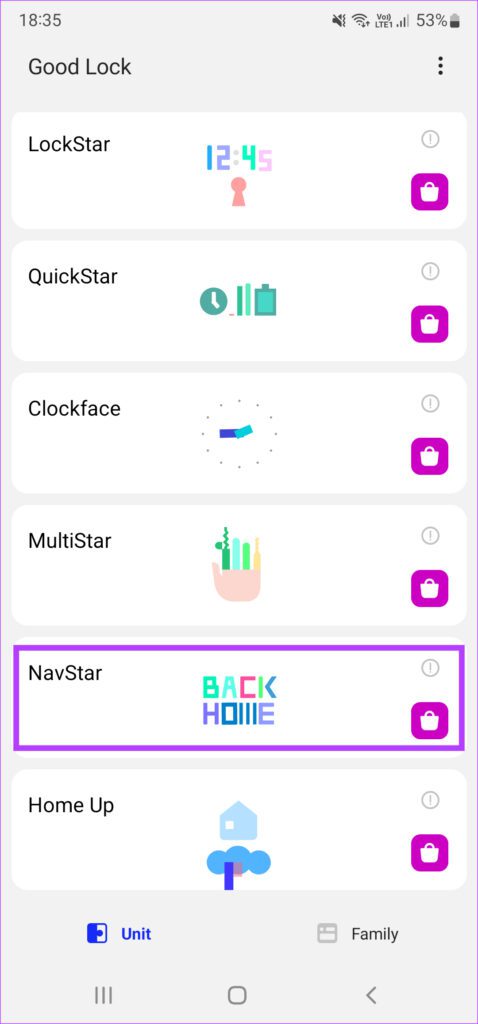
Step 3: Once installed, head back to the Good Lock app and tap on NavStar.
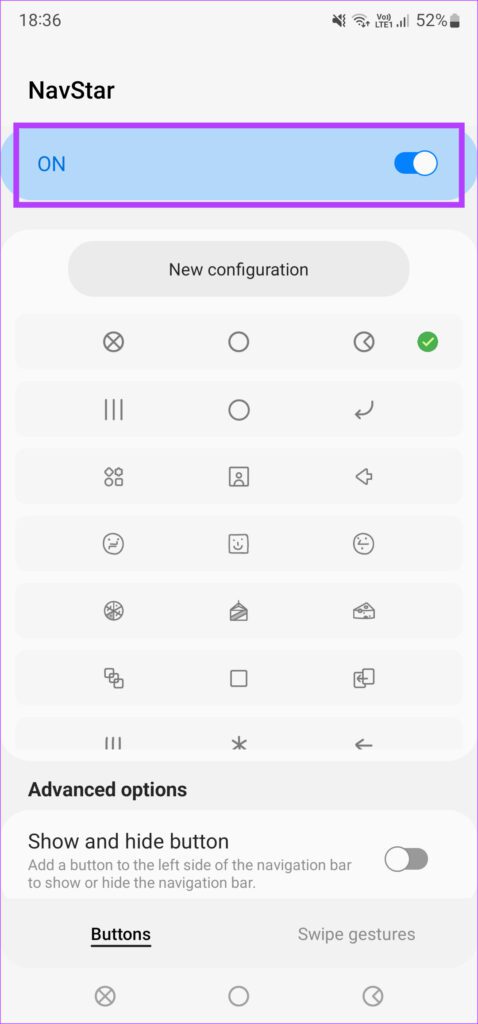
Step 4: Enable the toggle at the top to turn on the module and enable customization.
Step 5: You will now see several navigation buttons that you can choose from and set for the navigation bar. You can tap on each button configuration to set it and see if it suits your taste.
Creating a Custom Navigation Bar
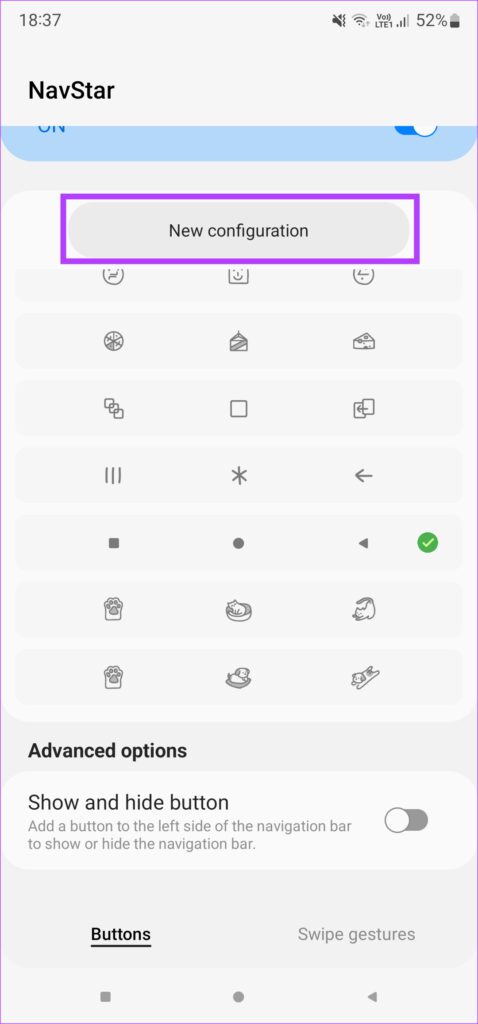
If you want complete customization, you can even create your own custom navigation bar by customizing the icon shapes, transparency, colors, etc. Here’s how to do it. Step 1: Select New configuration at the top of the screen.
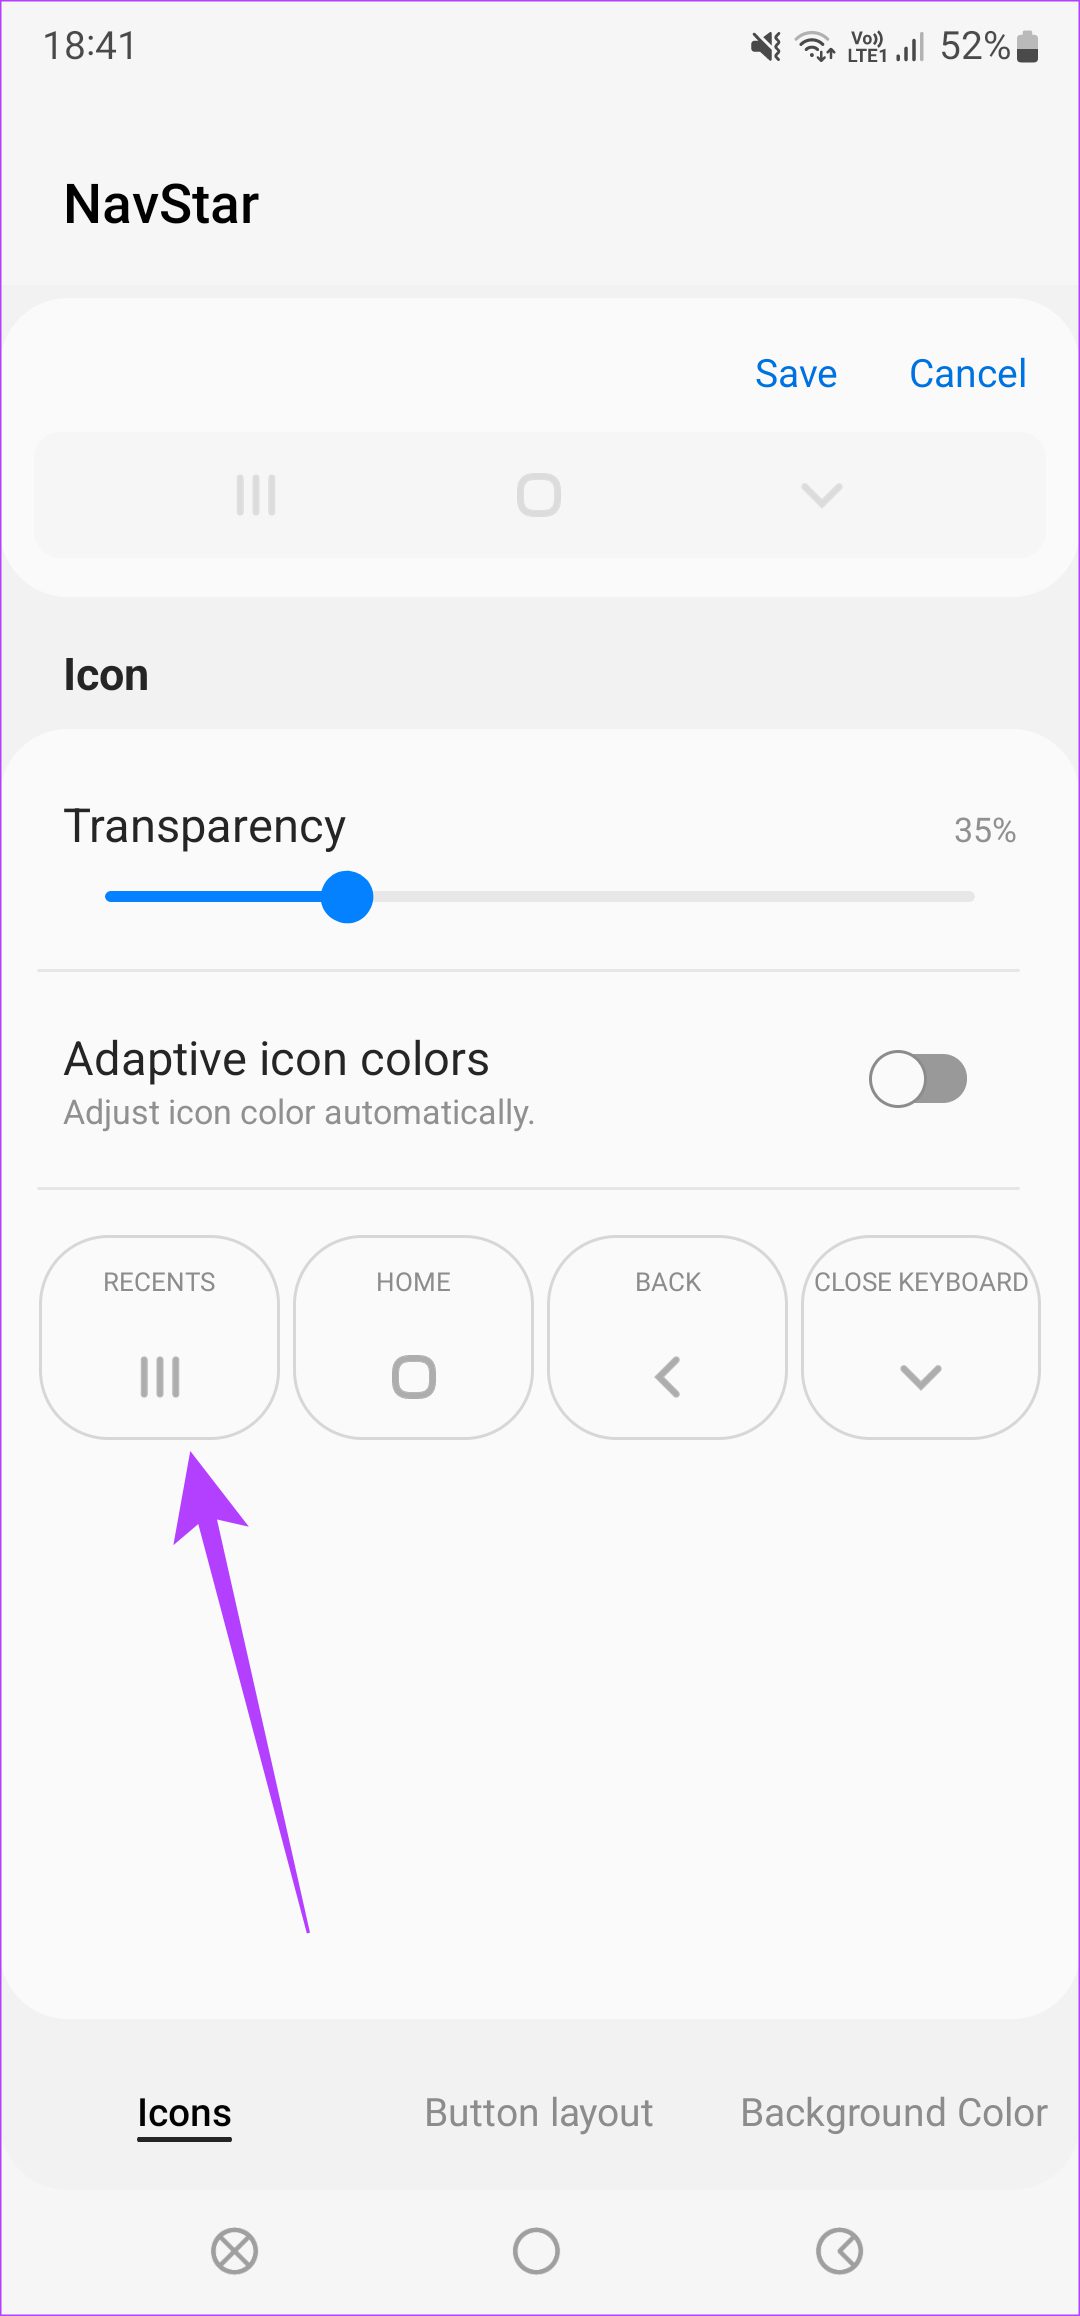
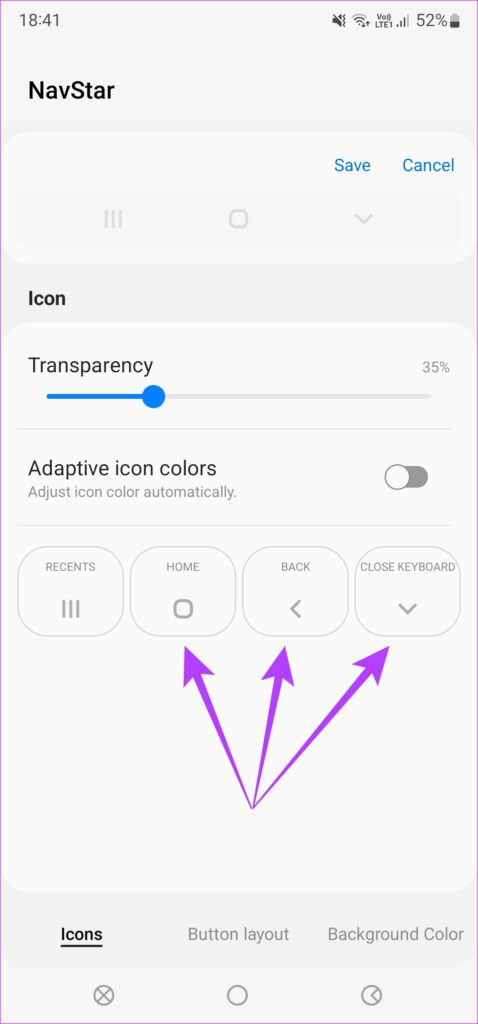
Step 2: Use the slider under Transparency to choose how transparent you want the icons in the navigation bar to be. You’ll get the preview of changes at the top of the screen.
Step 3: Enable the toggle next to adaptive icon colors if you want the color of the buttons to be adjusted based on the background of the app you are in.
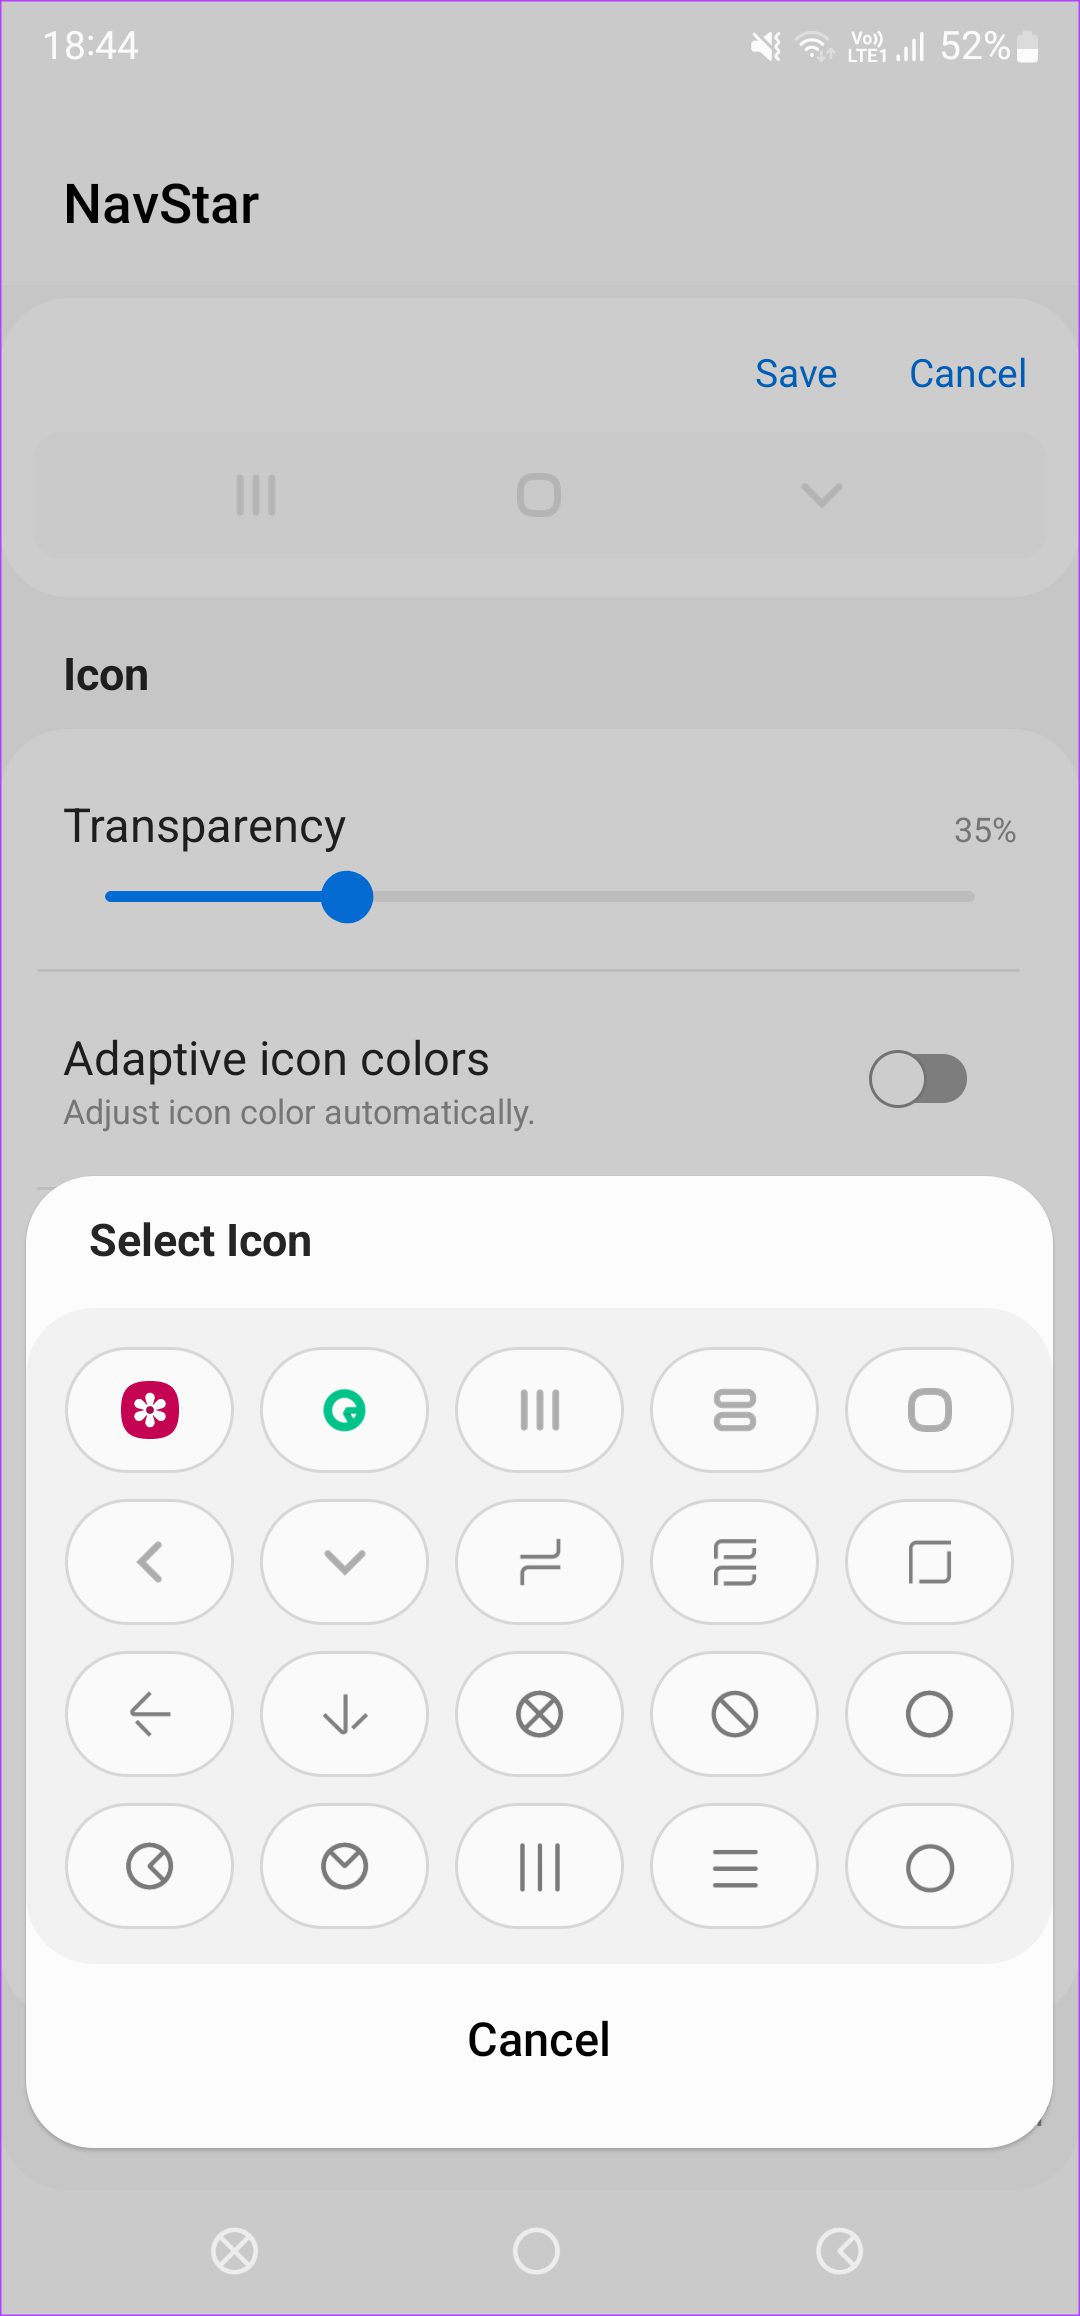
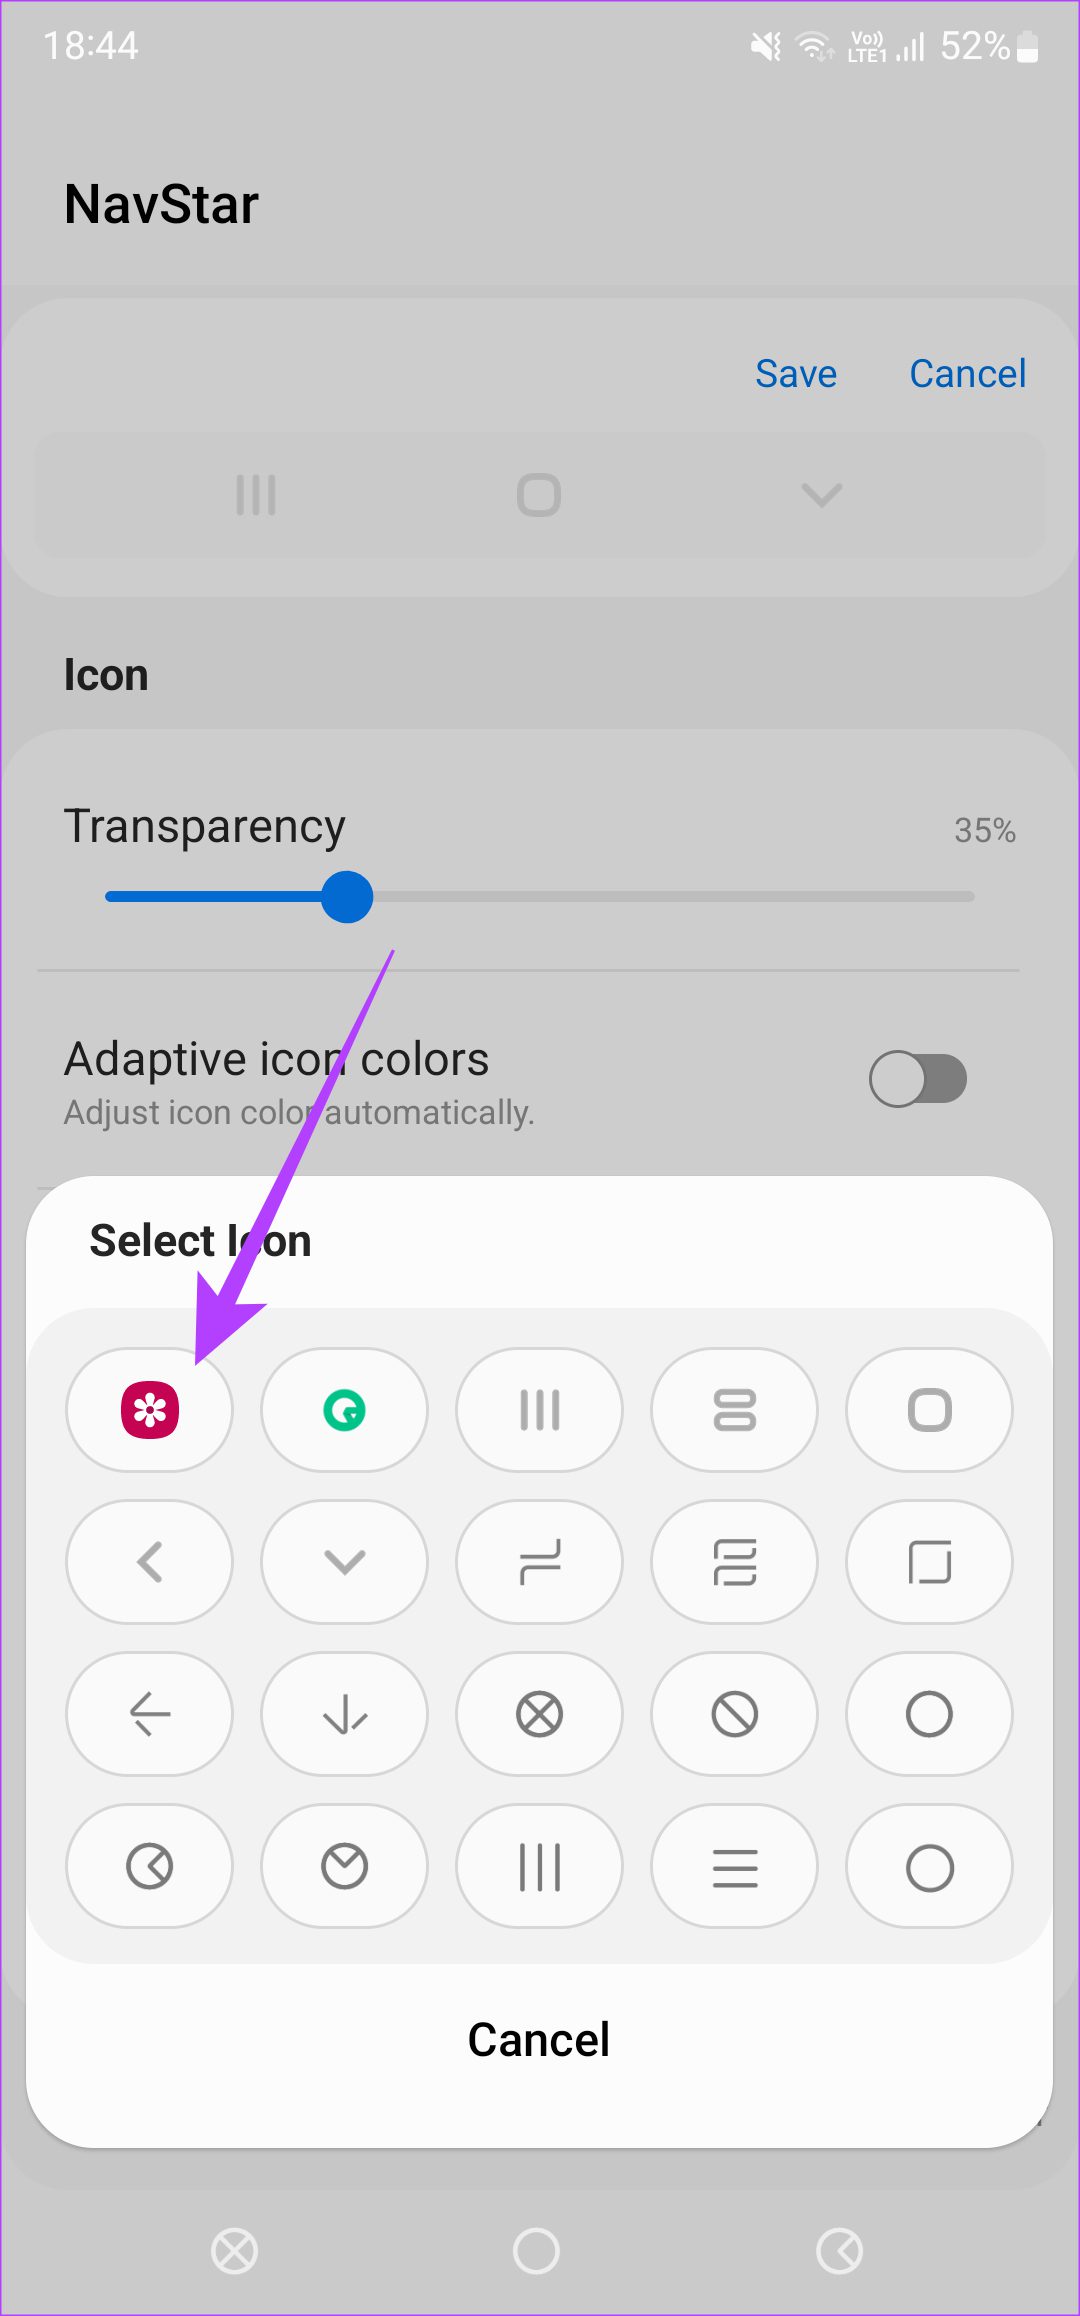
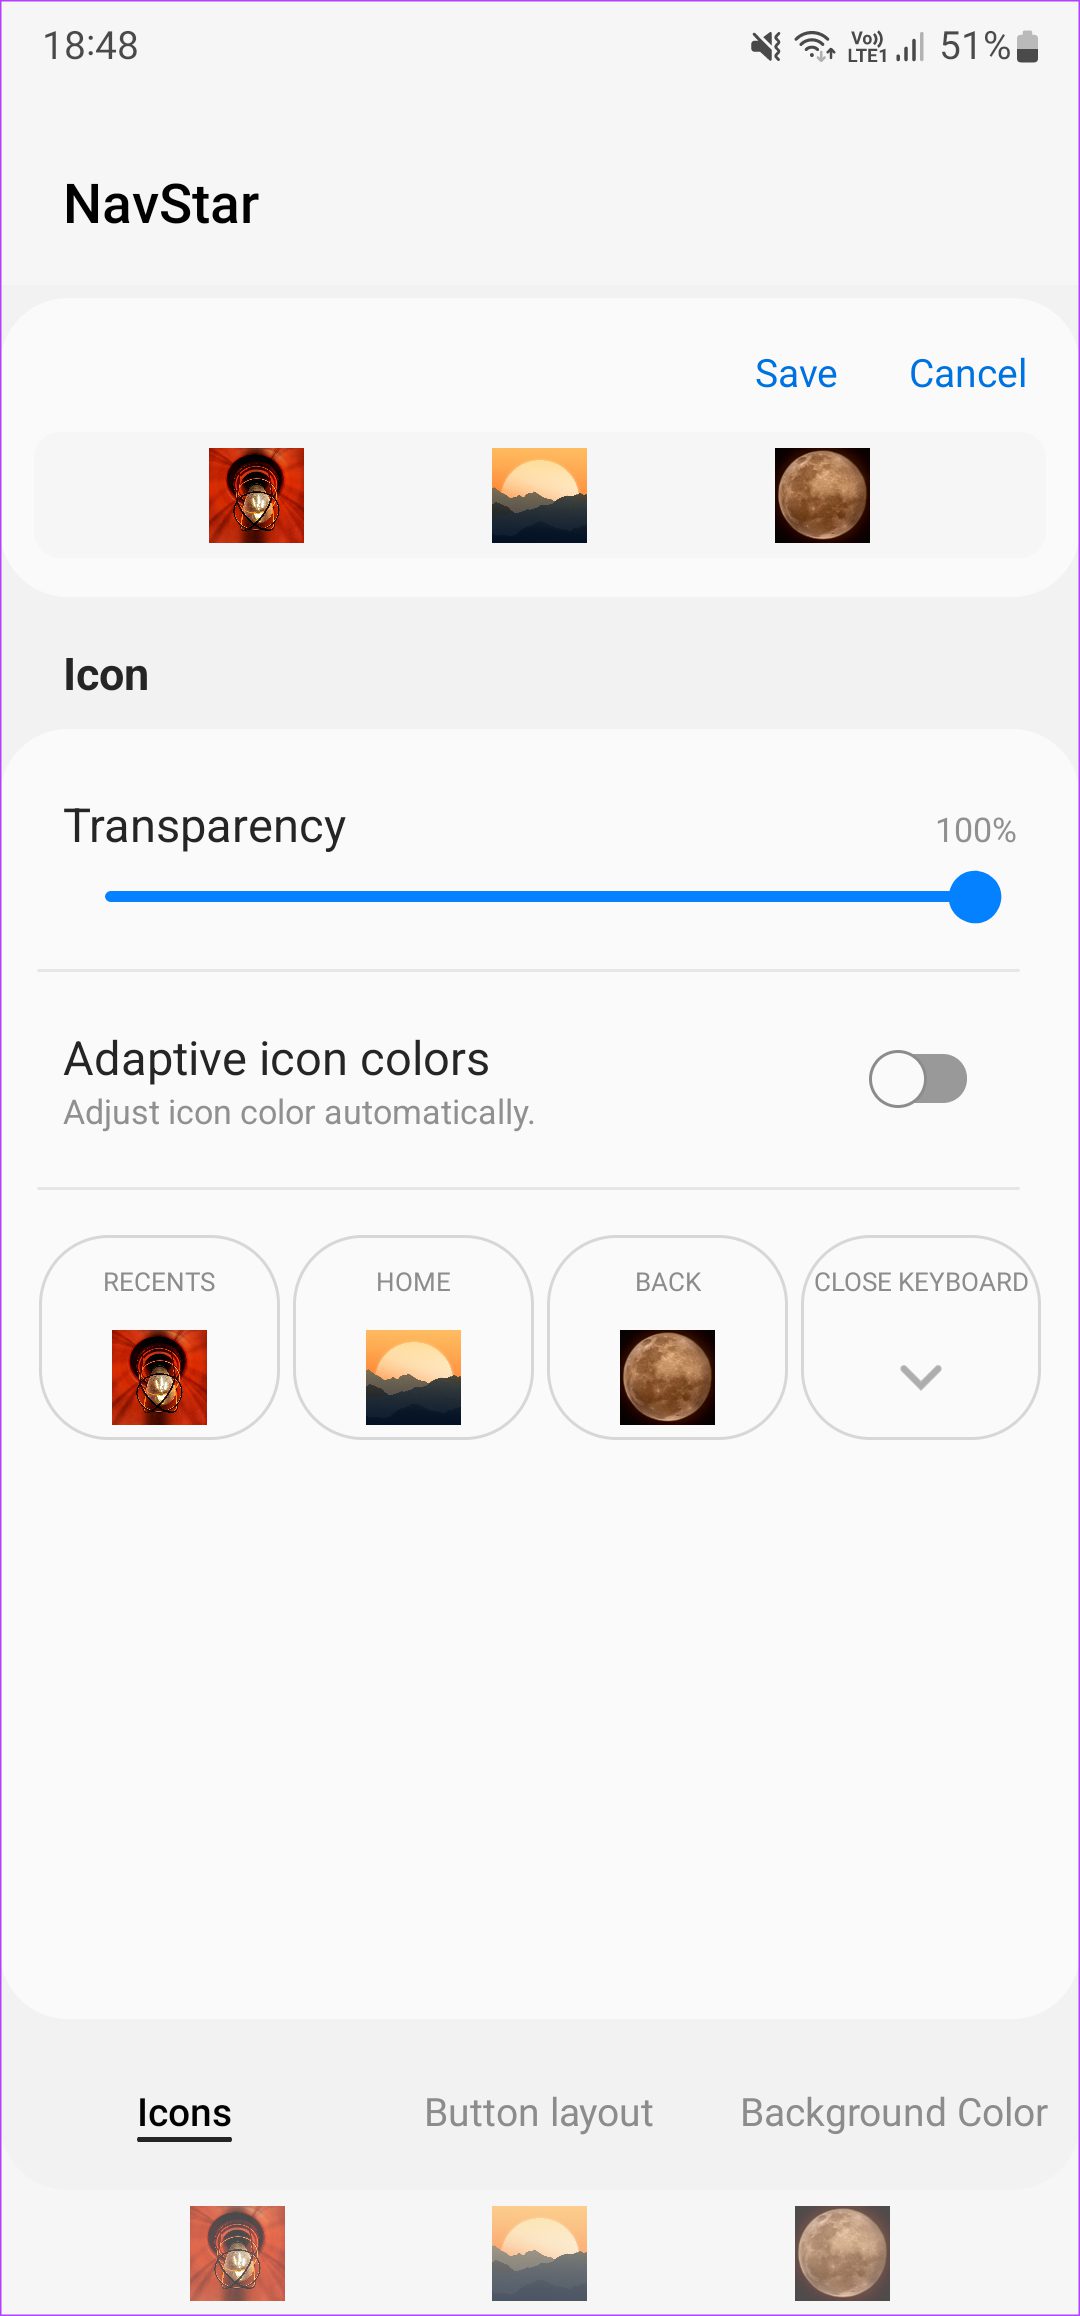
Step 4: This is where you can select the desired icons for each button. Tap on Recents and go through all the available options. Pick the one that you want to use as the recent button. What’s crazy is that you can even add a custom image as a button straight from your gallery. To do this, select the Gallery icon in the Select Icon list and choose the preferred image. Step 5: Similarly, select the desired icons for the home, back, and close keyboard keys.
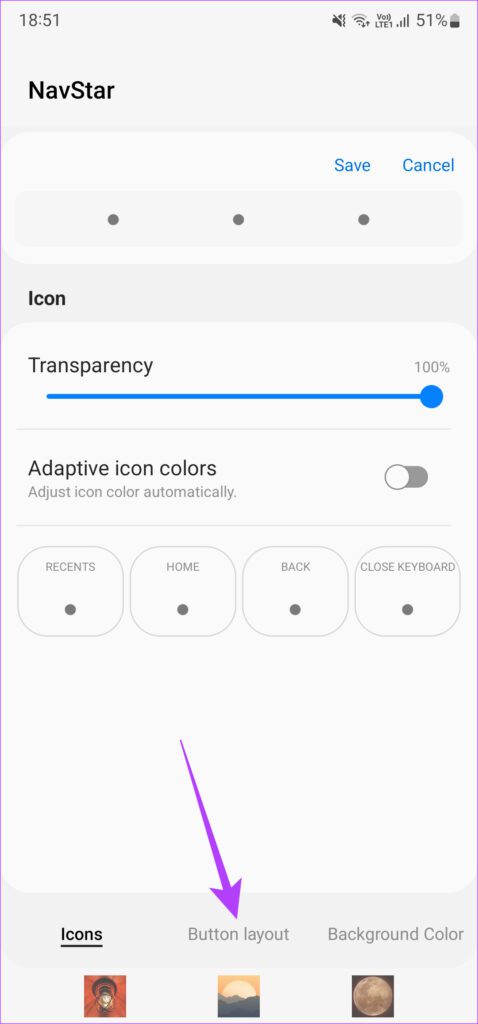
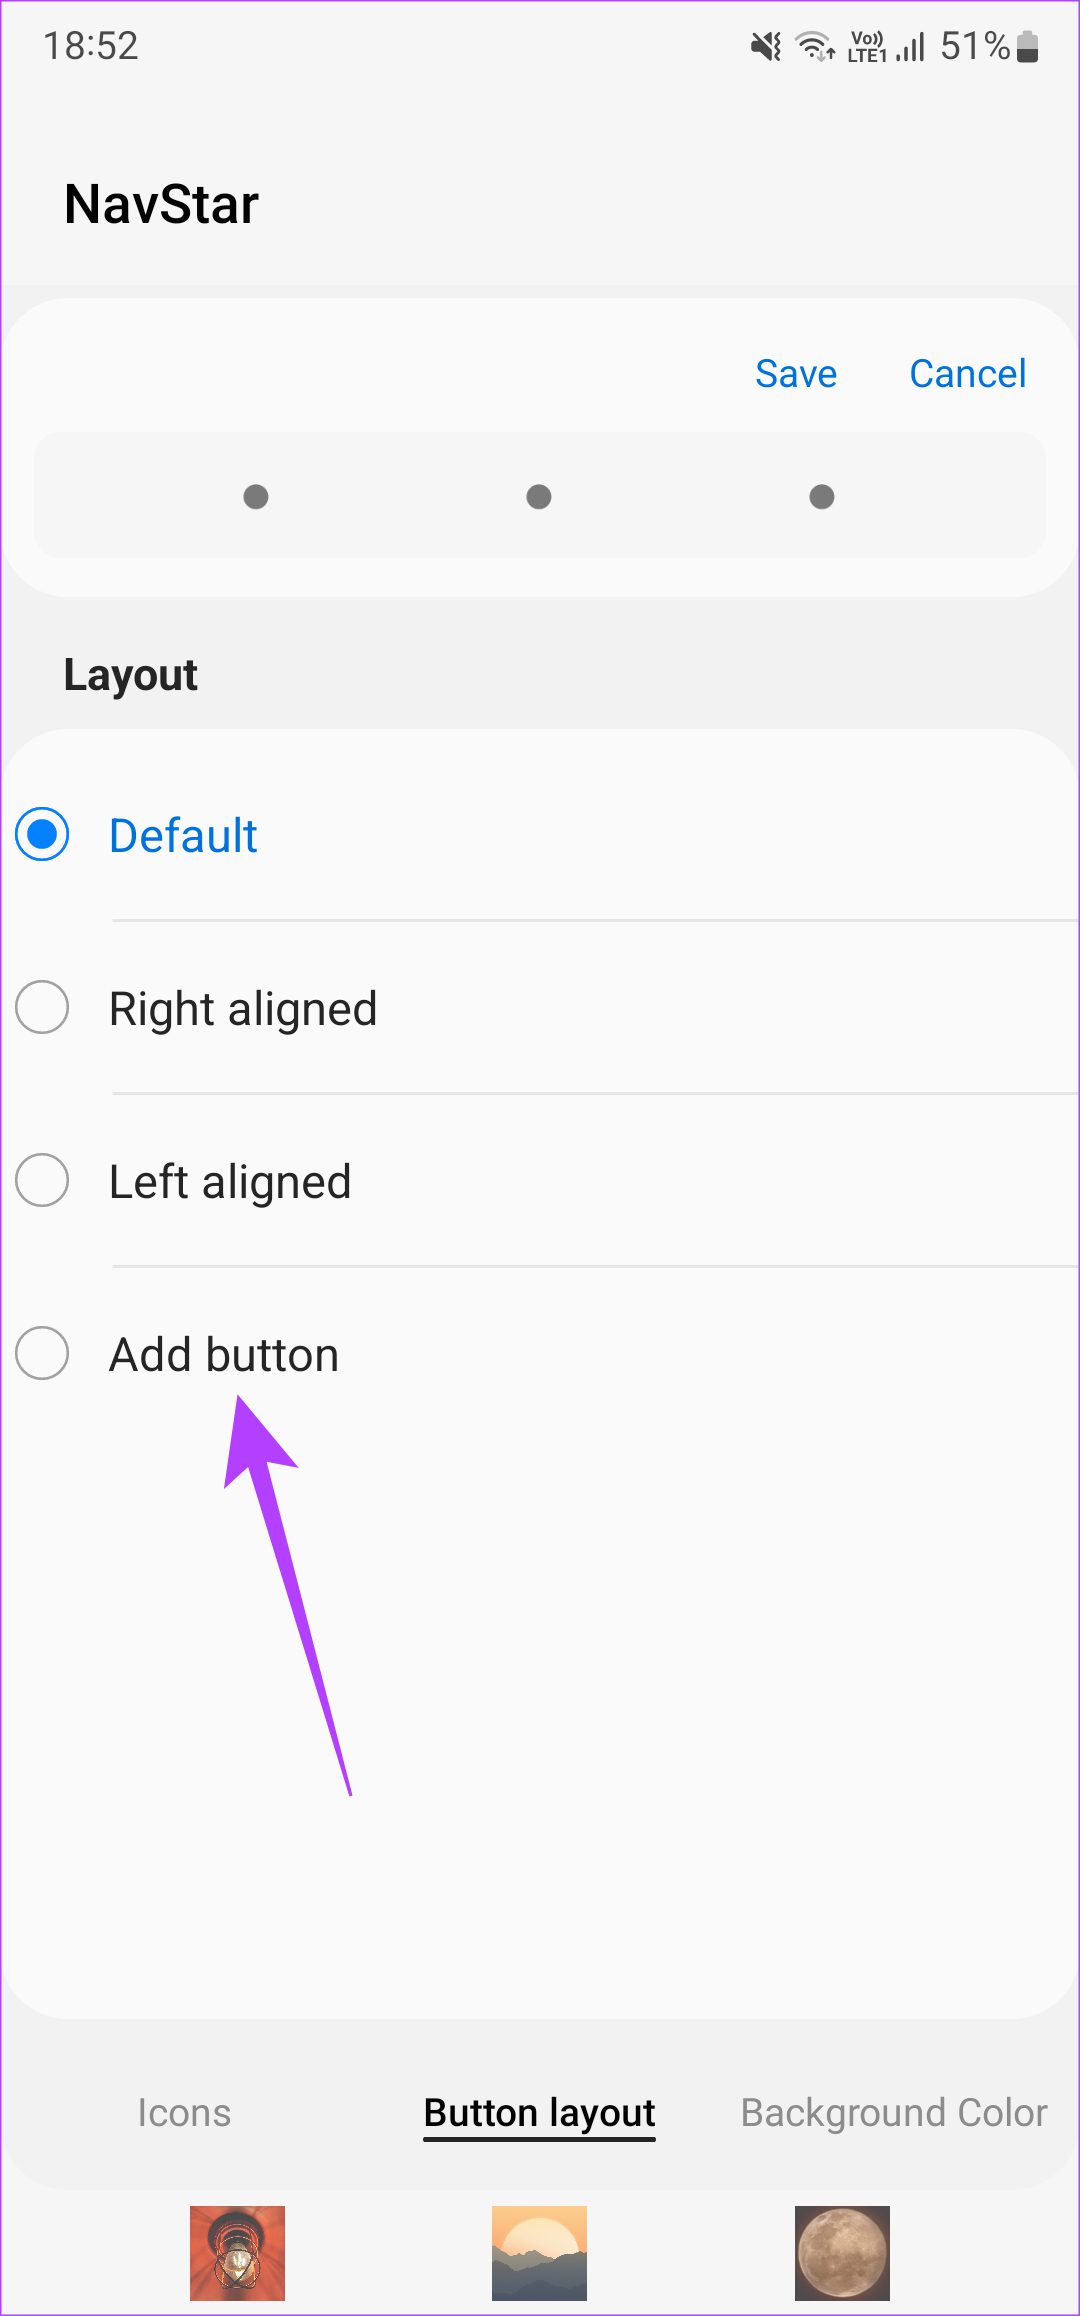
Step 6: Once you’ve set the icons, tap on the Button layout tab at the bottom to switch to it.
Step 7: Here, you can select if you want your buttons to be aligned in a certain direction or at the center as default.
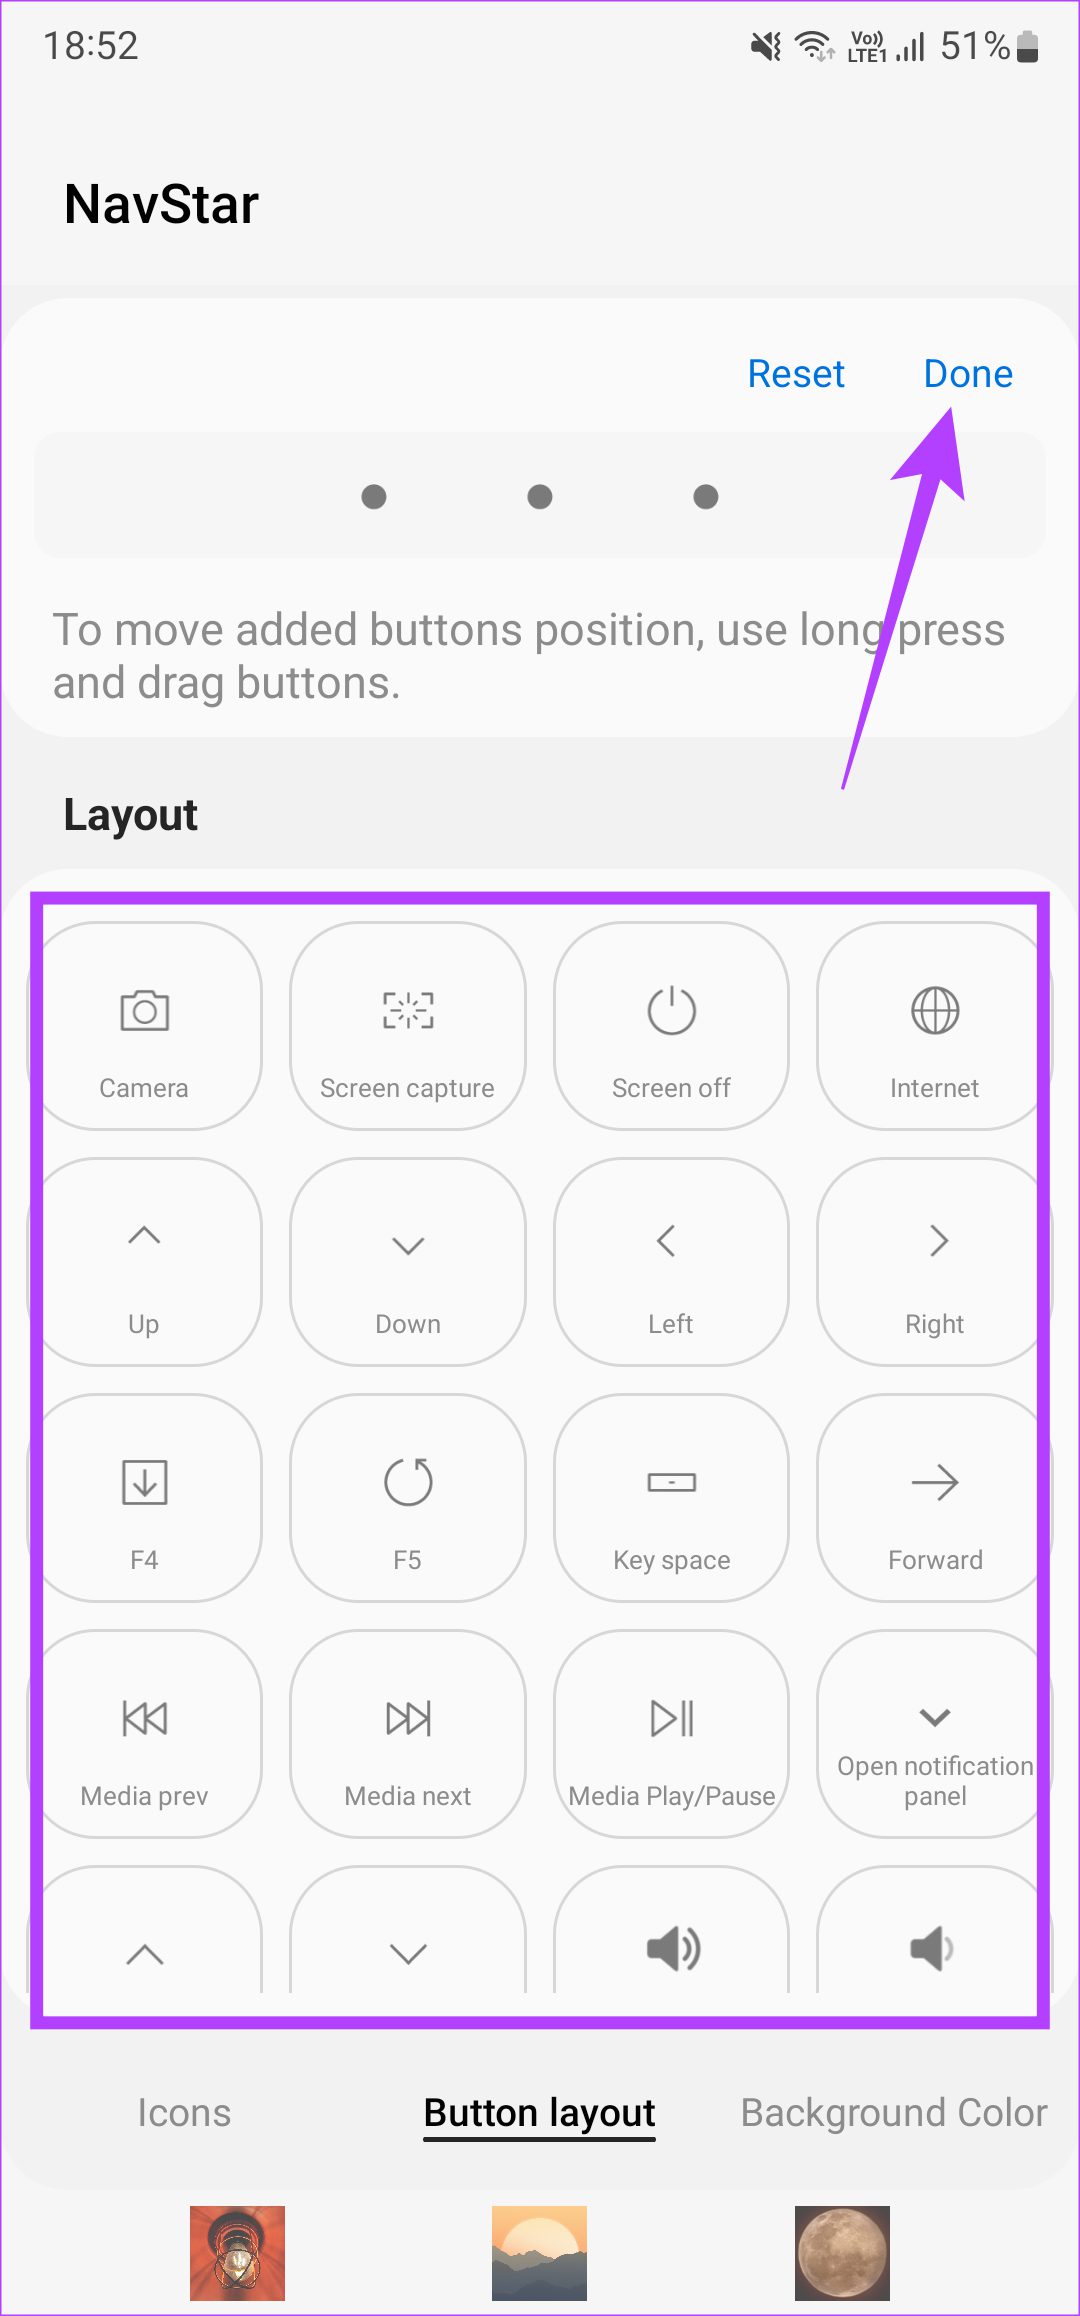
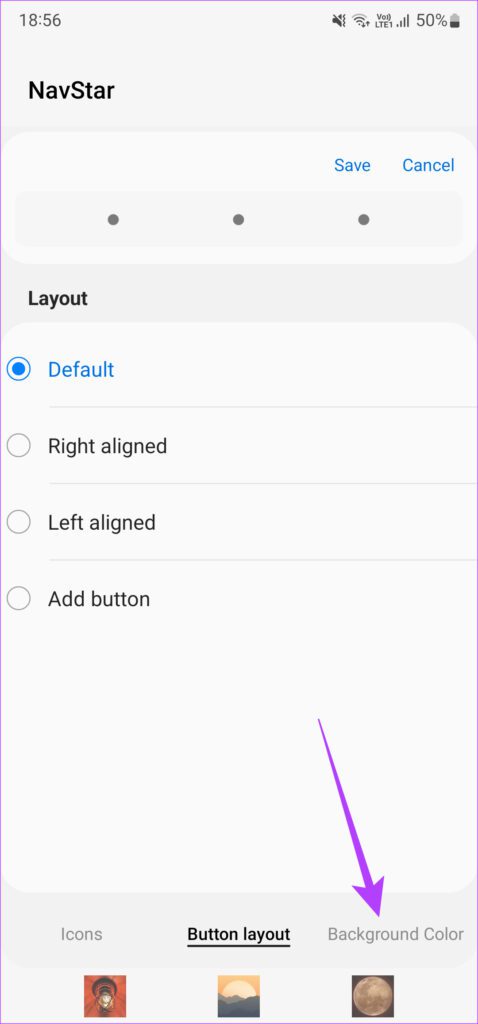
Step 8: You can even add additional buttons to shortcuts like camera, media controls, etc. Select Add button and then add any custom button you like. After that, select Done. Step 9: Now, tap on the Background color tab to switch to it.
Step 10: Select a color you like from the options. You can leave it on white if you want it to change dynamically with apps.
Step 11: If you’re happy with the look of the navigation bar, select Save at the top of the screen.
Step 12: The custom navigation layout that you set is available in the list of options. Tap on the layout to select it.
Your custom navigation bar has now been set. You can create as many new layouts possible and switch between them frequently.
Customizing Gestures
If you use gestures over conventional navigation keys, here’s how you can customize them. Step 1: Open the Settings app on your Samsung Galaxy phone. Navigate to the Display section.
Step 2: Scroll down and select Navigation bar.
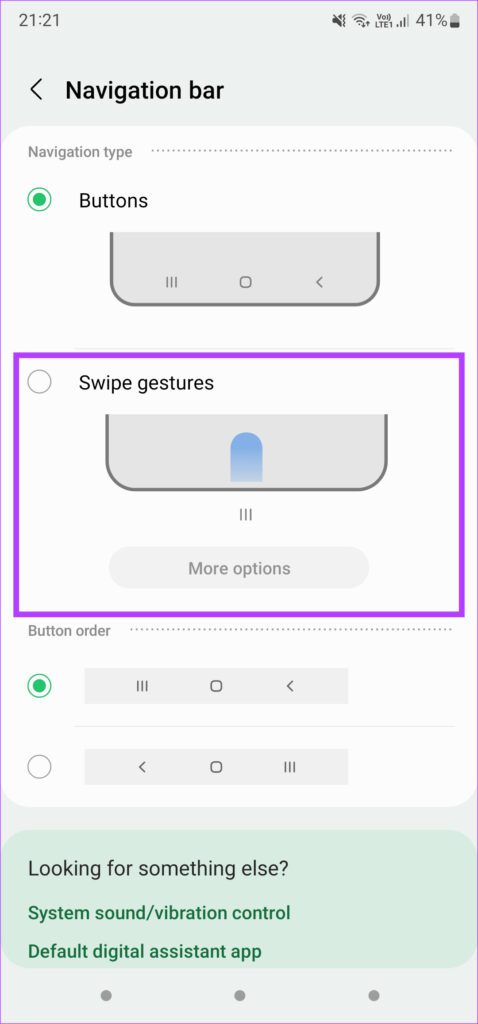
Step 3: Under Navigation type, select Swipe gestures.
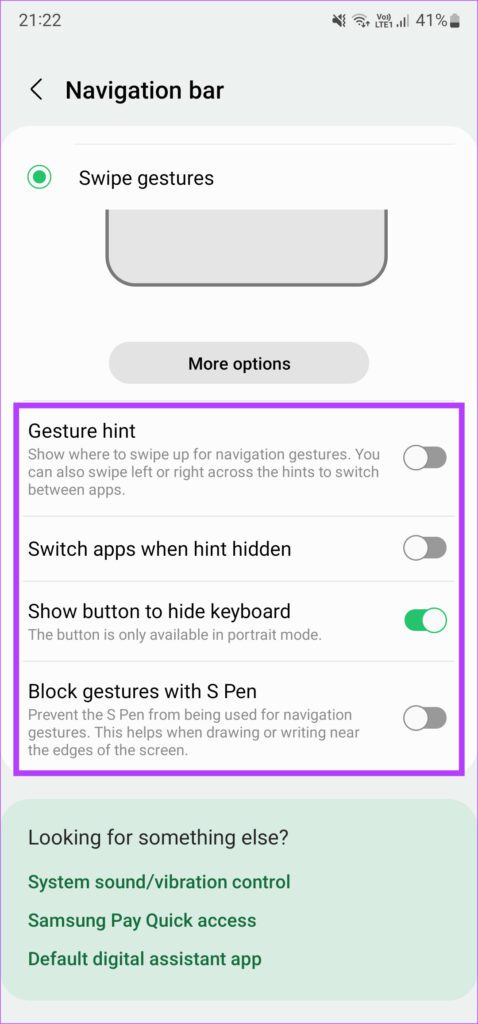
Step 4: Use the toggles below to select whatever option corresponds to your usage.
Step 5: To customize gestures, select More options.
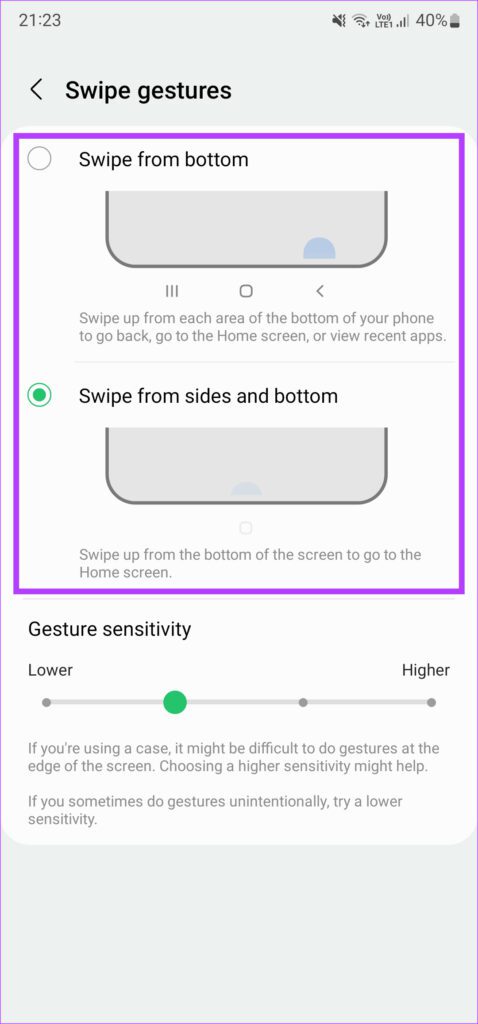
Step 6: You can now choose from two different types of gesture navigation. The first option lets you swipe only from the bottom, and the area you swipe from determines the action. This is similar to navigation buttons, but you’re using swipes instead of the buttons.
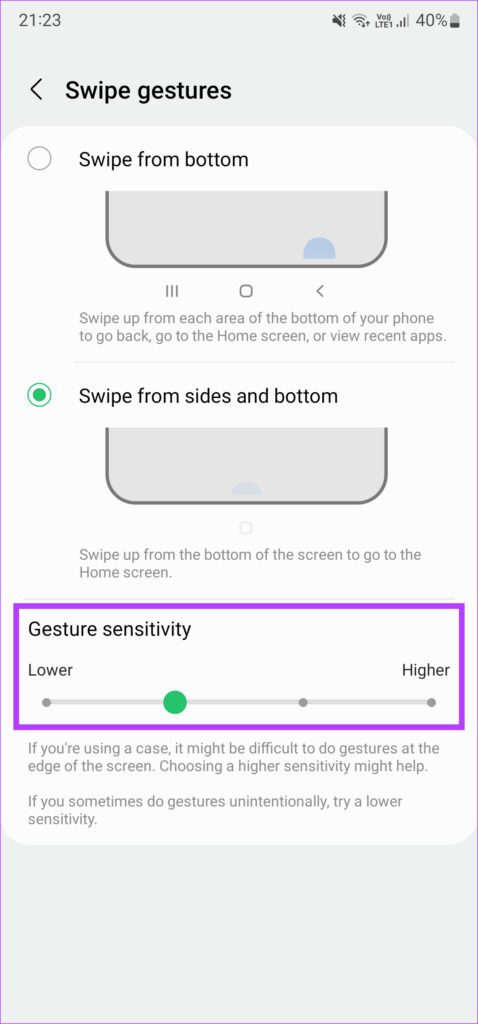
The second option is slightly more practical. You can swipe up from the bottom to go home and swipe and hold to access recent apps. To go back, you can swipe from either side of the screen. Step 7: Once you’ve picked the one best suited for your usage, you can use the slider to vary the gesture sensitivity.
That’s what it takes to customize the navigation gestures on your Samsung Galaxy phone.
Change the Look of the Navigation Bar as per Your Liking
While the default settings fall shorts with flexibility, Good Lock allows you to eke the true potential of customization on the navigation bar. You can make it look the way you want and even add custom images for an extra personal touch. The above article may contain affiliate links which help support Guiding Tech. However, it does not affect our editorial integrity. The content remains unbiased and authentic.

