Unlike Word, where you get several elements to play like dropdown lists and checkboxes, the options in Google Docs are limited. At best, you can create a simple form for offline usage, which you can print and later distribute. For now, you will have to create a fillable form from scratch. However, if you have a form sample in PDF format, you can modify it in Docs. Either way, the process is easy and shouldn’t take much time once you are accustomed to it. However, let us warn you that the process is time-consuming, especially if you want to create one from scratch. That said, here’s how to create a fillable form in Google Docs.
Method 1: Native Way
One of the best methods to create a form in Google Docs is to take the aid of Tables. They let your fields appear uniform and remove the hassle of adding space unnecessarily. As noted earlier, you can’t add interactive form fields like dropdowns, etc. You’ll have to limit yourself to form fields like text boxes, checkboxes, and text areas. So yeah, this does tie down your hands. Nevertheless, if it’s only text fields you want, here’s how to go about it. Step 1: Open a new document on Docs and click on Insert > Table, and select the number of rows and columns.
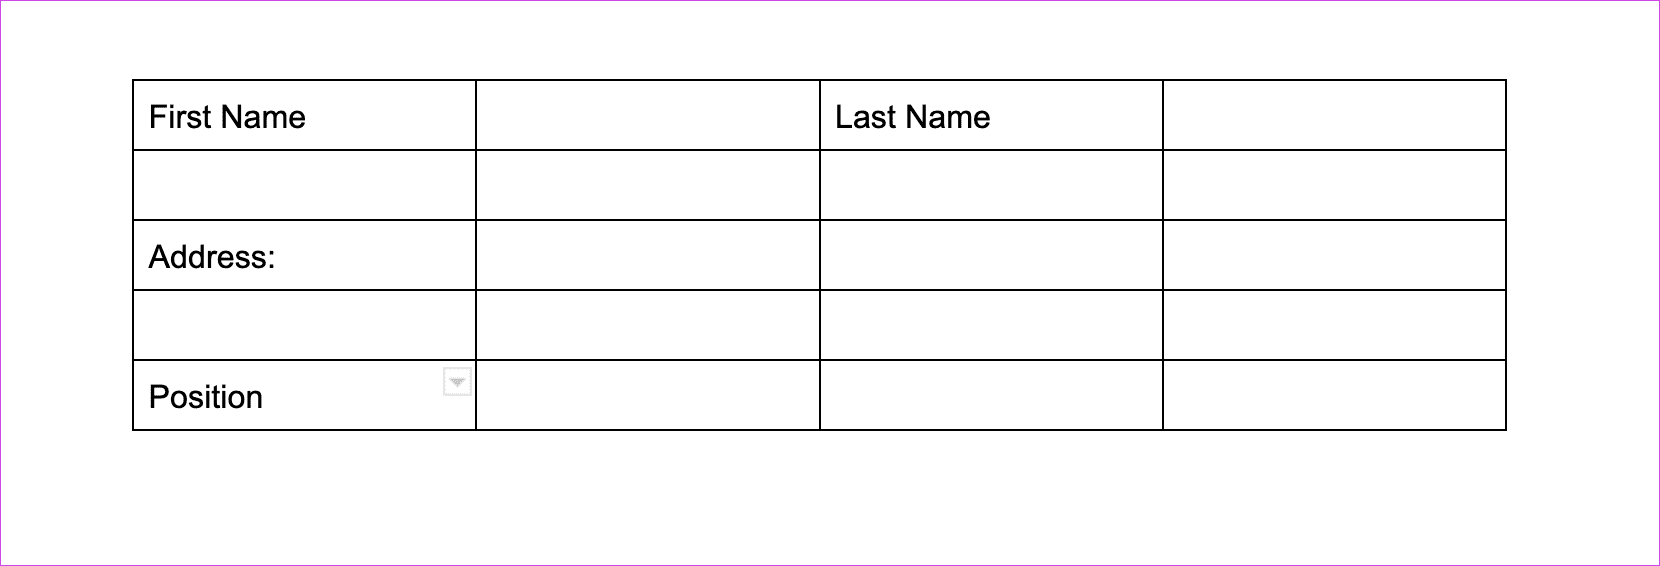
We have chosen to go with 4 columns and 5 rows in our case. Next, pull at the rows to enlarge the size of the table. Step 2: Add the first text field like First Name and Last name. Leave the cell blank for those you want the user’s input.
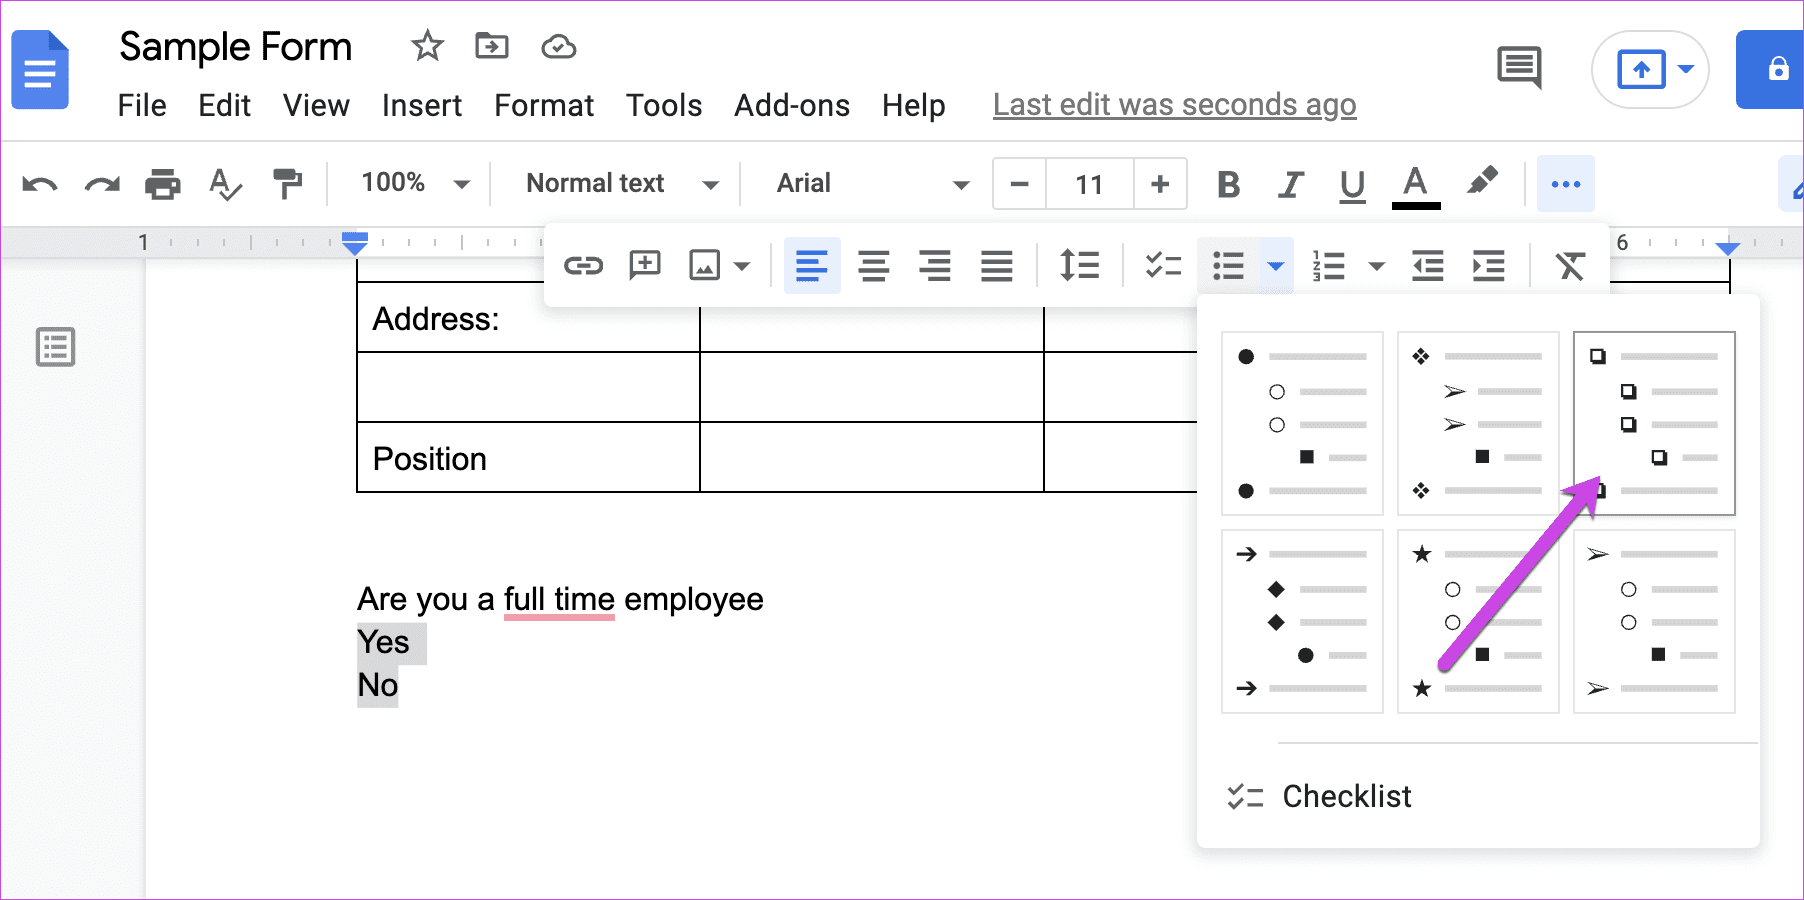
Select the text and click on the little Arrow-icon next to the Bullet list options to add a checklist. Pick the third option from the list to put a small checkbox next to every entry.
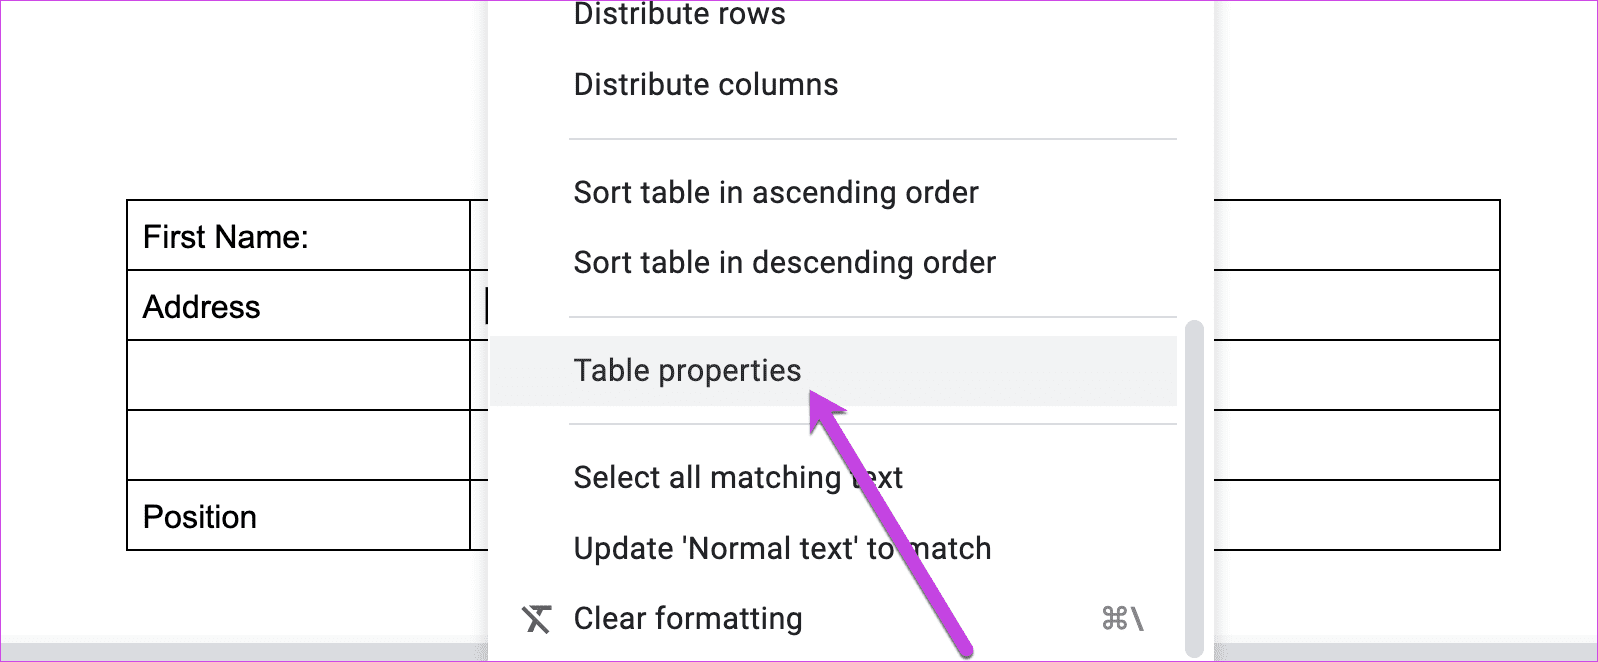
So, there you have it, a basic form’s skeleton. The good thing about this method is that you can add two-three tables per the design you have in mind. For instance, if you want to add a large text area option, you need to add a single-cell table and enlarge it. Simple, see. Step 3: Next, right-click on your table and select Table Properties.
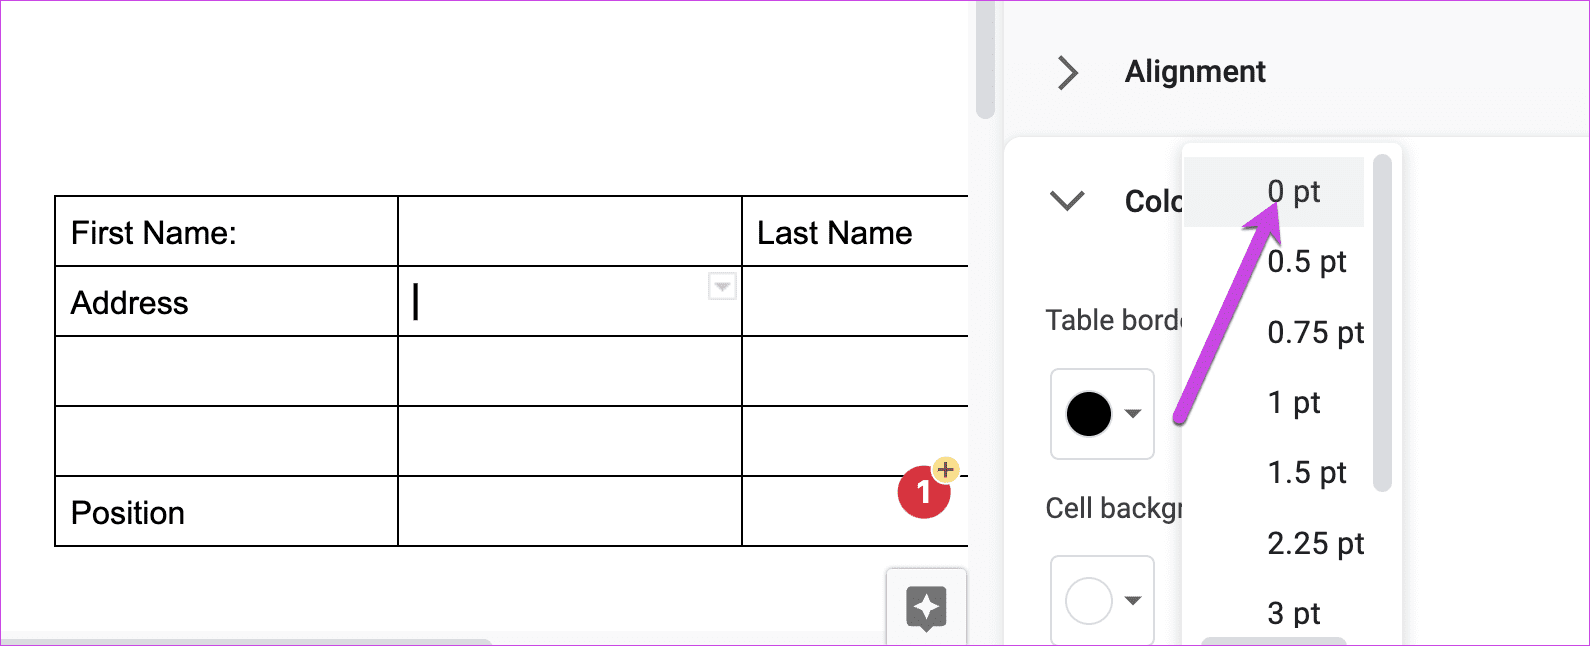
Next, click on Color, and under Table border, select 0 pt.
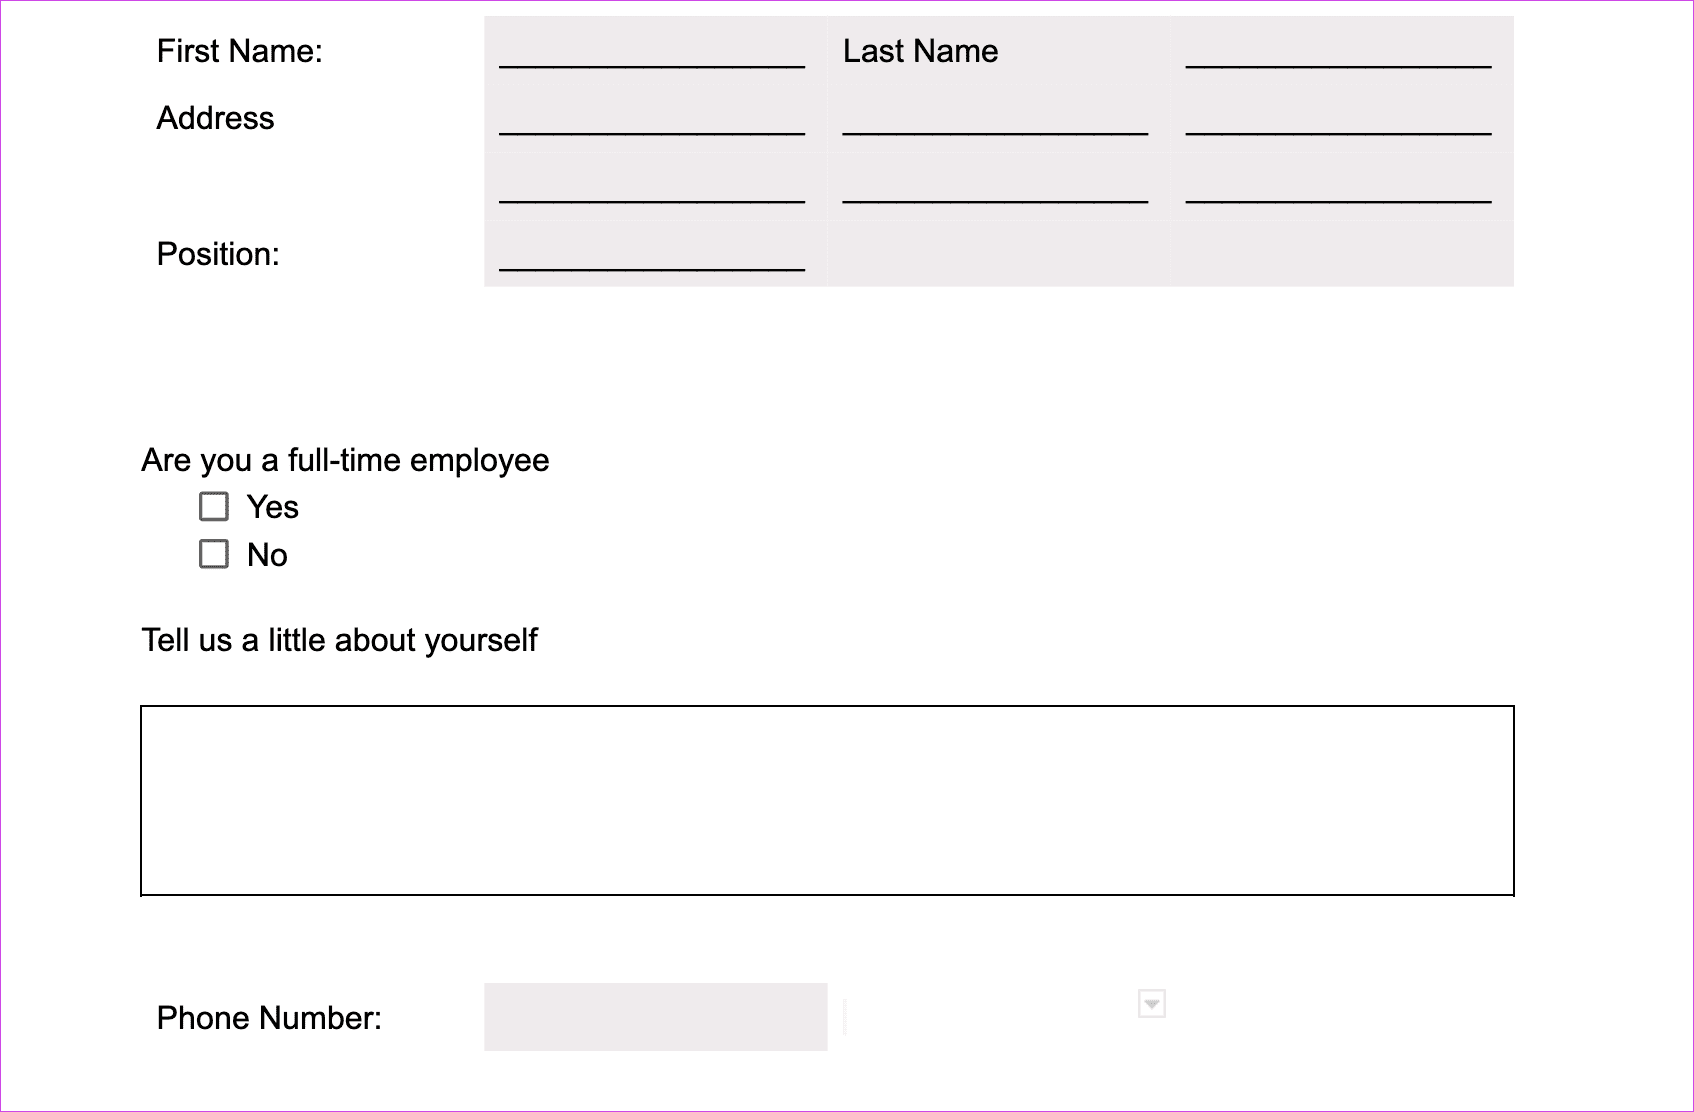
This will make the borders invisible, and you’ll have a better-looking form on your hand. Alternatively, you can highlight the cells with a light color or add dashes to make them more interactive. We created the following form entirely using Google Docs elements.
It’s worth mentioning that forms created from scratch in Google Docs can be printed and distributed. In the absence of field validations, using them for online submissions will involve a lot of manual validations. Nevertheless, if you want to use the form in the future, you need to save it. Next time you need to modify it, use it. Make a copy option under File and modify it as per your requirement.
Method 2: Convert a PDF File
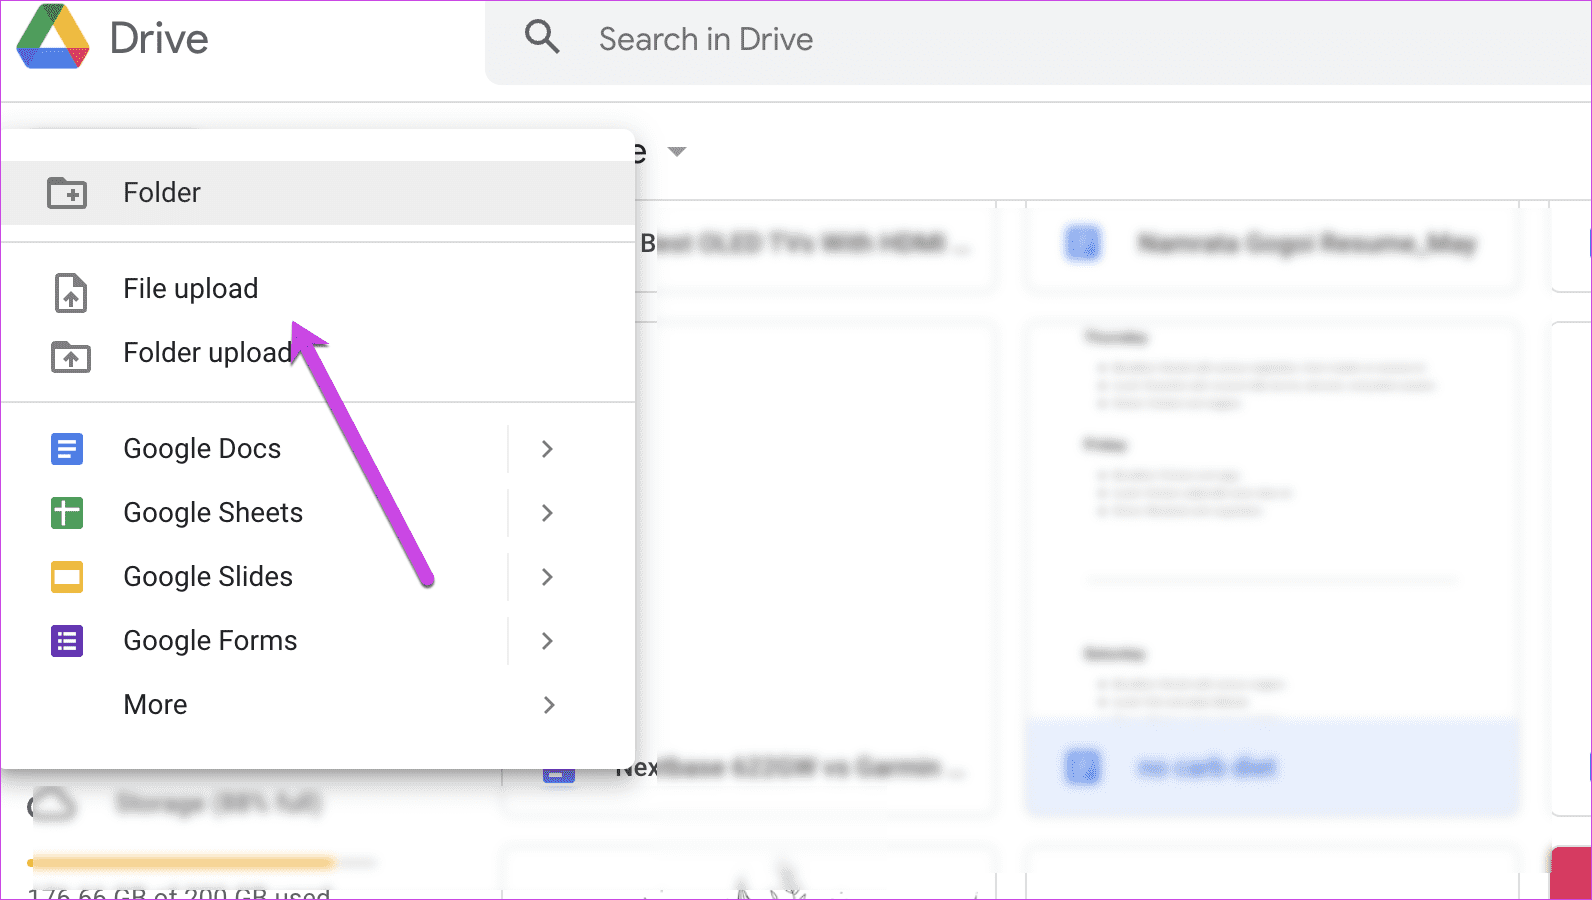
As mentioned above, Docs also lets you convert PDF files to Google Docs. So if you have a sample form in PDF format, you can convert it to Docs and then modify it. Step 1: Once your sample file is ready, open Google Drive and click on the New button at the top-left corner.
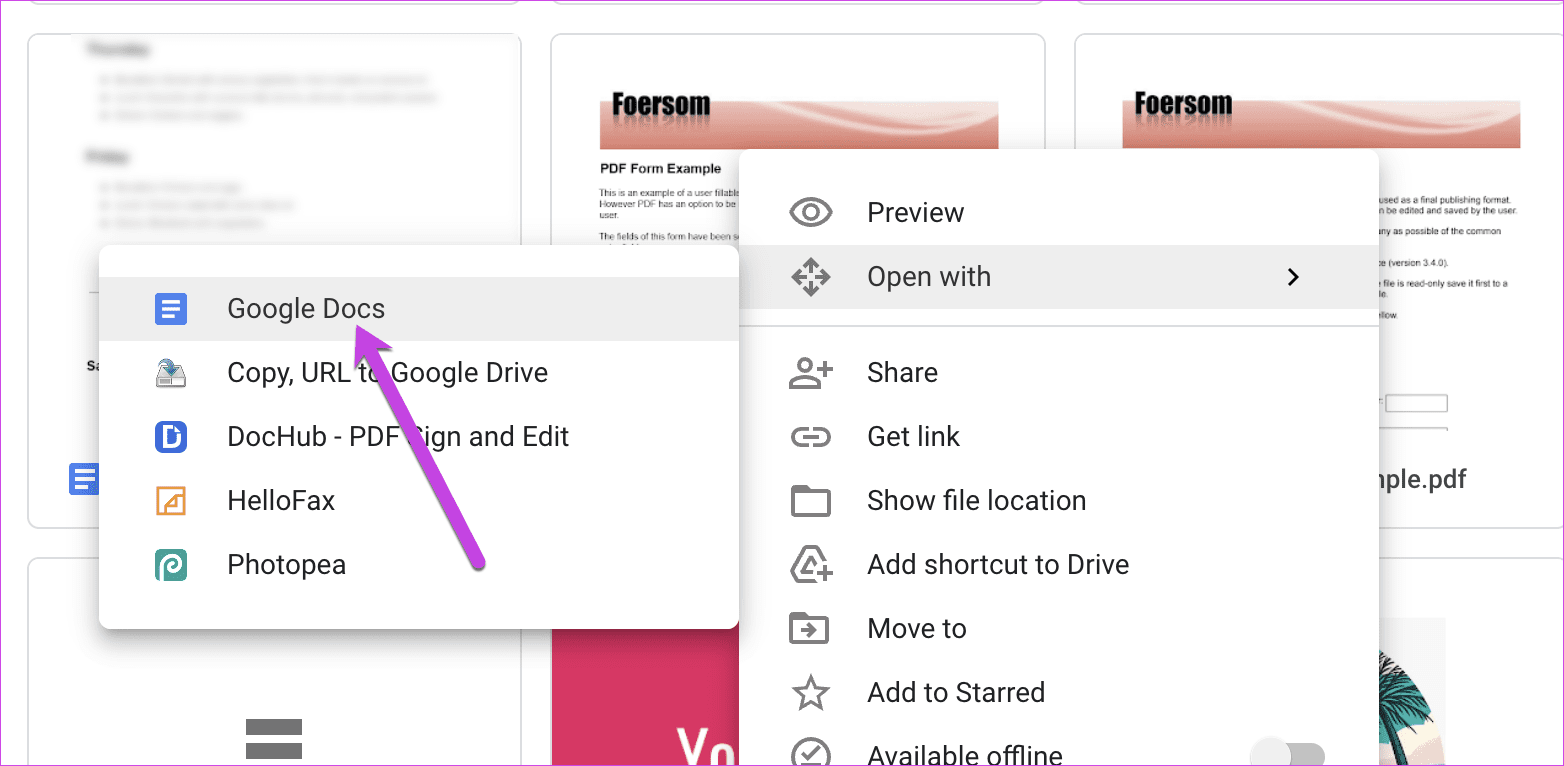
Select Upload to upload the file. Step 2: Once the upload completes, right-click on the file, and select Open with > Google Docs.
This will convert the document into editable text. Of course, it won’t convert into a fillable form right away, but you will have a rough structure.
You need to add the necessary formatting to complete the circle. Note that if your sample form has text boxes, they will be removed. You will only have the text to edit.
This is a major limitation. But for now, that’s the only way to upload a form to Google Docs.
Google Forms is the Answer
Google Docs has plenty of limitations in creating offline fillable forms. If you are looking to create online forms, the safest method is to use Google Forms. It bundles with a bevy of features that make form building an easy exercise. The above article may contain affiliate links which help support Guiding Tech. However, it does not affect our editorial integrity. The content remains unbiased and authentic.
