While Windows 11 lets you customize various UI elements right from the Settings app, changing the default system font requires you to modify registry settings. This post will share the steps to change the default font type and size on Windows 11.
How to Change the Default Font on Windows 11
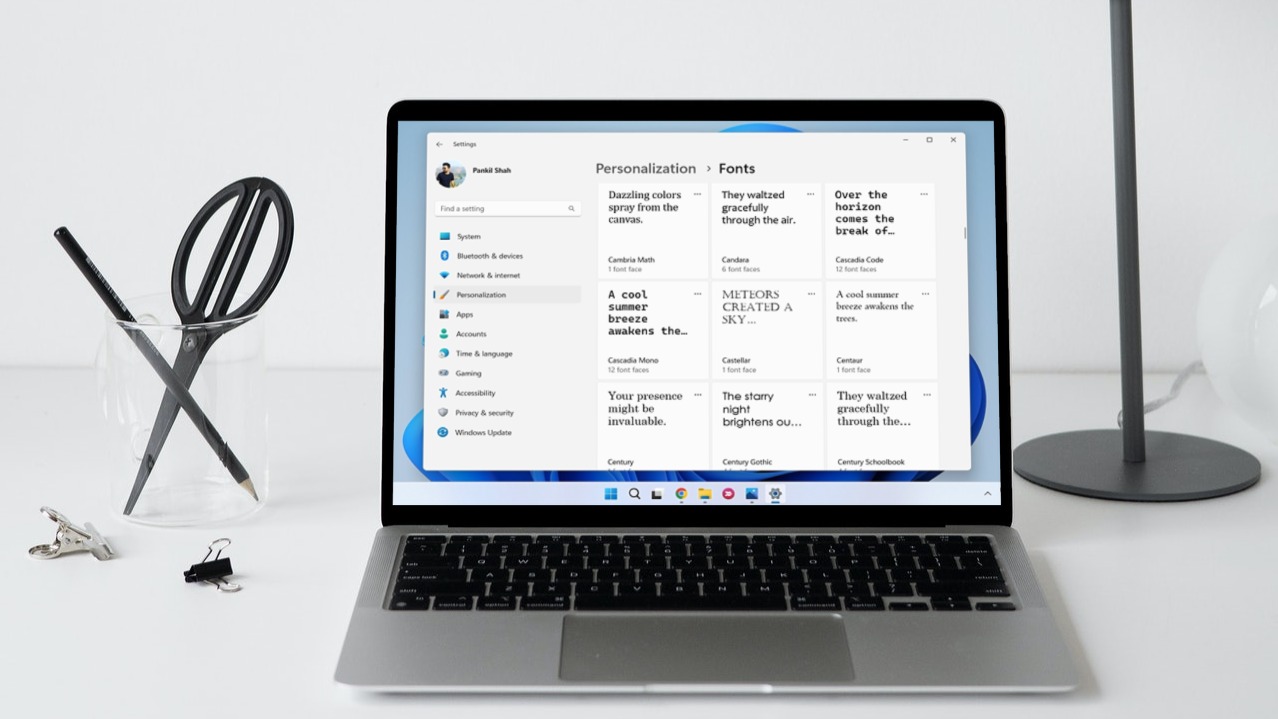
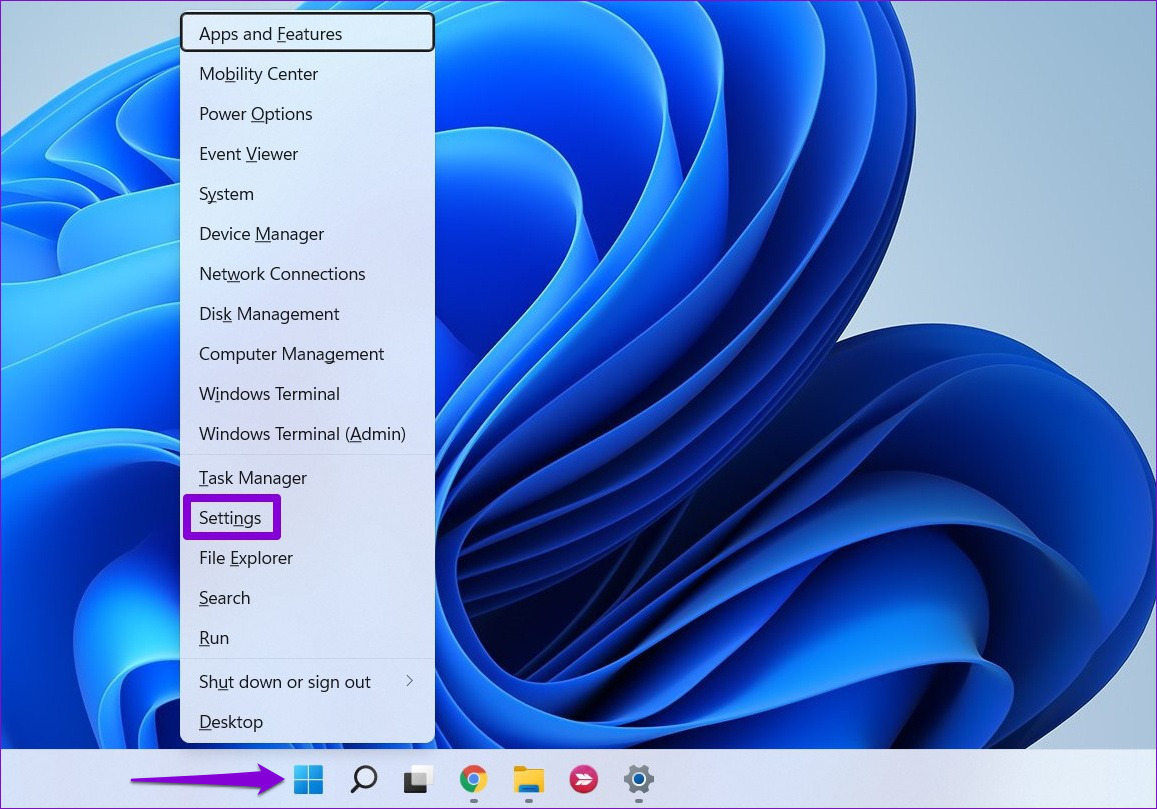
Windows 11 comes pre-installed with a wide range of fonts. That means, you’ll need to know the name of the font that you wish to use. Here’s how you can view available fonts on Windows 11. Step 1: Right-click on the Start menu and select Settings from the list.
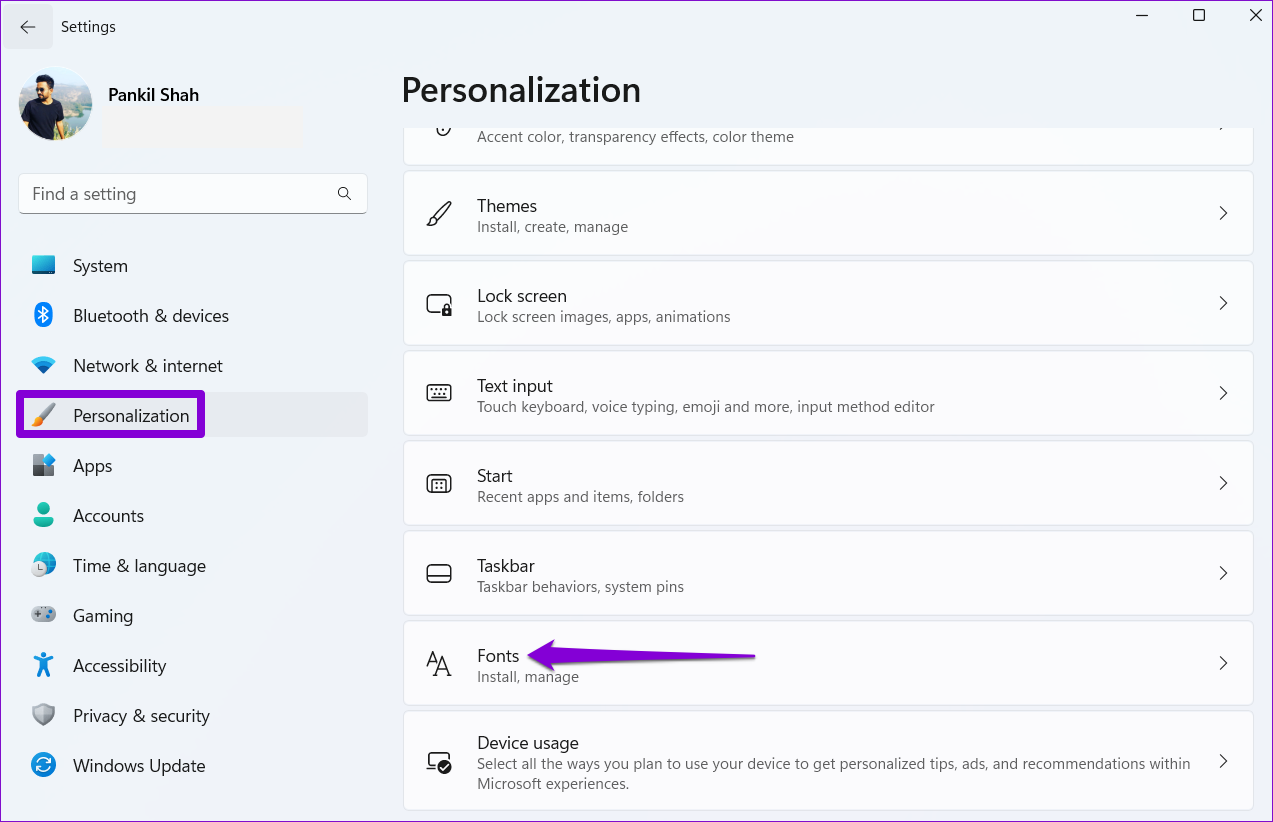
Step 2: Navigate to the Personalization tab and click on Fonts.
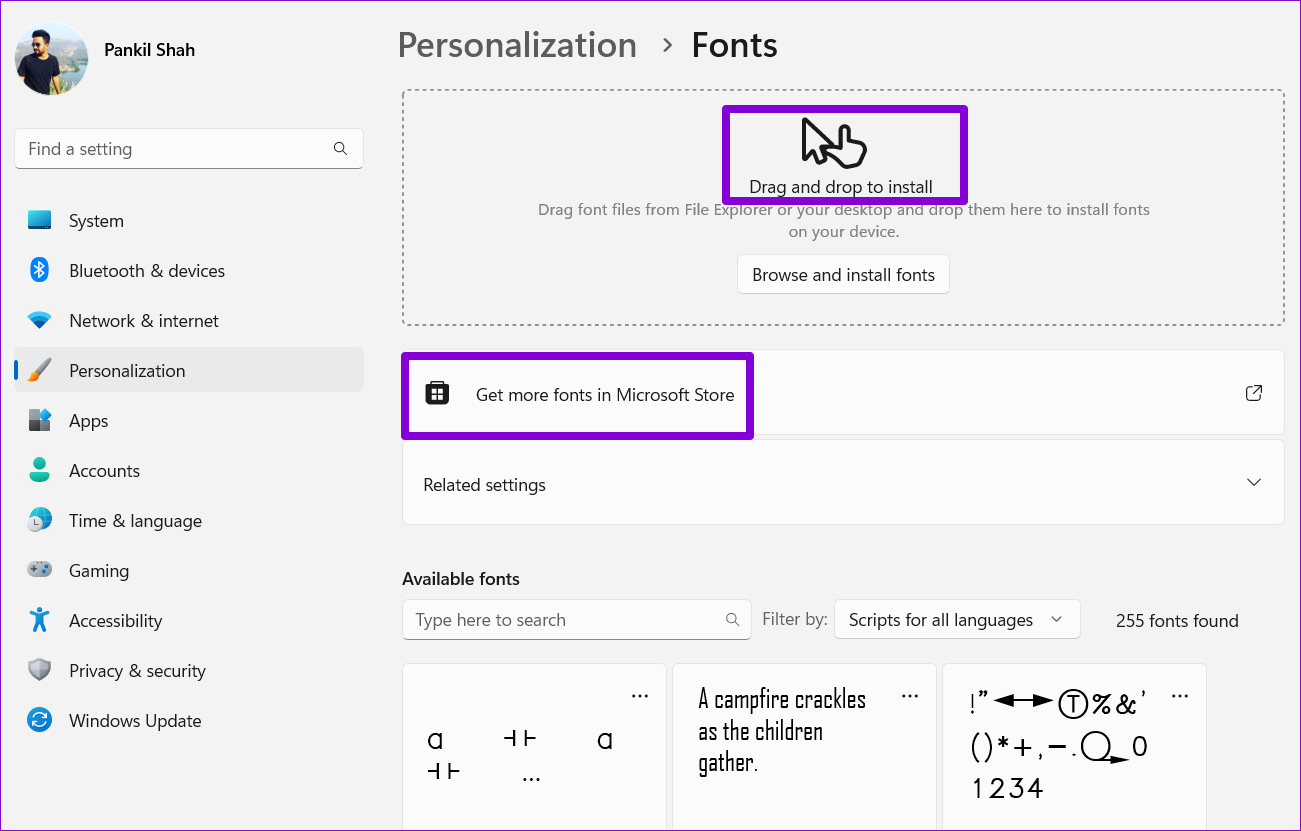
Step 3: Under Available fonts, you’ll see a list of fonts installed on your PC.
Optionally, you can install new fonts with drag and drop the TTF files to the Settings window or download them from the Microsoft Store.
Step 4: Note down the name of the font that you’d like to use.
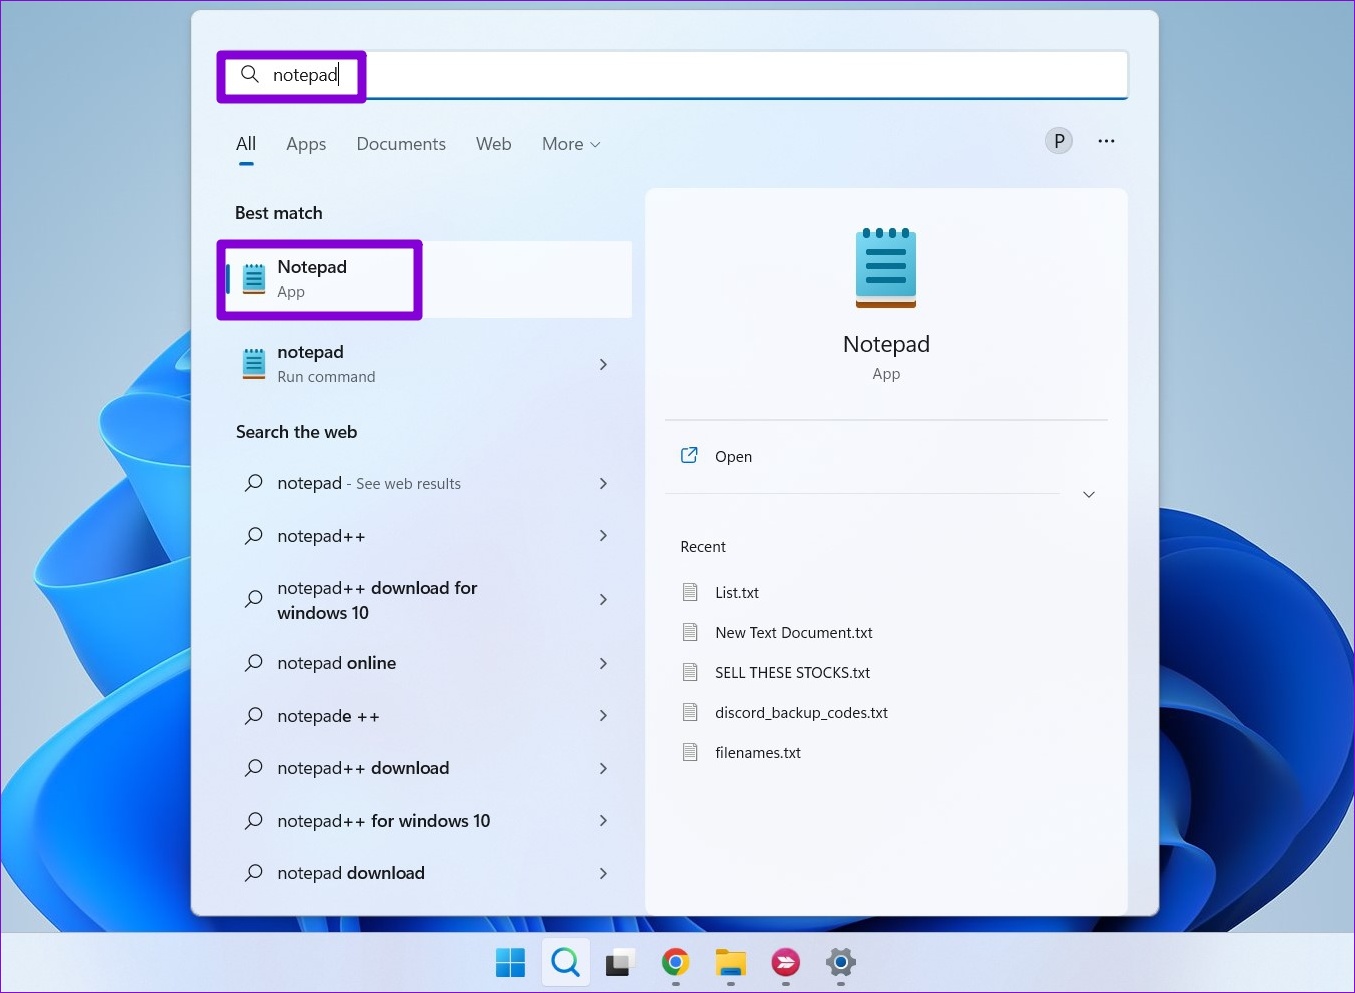
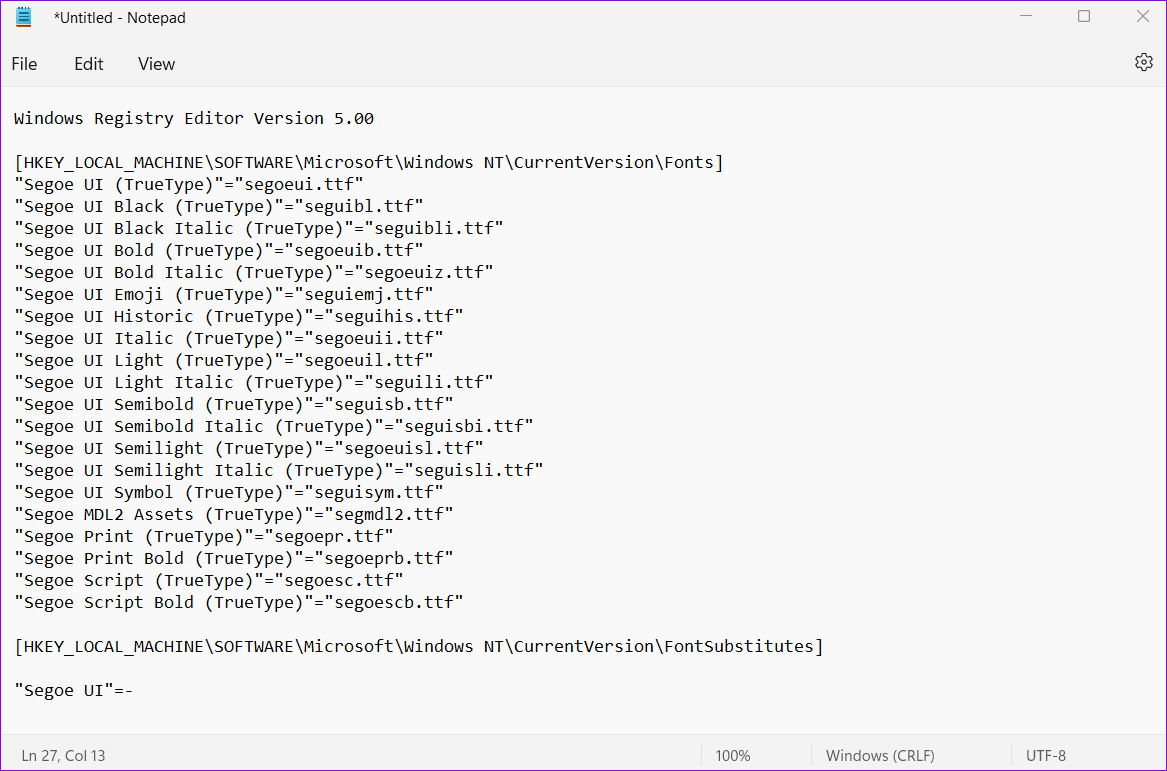
Once you have the font’s name, here’s how you can create a registry file to set it as the default system font on Windows 11. Since the Windows registry carries important settings for the system and its app, it’s important that you back up registry files or create a restore point before executing the steps below. Step 1: Press the Windows key + S to open the search menu. Type in notepad, and press Enter.
Step 2: Paste the following code in the text editor window. Replace FONT-NAME in the above code with the actual name of the font noted earlier. Here’s an example of how it would look:
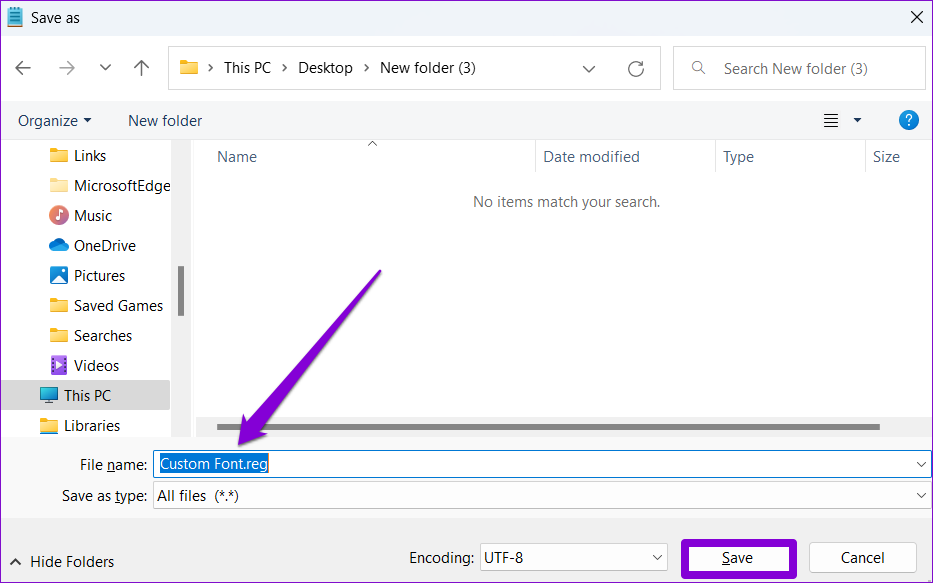
Step 3: Click on the File menu at the top and select Save as.
Step 4: In the Save as window, use the drop-down menu next to Save as type to select All files.
Step 5: In the File name field, type in a suitable name for the file followed by the ‘.reg’ extension. If you want to name your file Custom Font, for instance, type ‘Custom Font.reg’ in the File name box. Then, hit Save.
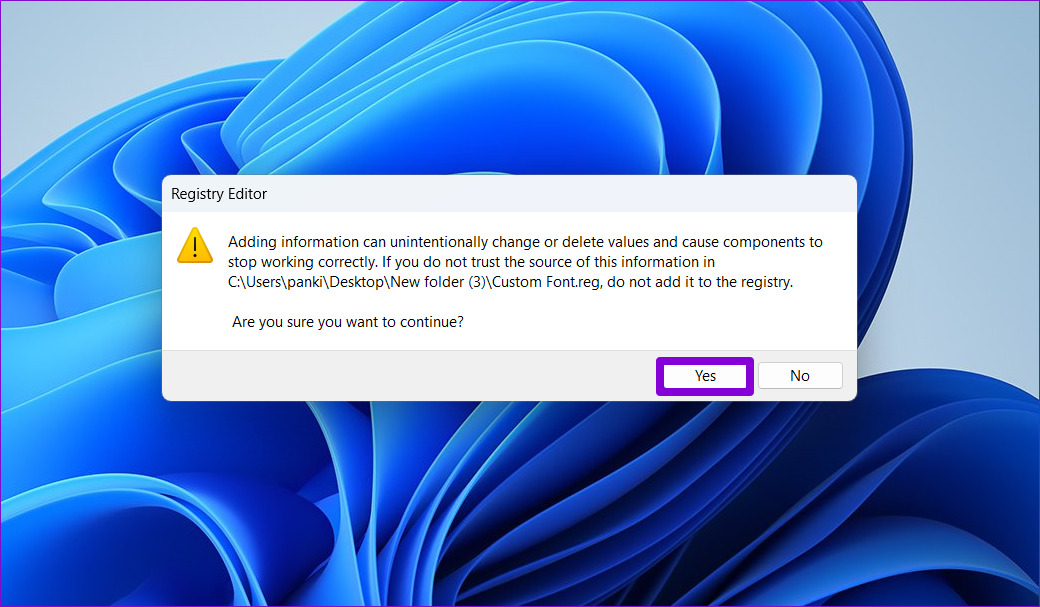
Step 6: Navigate to the newly created registry file on your PC, right-click on it and select Open.
Step 7: Click on Yes when the Registry Editor prompt appears.
Restart your PC after this and Windows will change the default system fonts.
How to Change Font Size on Windows 11
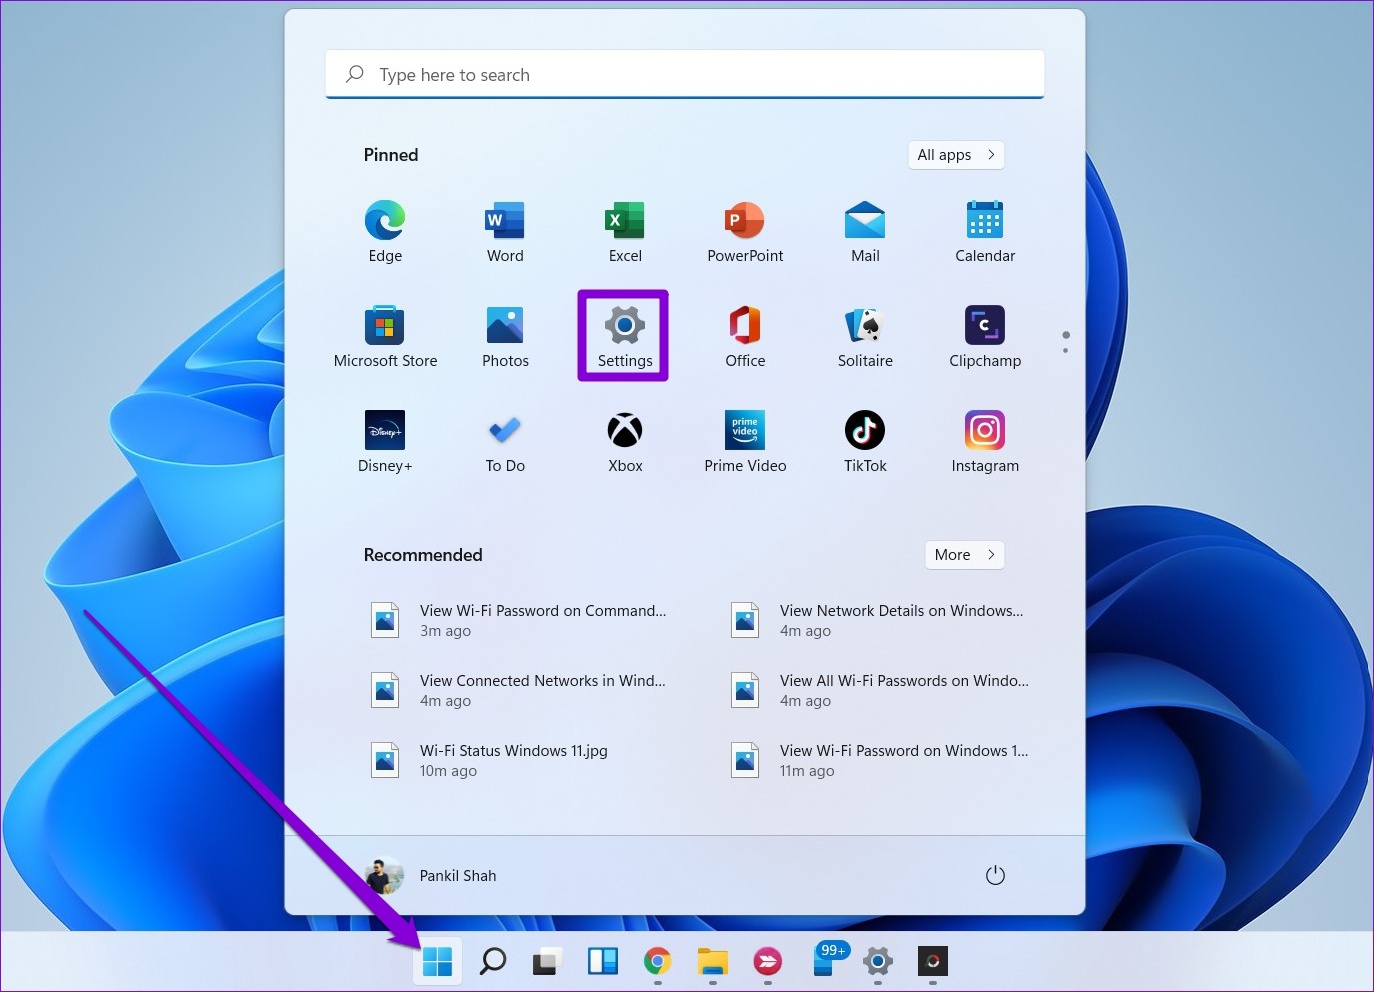
While changing the default system font is slightly complicated, thankfully, Windows does allow you to increase or decrease font size directly from the Settings app. Here’s how to do it. Step 1: Open the Start menu and click on the gear-shaped icon to launch the Settings app.
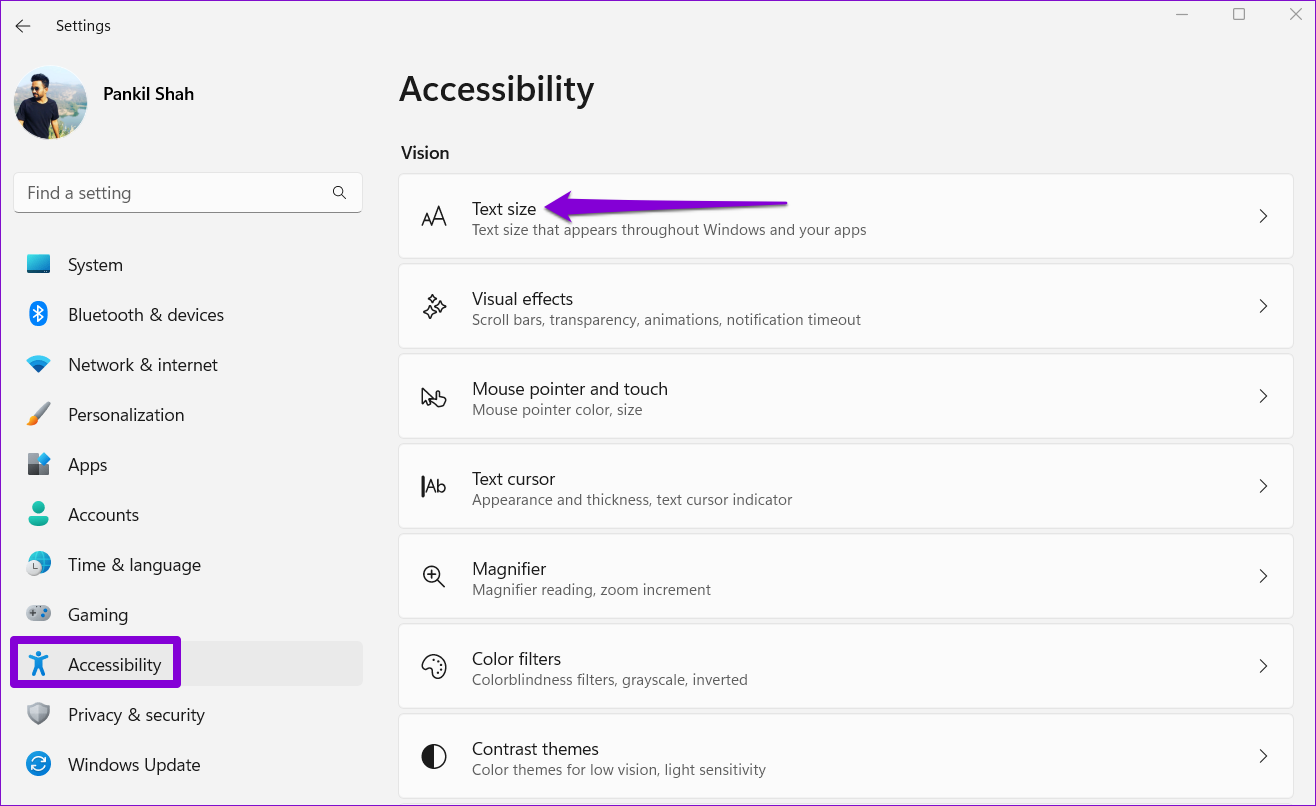
Step 2: Switch to the Accessibility tab on your left and click on Text size.
Step 3: Use the slider next to Text size to increase or decrease the size. You can preview the changes in the Text size preview box.
Step 4: After changing the text size, click on Apply.
And that’s about it. Windows will change the font size almost instantly.
How to Restore Default System Font on Windows 11
If you ever want to revert to the default system font—Segoe UI Variable—you can do so by creating a new registry file. Here’s how. Step 1: Press the Windows key + R to launch the Run dialog box. Type in notepad in the Open field and press Enter.
Step 2: In the text editor window, paste the following command.
Step 3: Click on the File menu at the top and select Save as.
Step 4: Use the drop-down menu next to Save as type to select All files and type in a suitable name for the file followed by the .REG extension. Then, hit Save.
Step 5: Locate and double-click on the newly created registry file on your PC. Click on Yes when the Registry Editor prompt appears.
Reboot your PC and Windows will switch back to the system default font.
Personalize Windows
Changing fonts is a neat way to freshen up your PC’s look. However, it isn’t the only way to personalize your Windows 11 PC. You can also try out different themes, change app icons, customize mouse cursors, and other things. The above article may contain affiliate links which help support Guiding Tech. However, it does not affect our editorial integrity. The content remains unbiased and authentic.


![]()