However, providing your password and the code from your 2FA method during every sign-in gets tiring. One way to save time and effort is by creating a list of trusted devices that can skip this step on your Google Account. If you lose the trusted device, you can also remove it from your Google Account to maintain your data security. Here are the steps to do so:
How to Add a Trusted Device to Your Google Account
Your trusted devices need to belong only to you. We recommend you don’t share your trusted phone with others. The device’s location must also be secure to safeguard against physical theft. Your phone needs to meet those conditions. After that, follow the steps below to add a trusted device to your Google account using the following devices:
On a Desktop
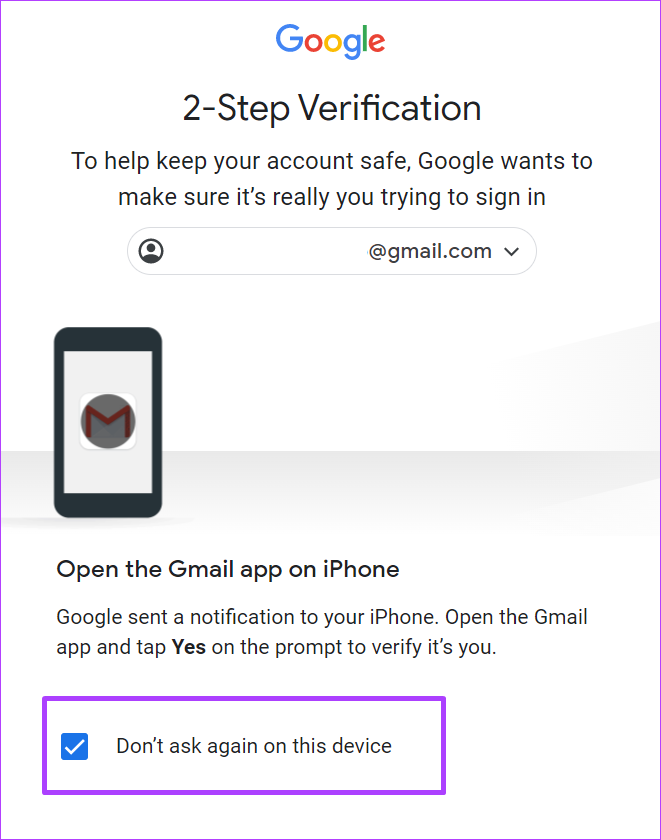
Follow the steps below to add a trusted device to your Google account using your PC: Step 1: Open the Google Accounts page in a web browser and sign in with your account details. Visit Google Accounts Step 2: On the next window for 2-Step Verification, tick the box beside ‘Don’t ask again on this device.’
Step 3: Check your mobile for the Google prompt or the code sent to your preferred 2FA method to complete the verification.
On an iPhone
Follow the steps below to add a trusted device to your Google account using your iPhone: Step 1: Open the Google Accounts site in a mobile web browser on your iPhone and try to sign in. Visit Google Accounts Step 2: On the next window for 2-Step Verification, tick the box beside ‘Don’t ask again on this device.’
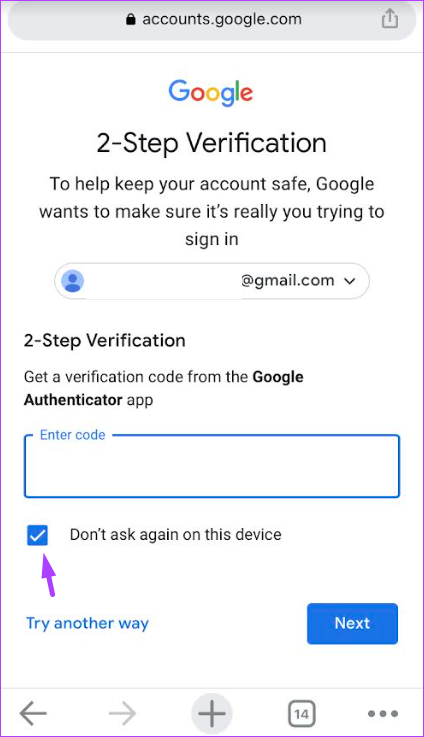
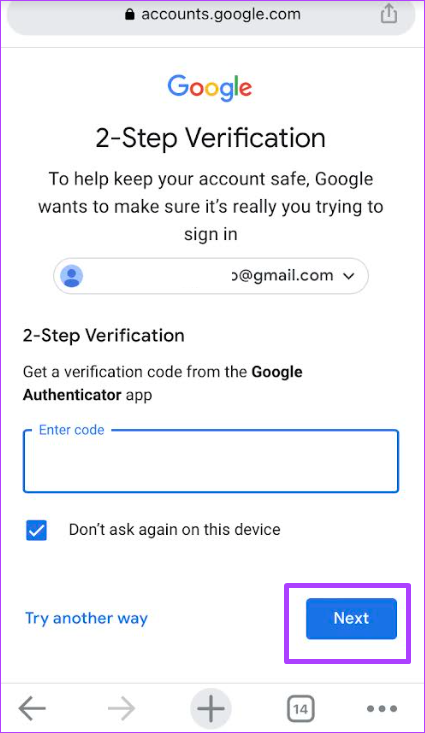
Step 3: Check your mobile for the Google prompt or the code sent to your preferred 2FA method and type it into the browser. Step 4: Tap Next to save your changes.
On an Android
Follow the steps below to add a trusted device to your Google account using your Android: Step 1: Visit the Google Accounts page in a mobile web browser and sign in with your account details. Visit Google Accounts Step 2: On the next window for 2-Step Verification, tick the box beside ‘Don’t ask again on this device.’
Step 3: Check your mobile for the Google prompt or the code sent to your preferred 2FA method and type it into the browser. Step 4: Tap Next to save your changes.
How to Remove a Trusted Device from Your Google Account
Removing a device from your Google account’s trusted list means two-factor authentication procedures should be carried out. Here are the steps to follow to remove a device:
On a Desktop
Follow the steps below to remove a device from your Google account’s trusted list using your PC: Step 1: Visit the Google Accounts site in a browser and sign in with your account details. Visit Google Accounts Step 2: On the left of the Google Account window, click on Security.
Step 3: Scroll down the window to ‘Signing in to Google’ and click on ‘2-Step Verification.’
Step 4: Provide your password to verify your identity and click on Next.
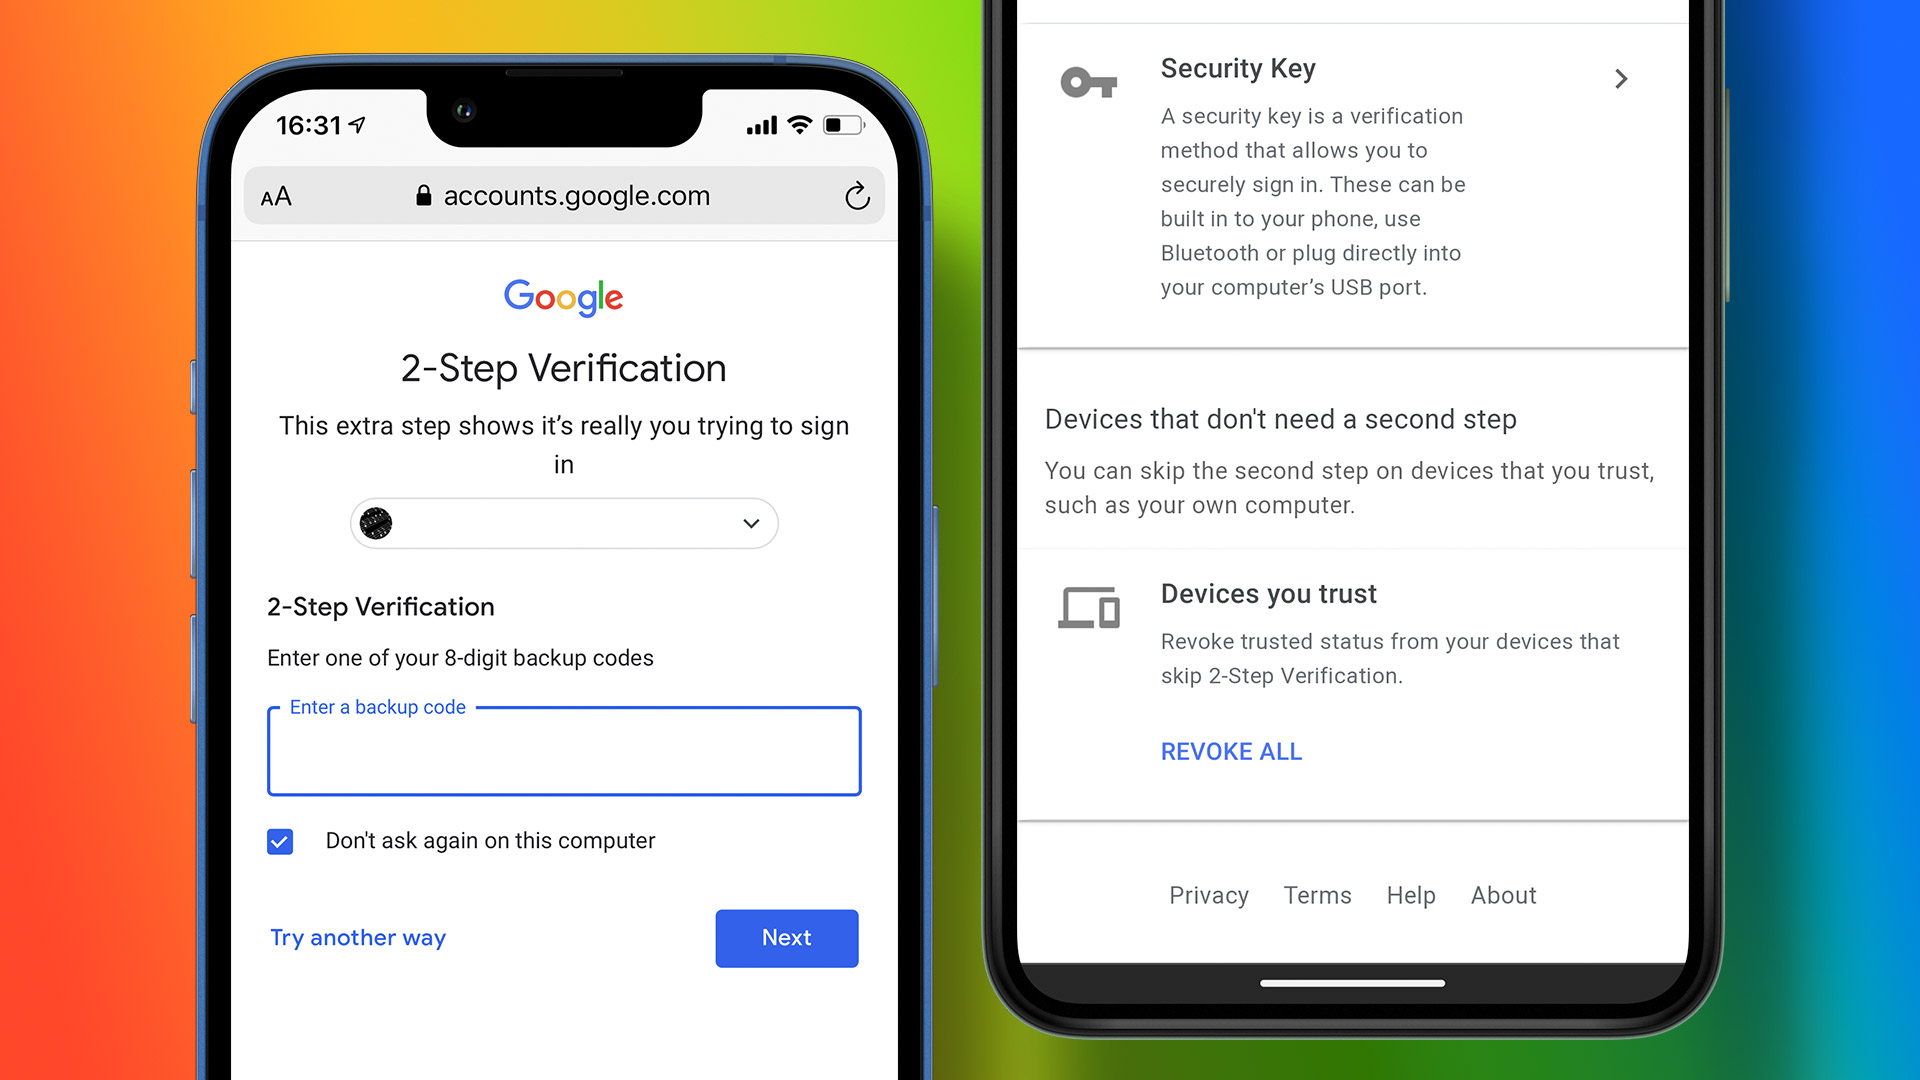
Step 5: Scroll down to the bottom of the page to ‘Devices that don’t need a second step’.
Step 6: Under ‘Devices you trust,’ click on Revoke All.
On an iPhone
Follow the steps below to remove a device from your Google account’s trusted list using your iPhone: Step 1: Open the Google Accounts site in a mobile web browser on your iPhone and try to sign in. Visit Google Accounts Step 2: At the top of the page, swipe the options and tap on Security.
Step 3: Scroll down the window to ‘Signing in to Google’ and tap on ‘2-Step Verification.’
Step 4: Provide your password to verify your identity and click on Next.
Step 5: Scroll down to the bottom of the page to ‘Devices that don’t need a second step.’
Step 6: Under ‘Devices you trust’, click on Revoke All.
On an Android
Follow the steps below to remove a device from your Google account’s trusted list using your Android: Step 1: Visit the Google Accounts page in a mobile web browser on your Android phone and sign in with your account details. Visit Google Accounts Step 2: At the top of the page, swipe the options and tap on Security.
Step 3: Scroll down the window to ‘Signing in to Google’ and tap on ‘2-Step Verification.’
Step 4: Provide your password to verify your identity and click on Next. Step 5: Scroll down to the bottom of the page to ‘Devices that don’t need a second step.’
Step 6: Under ‘Devices you trust’, click on Revoke All.
Editing Cookies and Cache on Chrome
You may still get the prompt to sign in with 2-Step Verification, even though you checked the box for ‘Don’t ask again on this computer.’ This might be because your browser’s cookies have been deleted or are not enabled. You can fix this by editing the Chrome cookie settings. The above article may contain affiliate links which help support Guiding Tech. However, it does not affect our editorial integrity. The content remains unbiased and authentic.