Be it the Night Mode to take low-light shots or the newly introduced Photographic Styles to change the way your photos look. Photographic Styles were introduced with the iPhone 13 series and can be used to change the overall look of your photos. If you like contrast-rich photos or pictures with a warmer tint, you can achieve exactly that with Photographic Styles. If you have an iPhone 13 or a newer device, here’s how you can use Photographic Styles to take pictures the way you want them to look!
What are Photographic Styles
The Photographic Styles are not just filters that you can add. You’ve probably applied filters to your photos on social media apps like Instagram and Snapchat. In fact, the default camera app on the iPhone also has in-built filters.
The Photographic styles are different and you can apply them in the real time. You may consider them specific profiles that adjust the warmth and tonal values to improve a photo’s quality. Depending on the style you choose, the iPhone lets you apply those changes and adjust them in real-time. This results in a better output when compared to applying filters as there’s no loss in quality or resolution either.
Applying Photographic Styles
Apple provides five Photographic Styles to capture specific type and style of photos you want. Here’s how you can compare and decide which Photographic Style would suit your needs. Step 1: Open the Settings app on your iPhone and scroll down to the Camera section.
Step 2: Tap on it and you should see the camera settings. Step 3: Select the Photographic Styles option under Photo Capture.
Step 4: You should now see the different photographic styles with a preview of what an image clicked in that style would look like. Here’s a better idea of what each style would bring a specific change in the photos.
Standard
This is the default style that would be selected if you don’t make any changes. The iPhone’s cameras are known to click true-to-life images with natural color tones.
If you prefer that sort of a look, you can leave it on the Standard setting.
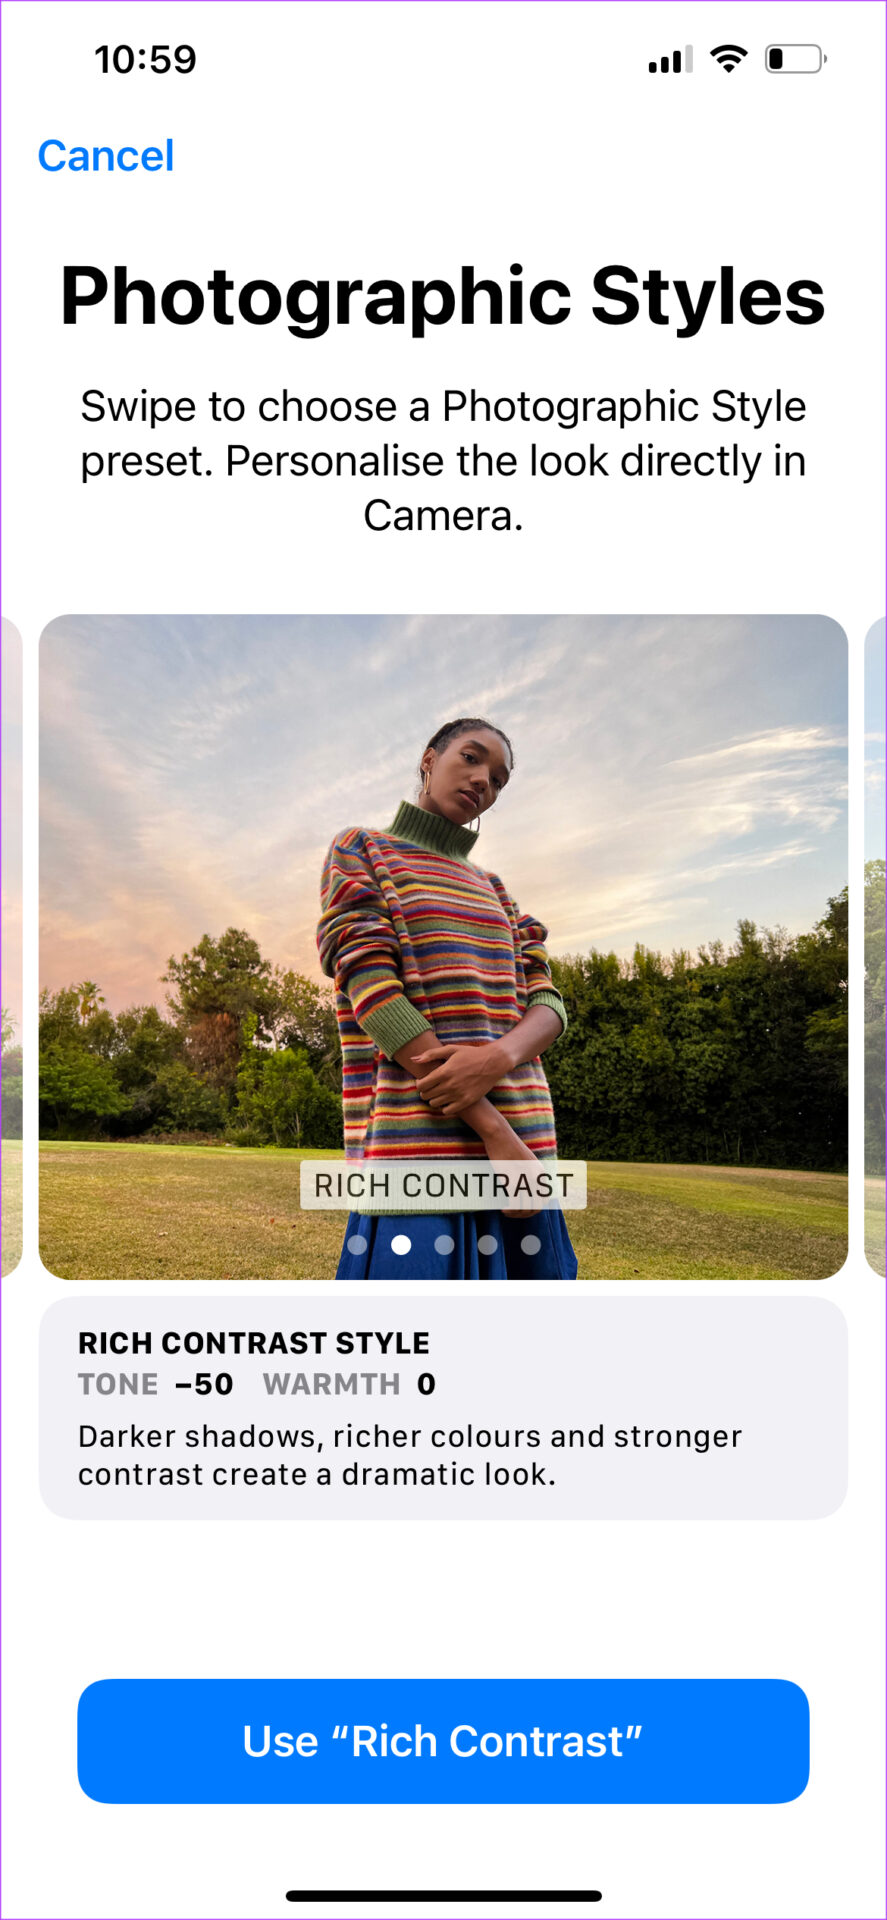
Rich Contrast
As the name suggests, this style emphasizes the contrast levels and makes the shadows appear darker. The colors also look slightly more saturated with this style.
If you want to create a dramatic look with a clear distinction between the bright and dark areas, choose this style. Also, note the Tone and Warmth value set by default when you choose this style.
Vibrant
If you’re not a fan of the iPhone’s natural color tones and slightly muted look, this style is exactly for you. Applying this style results in boosted colors that pop when viewing an image.
If you have a lot of colorful elements in the scene you’re clicking, this style will give you a great look. It’s also good when post your photos online without any editing.
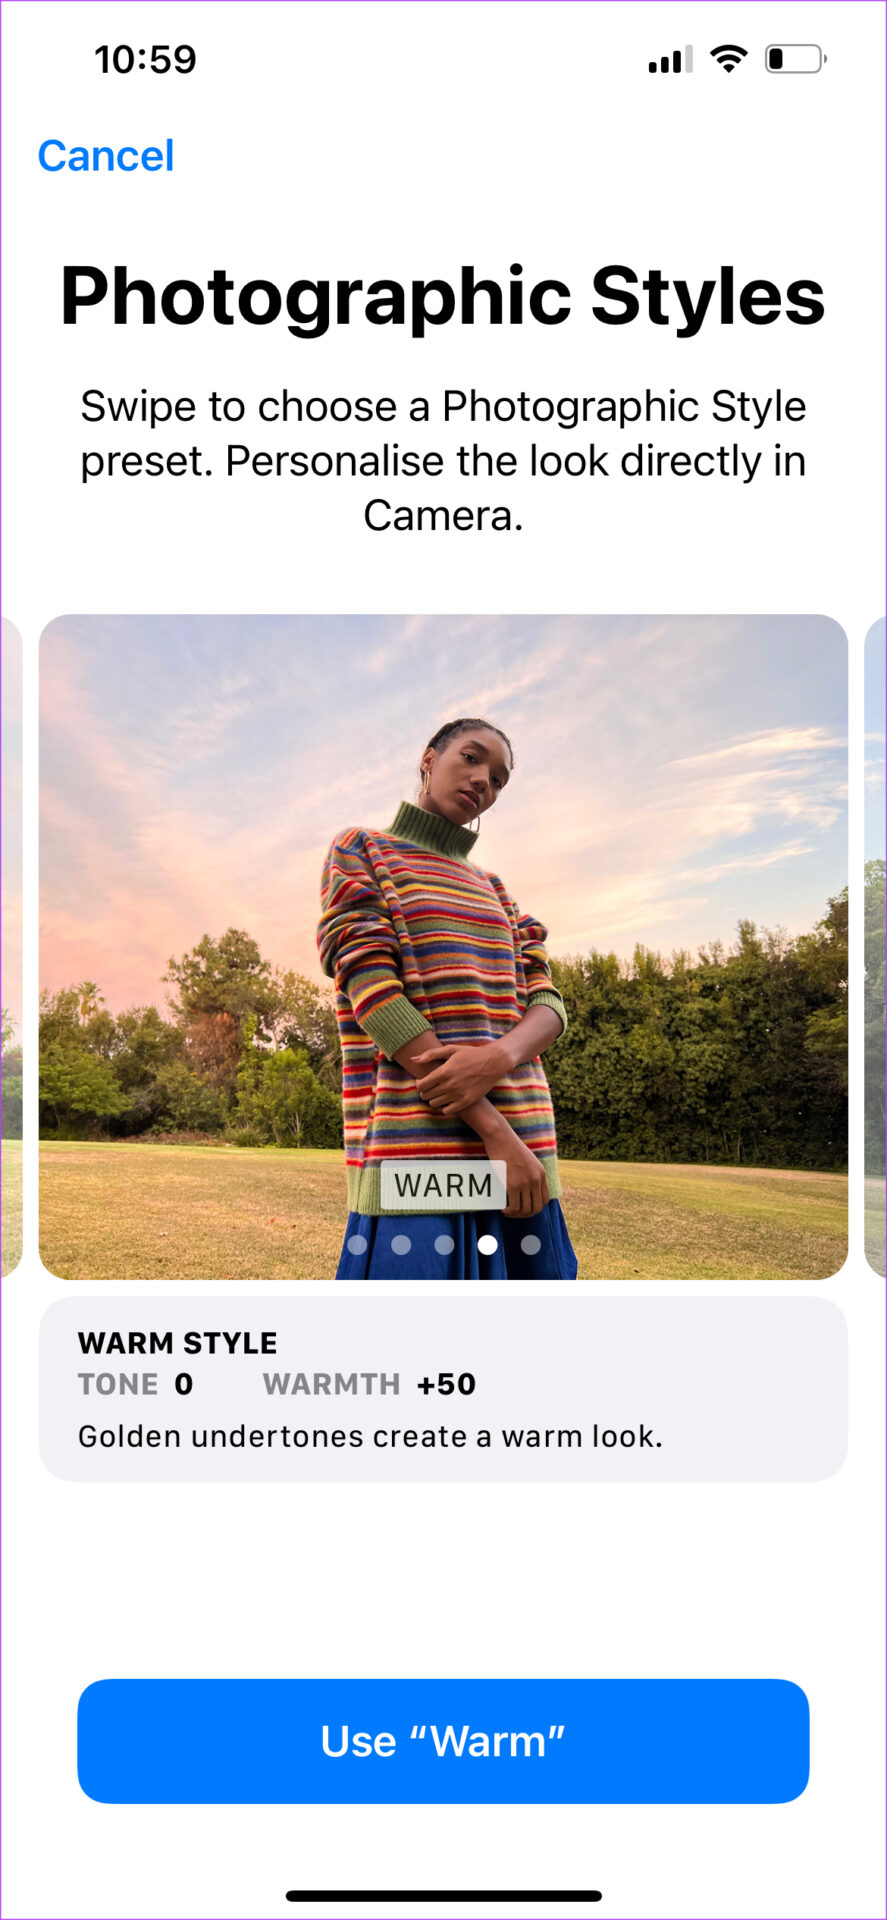
Warm
Generally, photos clicked on an iPhone tend to have a warmer tone. This style makes the pictures look even warmer if that’s the look you’re going for.
If you’re shooting yellow lights or a bright afternoon scene with the sun outside, this style might give you a good look.
Cool
This is the exact opposite of the Warm style. It boosts the Blue levels in the picture, making it apt to be used at night or when you’re clicking the sky or a water body.
It can also be a good option if you like slightly muted colors. Photographic Styles can be changed every time before you click a photo. Hence, you can use a particular style for certain scenarios and change them up depending on the situation. Once you’ve chosen the style you want to use, tap on the Use button at the bottom.
Using Photographic Styles
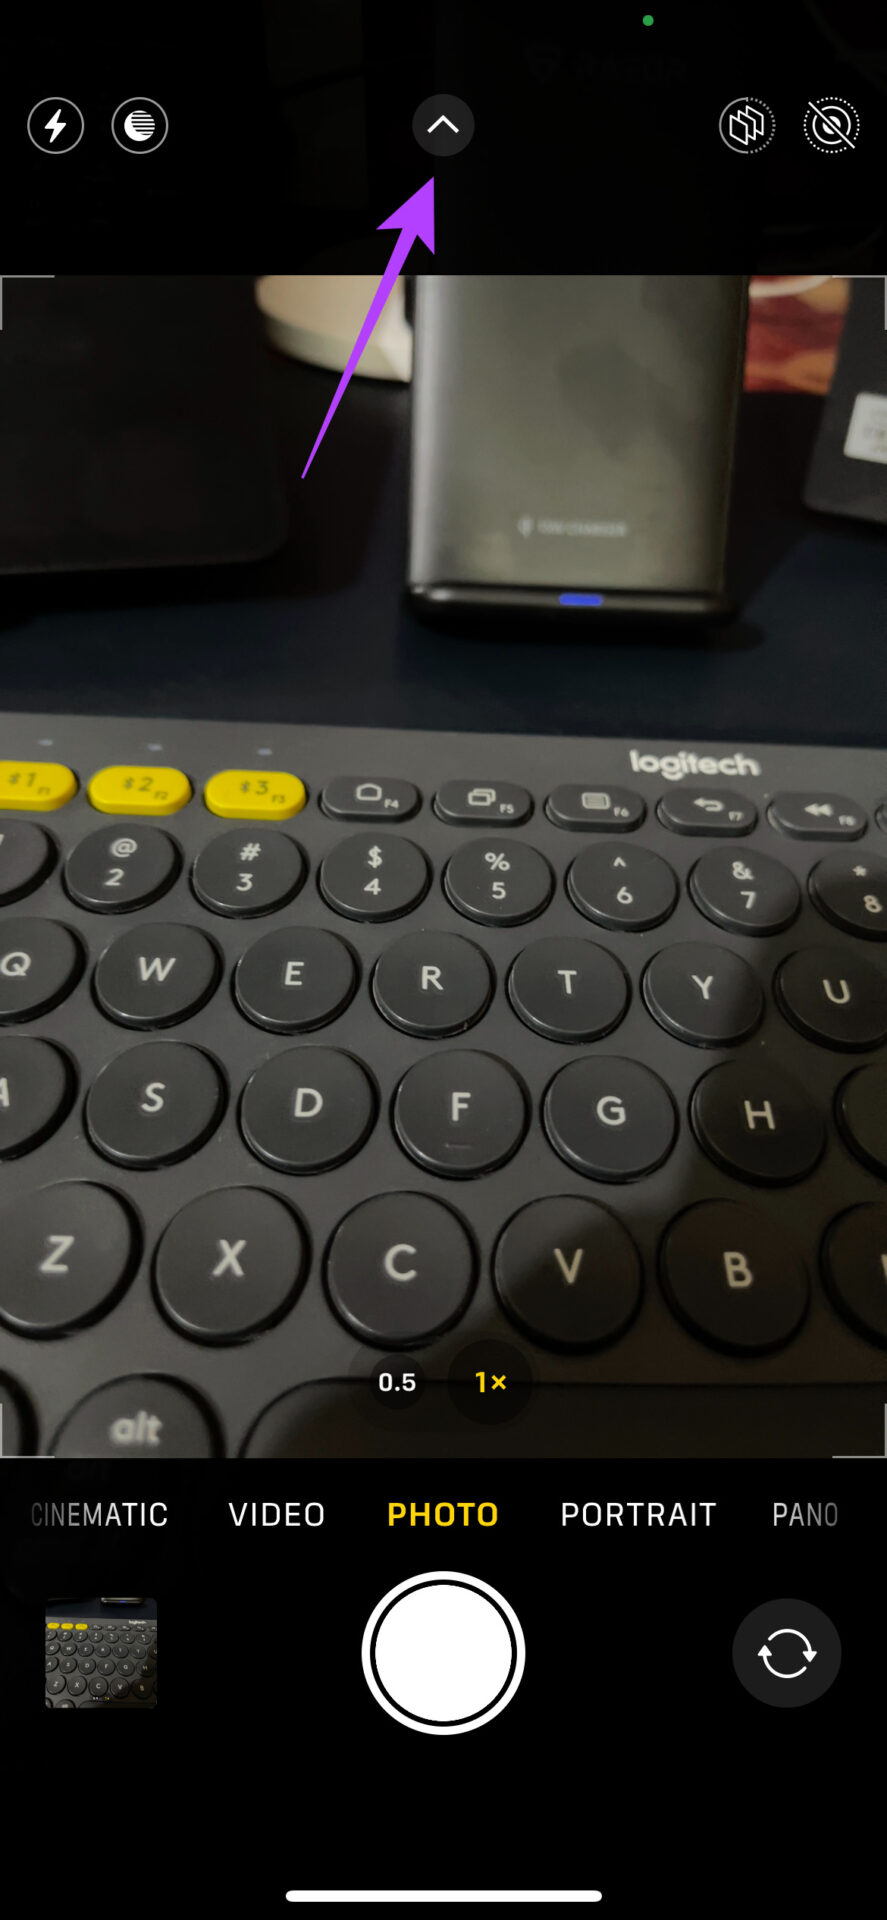
The best way to figure out which Photographic Style you want to use is by clicking photos with all the styles applied. Here’s how to do it. Step 1: Open the Camera app on your iPhone. Step 2: Tap on the small upward arrow at the top of the screen.
Step 3: Additional options will appear at the bottom of the screen. Select the Photographic Styles button, which looks like a few rectangles stacked together.
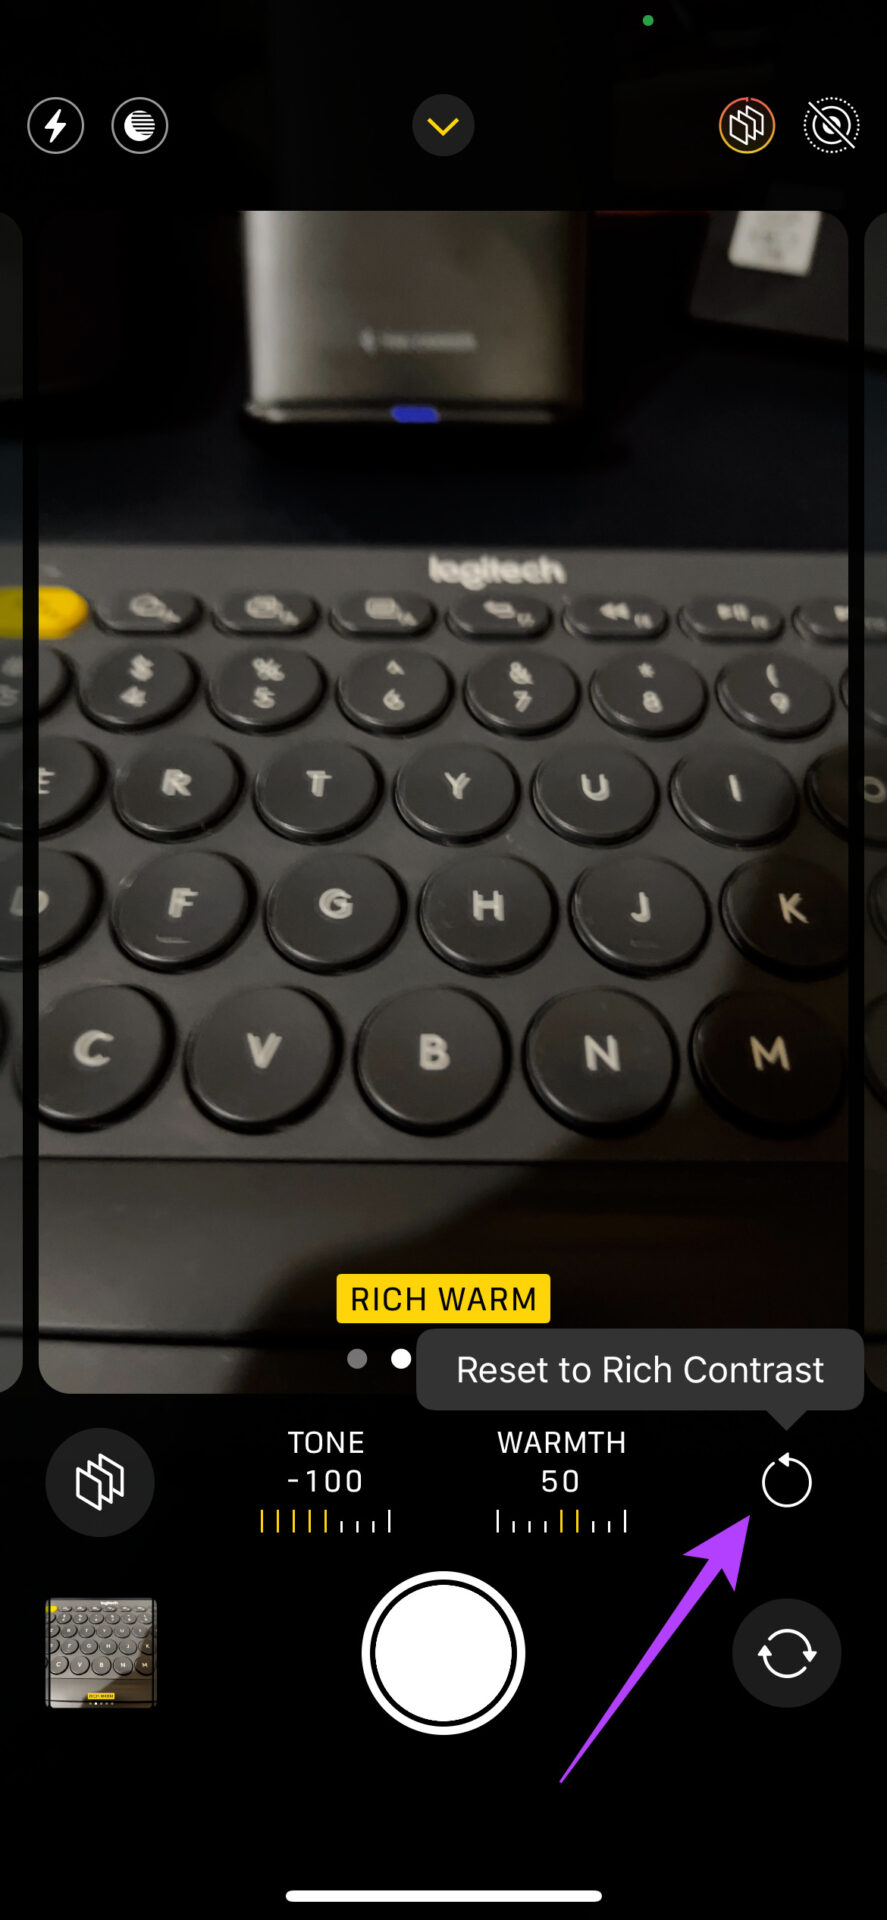
Step 4: You will now see the Photographic Style you selected earlier. You can swipe between different styles to choose the one you prefer.
Step 5: There are two sliders at the bottom representing Tone and Warmth. Feel free to play around with those and customize the look based on your needs. For example, increasing the Warmth in the Rich Contrat style creates a Rich Warm style. Use the Reset button beside the sliders to reset the style back to default.
Step 6: Tap on the shutter button to capture a photo with the applied style. Note that once you capture a photo with a particular Photographic Style, you cannot change it unless you manually edit the photo. You can click the same picture with different styles to compare the differences side-by-side.
Comparison of Different Photographic Styles
Here’s a gallery showing the different photography styles compared to the Standard profile. You can see the differences in colors and color temperatures with each style.
Change the Way Your Photos Look
Customize the look of your photos as per your preferences using Photographic Styles. Some people prefer natural colors, while some may like pictures with boosted colors that look more appealing to the eyes. The best part about Photographic Styles is that it gives you the option to choose the kind of look you prefer. The above article may contain affiliate links which help support Guiding Tech. However, it does not affect our editorial integrity. The content remains unbiased and authentic.