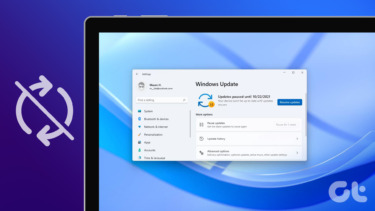
Microsoft’s overtly proactive approach to Windows 10 updates has often landed several folks in a soup. Cumulative updates are installed automatically when Windows decides to do it. This can be extremely frustrating for Windows 10 users as they are often forced to stop work and restart their machines at an inopportune time. I know that we always recommend you guys to install the latest software update for security reasons. However, it just isn’t practical to let it happen any point of time or it can cause problems for other software on your PC. The automatic Windows 10 updates also consumes the data in the background, since it downloads from Microsoft’s servers, and it’s no surprise why the software giant is facing lawsuits due to the default behavior of Windows 10. If you are fed up with automatic Windows 10 updates installing while you are working on something, then follow this guide to disable those updates. Disclaimer: By disabling Windows 10 Updates, you’ll put your computer at a potential security risk. We are not responsible if your PC gets compromised or crashes. Also, it’s quite possible a few software might not work as expected. That said, you can always revert to allowing Windows 10 updates downloads over a weekend and install them.
Use Windows Settings
Microsoft has heard the growing consumer demand, and it’s offering a native way to pause automatic Windows 10 updates through the Settings menu. Follow the steps below to make the necessary changes to stop automatic Windows 10 updates. Step 1: Open the Windows Settings app. Go to Windows Update, and you’ll find all the relevant options. Step 2: Under the Windows Update menu, go to Advanced options. Step 3: Under Pause updates, select up to seven days to pause Windows 10 update. Go back to the main Windows Update menu, and you will see that the system has paused the updates till the selected day. If you want to undo the changes then simply go to the same Windows Update menu and select the Resume updates function.
Meter Your Network Connection
First, you need to understand that the method won’t work with an Ethernet connection. You can only disable automatic updates by using this method on a Wi-Fi connection. If your computer is connected to Wi-Fi, you can try this to stop Windows 10 automatic updates. It can be useful when working with limited GBs to spare in a monthly cycle and don’t want to waste the data on Windows 10 updates. By default, when you connect the Windows 10 device to a Wi-Fi connection, the OS won’t mark the connection as a metered one. Follow the steps below. Step 1: Open the Windows 10 Settings app and head to Network & Internet > Wi-Fi. Step 2: Select the connected Wi-Fi network. Step 3: Scroll down and set the connections as a metered one. Do note that some apps might work differently to reduce data usage when connected to a metered network. Especially those that tend to use a lot of bandwidth like Netflix and Zoom. Now go back to the main Settings menu and open the Windows Updates option. Go to Advanced options and disable Download updates over metered connections. From now on, Windows 10 won’t download updates over the specified metered Wi-Fi connection.
Disable Windows 10 Update Permanently
You can disable Windows 10 updates by following the below steps. Step 1: Press Windows + R and open the Windows Run menu. Step 2: Type services.msc and open the Services menu. Step 3: Double click on Windows update service to access the General settings. Step 4: Select Disabled from the Startup drop-down. Once done, click Ok and restart your PC. Performing this action will permanently disable Windows automatic updates. If you’d like to enable it again, follow the same steps as above and toggle the option to Automatic. There is another way to disable Windows 10 updates using Group Policy Editor. But the trick is only available for Windows 10 Pro users and not the Home users. I will recommend the tricks mentioned above to pause automatic Windows 10 update. You can also disable automatic Windows 10 updates using the Registry Editor. But it is a complex procedure and should only be performed by experienced power users who often take a a full backup of their machine. If anything goes south then it can have serious negative effects on your computer’s performance.
Pause Windows 10 Update Installation
If the system has already downloaded the Windows 10 update, it will try to install it. We have seen users complaining about Windows 10 forcing update installation right in the middle of work. Follow the steps below to pause Windows 10 update installation. Step 1: Open the Windows 10 Settings app. Step 2: Go to Windows 10 update > Active hours. By default, Windows 10 defines Active hours based on the user’s activity, but you can also define active hours and turn off the option. Select the Start time and End time for your activity, and the system won’t force Windows 10 update installation during the set time.
Are Windows 10 Updates Necessary
Frequent security and OS updates are essential for a healthy run for your device. However, not all OS updates are stable, and sometimes it may cause serious issues on your computer. Remember that some of the automatic updates will be security updates or important stability improvements that one must install to safeguard the PC. As for large OS updates, I would advise you to wait for a couple of weeks before installing them.
Fix Windows 10 Update Mess
Follow the steps above and pause automatic Windows 10 updates and installation on your device. Just be careful not to turn the Windows 10 service off and forget to check for updates. While automatic updates can be problematic, letting your system lag behind critical updates can also have serious consequences in the long run. Next up: Are you facing Wi-Fi connectivity issues on Windows 10? Read the post from the link below to learn the 8 useful ways to fix your Wi-Fi woes in Windows 10 when you put it to sleep. The above article may contain affiliate links which help support Guiding Tech. However, it does not affect our editorial integrity. The content remains unbiased and authentic.


