Knowing how many RAM slots are available on your PC should help determine whether your computer has a room for extra RAM sticks. Alternatively, you can also swap out the old ones with the new faster and better ones. We’ll show you three simple methods for checking available RAM slots in Windows 11. So, without further ado, let’s get right to it.
1. Check Available RAM Slots via Task Manager
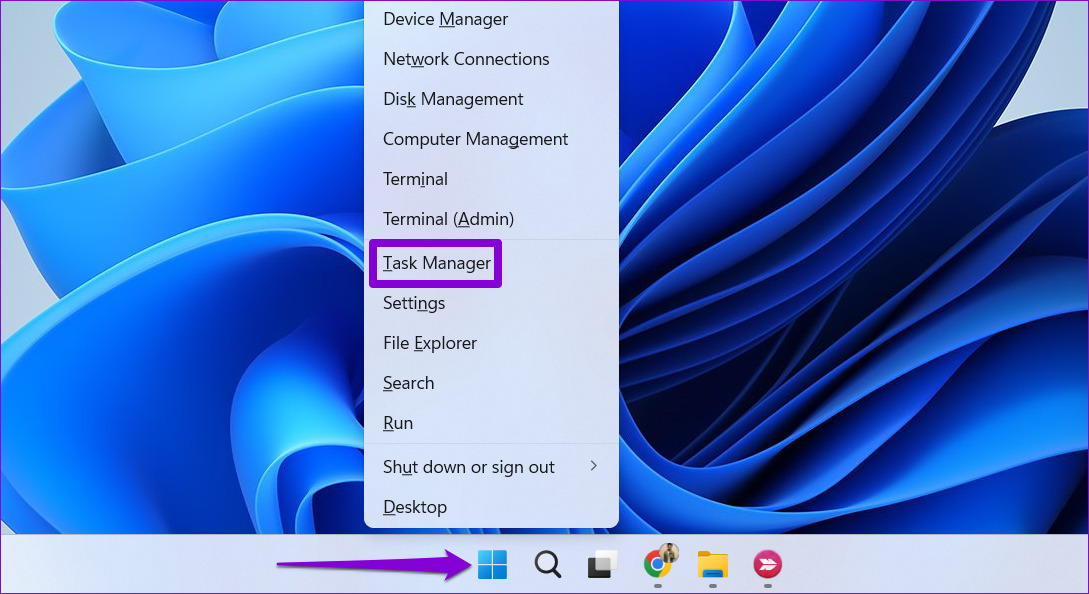
Task Manager is an advanced tool that lets you force-stop apps, change startup programs, and manage system processes on Windows 11. It also provides you with hardware information about your PC, including the number of available memory slots on the motherboard. Follow these steps to check available RAM slots using Task Manager. Step 1: Right-click on the Start icon and select Task Manager from the list. Alternatively, you can press Ctrl + Shift + Esc on your keyboard to launch the Task Manager quickly.
Step 2: Use the left sidebar to switch to the Performance tab.
Step 3: In the Performance tab, click on Memory. Then, check the number of slots next to the ‘Slots used’ option in the bottom-right corner of the window. The screenshot below shows ‘Slots used’ details as 2 of 4. That means, 2 memory slots are available.
2. Check Available RAM Slots Using Command Prompt
If you prefer to interact with your computer through a command line interface, you can use Command Prompt to check for available RAM slots in Windows 11. As intimidating as it may sound, this method is quite easy and does not require much technical know-how. Use the following steps to find out available RAM slots using the command prompt: Step 1: Press the Windows key + R to open the Run dialog box and type cmd in the Open field. Then, press Ctrl + Shift + Enter to open the command prompt with administrative privileges.
Step 2: Select Yes when the User Account Control (UAC) prompt appears.
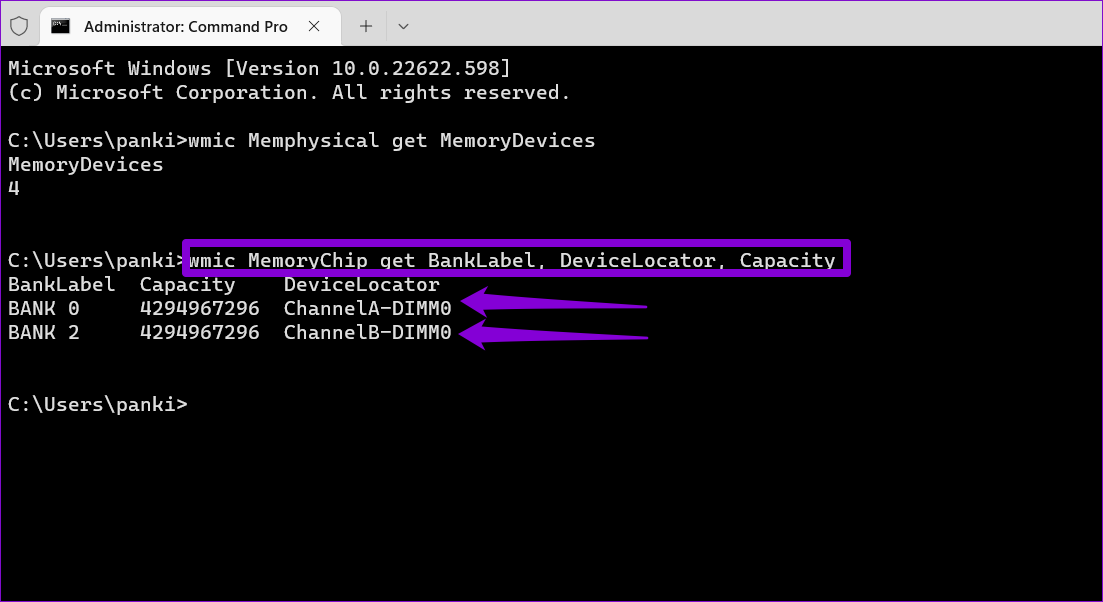
Step 3: Paste the following command and press Enter to reveal the total number of memory slots on your PC.
The total number of memory slots should appear under MemoryDevices. Step 4: Next, run the following command to find out how many of the total RAM slots are currently in use:
In the above example, two memory slots are in use, indicating that the other two are available.
3. Check Available RAM Slots With Windows PowerShell
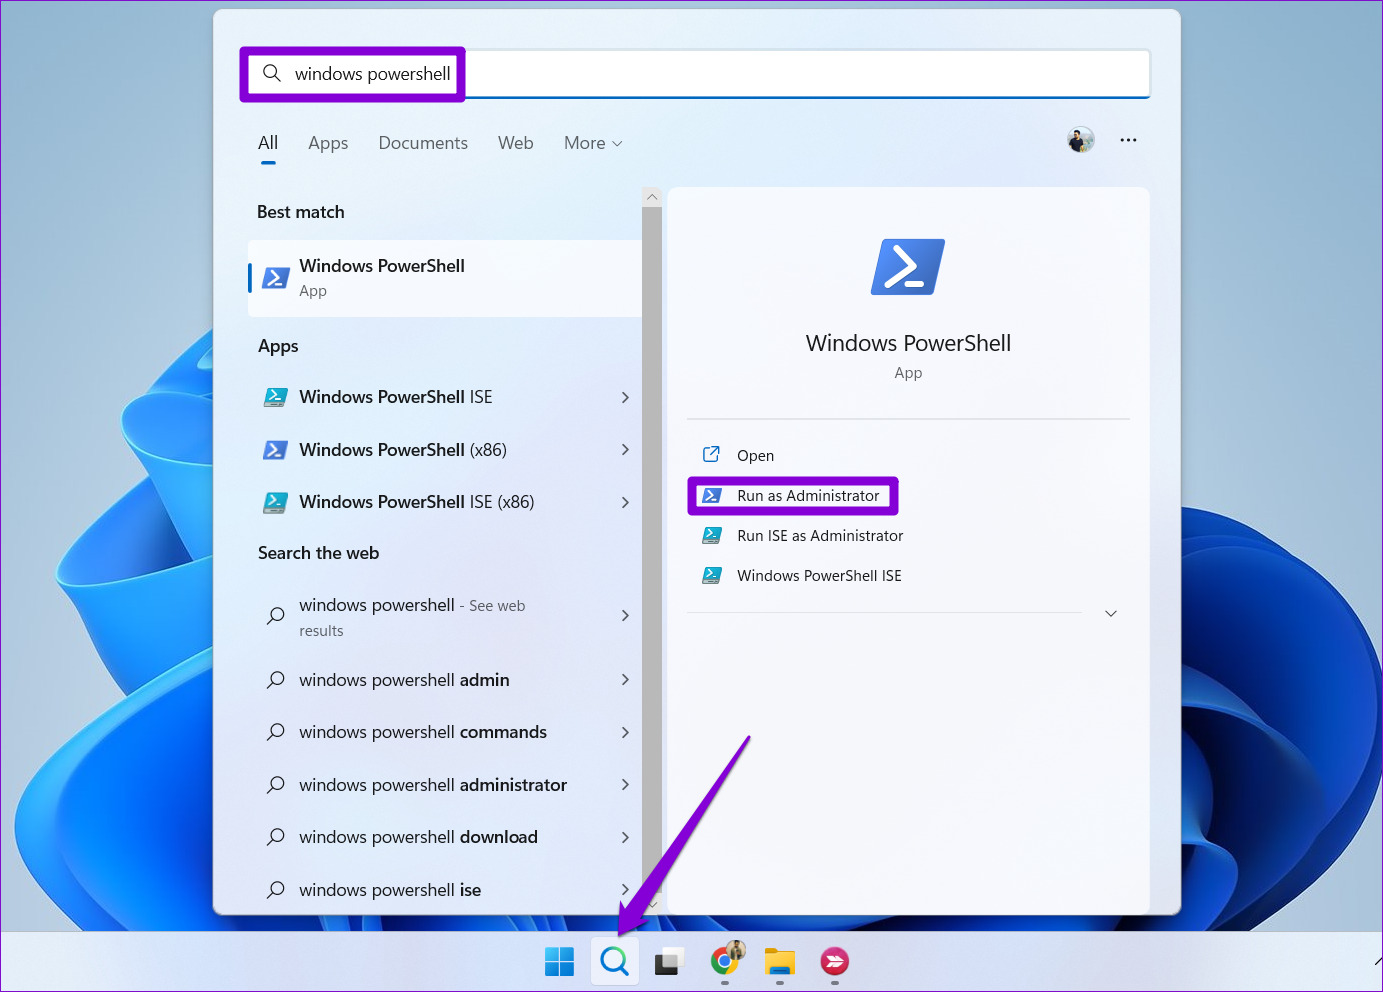
Windows PowerShell is a useful command-line utility to perform various administrative tasks and make system-level changes. You can run a few commands in the Windows PowerShell to find out how many memory slots are available on your PC. Follow these steps: Step 1: Click the Windows Search icon on the Taskbar or press the Windows key + S to open the search menu. Type Windows PowerShell in the search box and select Run as Administrator.
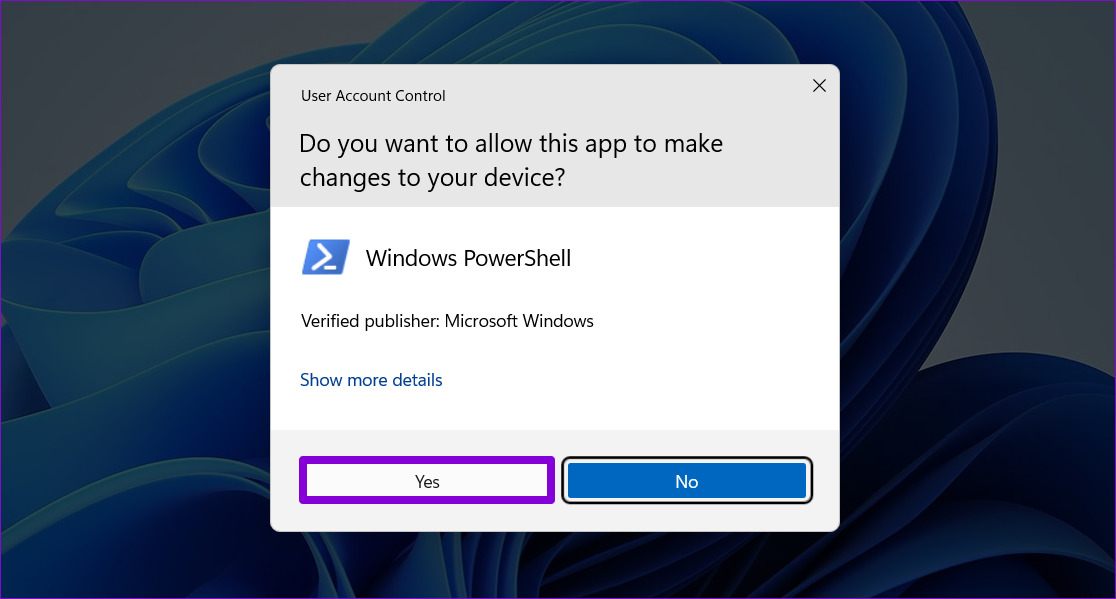
Step 2: Select Yes when the User Account Control (UAC) prompt appears.
Step 3: In the console, run the following command to reveal the total number of memory slots on your PC.
You’ll find the total number of memory slots under the MemoryDevices column. Step 4: Run the following command to view how many memory slots are currently in use.
After viewing the number of slots in use, you can determine how many RAM slots are still available on your PC.
Know Your PC
Being a powerful operating system, Windows 11 necessitates appropriate hardware. If your Windows 11 PC feels sluggish while gaming or performing memory-intensive tasks, upgrading your system’s RAM should help boost its performance. In addition to the methods described above, you can use third-party programs such as CPU-Z to view the available RAM slots on your PC. These apps will provide you with all the details about your PC’s hardware. That said, it’s best to stick to native methods if possible. The above article may contain affiliate links which help support Guiding Tech. However, it does not affect our editorial integrity. The content remains unbiased and authentic.
