We’ve compiled a list of working solutions to fix when the MacBook Air is not charging. Our solutions cover the latest 2020 MacBook Air with M1 chip, 2018 Intel MacBook Air, 2017 Intel MacBook Air, and 2015 Intel MacBook Air models.
For All MacBook Air Models
The following list of solutions applies to users having any of the models mentioned above.
1. Check for Charger Connection With the Power Source
The easiest thing to do is to check whether you’ve connected your MacBook Air properly to the power source or not. If the adapter is loose or the wall socket doesn’t have proper grounding, we recommend you to plug the charger into a different power source. You should also see if the charging cable has been connected properly between your MacBook Air and the charging adaptor. If you are using a MagSafe charger, please ensure that the head of the DC connector is properly attached to the magnetic port on your MacBook Air.
2. Let Your Mac Cool Down for Some Time
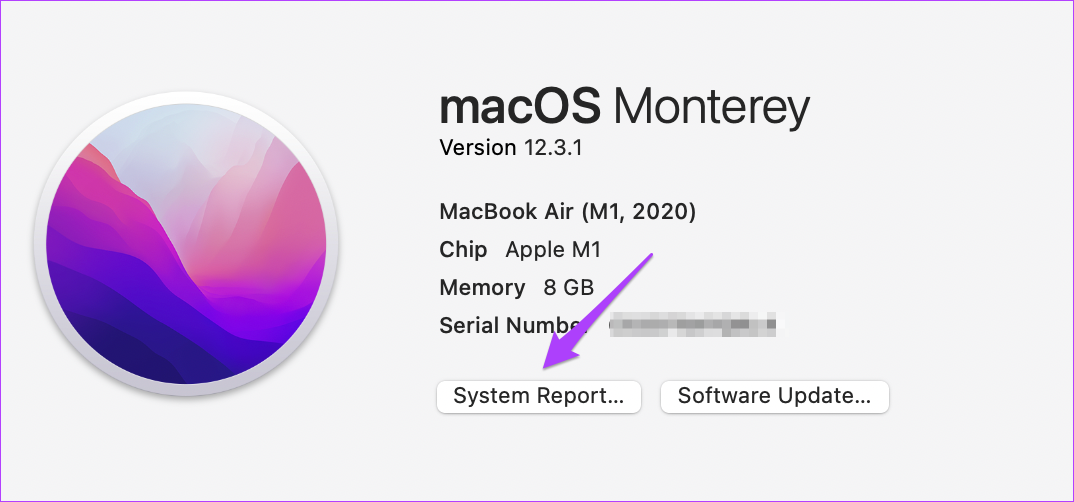
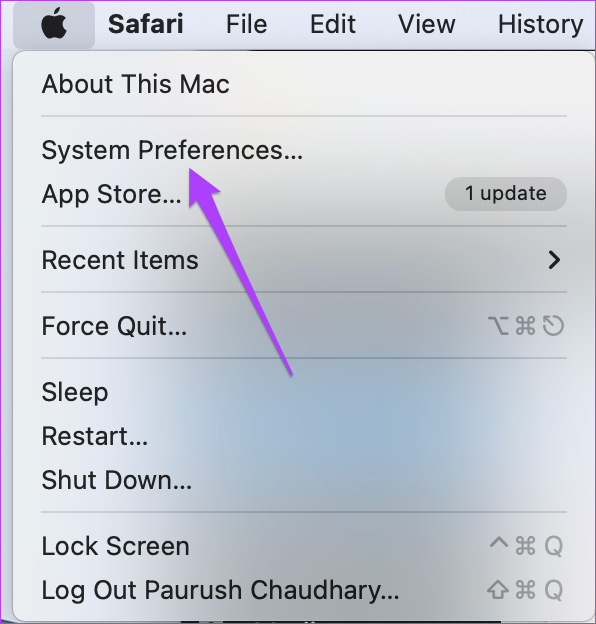
While watching a 4K movie or rendering graphics, the MacBook Air will heat up due to excessive usage. If your MacBook Air is considerably warm, avoid using it. Let it cool down and refrain from stressing system resources when the MacBook Air hits high-temperature environment for a long time. 3. Check the Battery Health Status of Your MacBook Air The battery inside your MacBook Air has a specific life cycle. It will eventually end up losing its charging capabilities with time. If you have been using your system for two-three years or more, you must check the Battery Health Status.. This will help estimate how much longer your MacBook Air can provide good battery backup after a full charge. Here’s how to check the same. Step 1: Click the Apple logo at the top-left corner.
Step 2: Select About This Mac.
Step 3: Click on System Report.
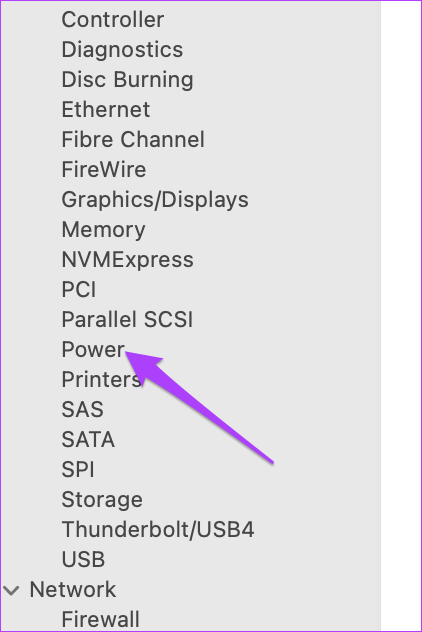
Step 4: In the System Information tab, click on Power from the left menu.
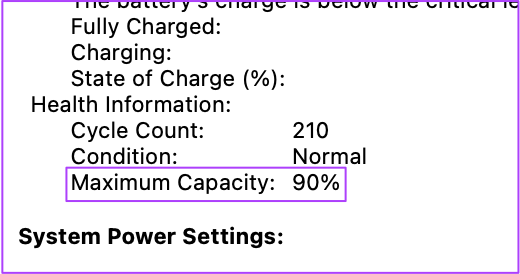
Step 5: Look for Battery Capacity below Health Information.
The Battery Health Status of your MacBook appears in percentage. If the Battery Capacity has gone below 85%, Apple recommends replacing the battery by visiting their store. Alternatively, you can check the Battery Health Status by following these steps as well. Step 1: Click the Apple logo at the top left corner.
Step 2: Select System Preferences.
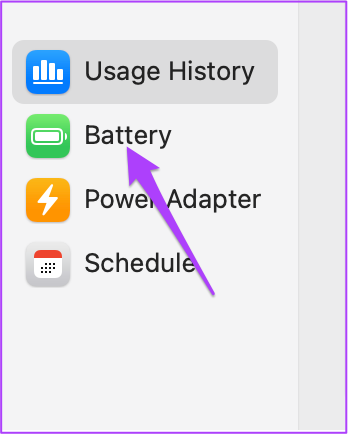
Step 3: Click on Battery.
Step 4: Select Battery from the tab.
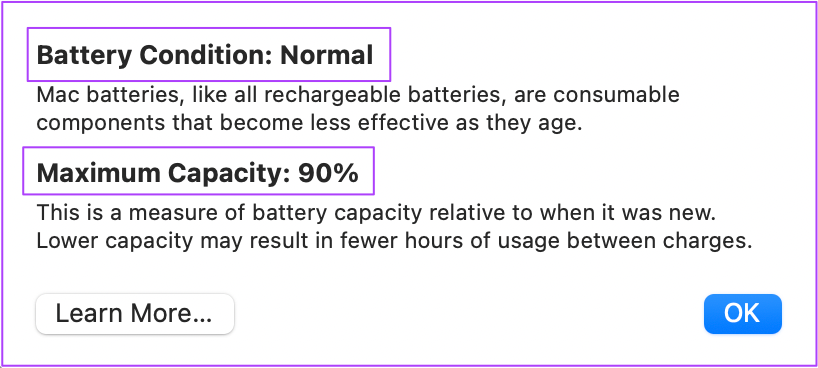
Step 5: Click on Battery Health at the bottom.
You will see the Battery Capacity Percentage and Battery Health information. You don’t need to replace the battery if it says Normal. However, if you see Service Recommended status, visit your nearest Apple store to replace the battery.
4. Check the Charge Cycle Status
Every MacBook Air and MacBook Pro model carries charge cycle count. It is basically the total number of times you can charge the battery of that particular system. 2020, 2018, and 2015 MacBook Air models support 1,000 charge cycles. Follow these steps to check the remaining charge cycles for the battery of your MacBook Air. Step 1: Click the Apple logo and select About This Mac.
Step 2: Click on System Report and select Power from the left menu.
Step 3: Look for Cycle Count below Health Information.
If the cycle count is approaching 1,000, it is better to get the battery replaced for your model.
For the 2020 MacBook Air With M1 Chip
If you own the latest M1 model of MacBook Air, here are two solutions available for your model.
1. Turn off Low Power Mode for Charging Adapter
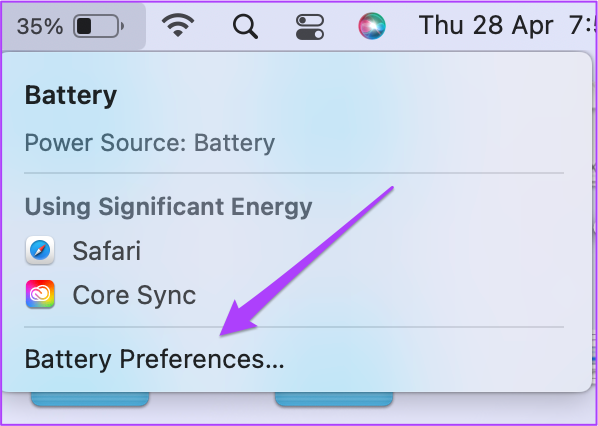
The macOS Monterey release brought this feature. Enabling it reduces energy consumption since it lowers screen brightness and reduces the processor’s clock speed. If your M1 MacBook Air is not charging properly, you can disable the low power mode for the charging adapter. Follow these steps. Step 1: Click on the battery status icon in the menu bar in the top left corner.
Step 2: Select Battery Preferences from the dropdown menu.
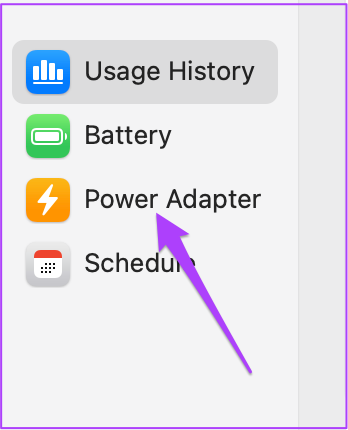
Step 3: In the Battery tab, click on Power Adapter from the left menu.
Step 4: Disable the option of Low Power Mode.
- Turn Off Optimized Battery Charging Another feature that got introduced with macOS Monterey was Optimized Battery Charging. This works exactly like how it works for iPhones. But then you can face the same issue of reduced charging speeds after 80%. To remove this obstacle, here’s how you can turn off Optimized Battery Charging. Step 1: Go to System Preferences again and click on Battery.
Step 2: Select Battery from the left menu.
Step 3: Turn off the feature of Optimized Battery Charging.
For Intel Macbook Air Models
These solutions will specifically cater to those who have 2018, 2017, and 2015 Intel MacBook Air models.
1. Reset SMC
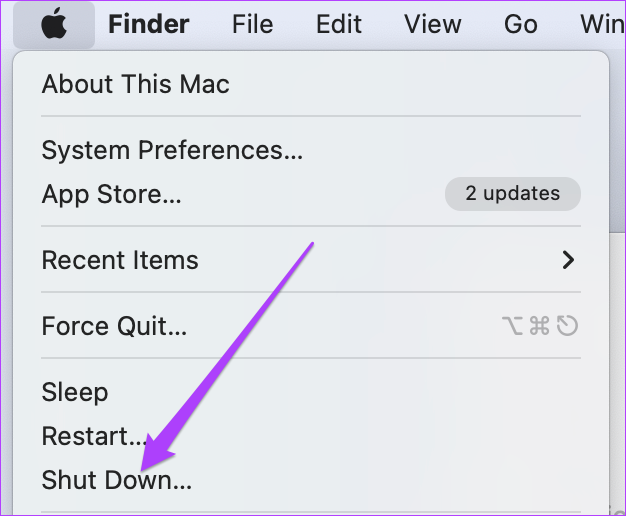
System Management Controller or SMC is a chip that controls different hardware functions on Intel-based Macs. These functions include cooling fans, system performance, and power supply. The battery charging process will get affected if the SMC somehow has incorrect data about the charger or the battery. If your MacBook Air is not charging, you can solve this issue by resetting the SMC on your system. Follow these steps to reset SMC if you are using 2020, 2019, or 2018 Intel MacBook Air. Step 1: Click on the Apple logo and select Shut Down.
Step 2: Press and hold the power button for 10 seconds. Then release the button. Step 3: Wait for a few seconds and then restart your machine. If this doesn’t help, follow these steps. Step 1: Shut down your Mac again.
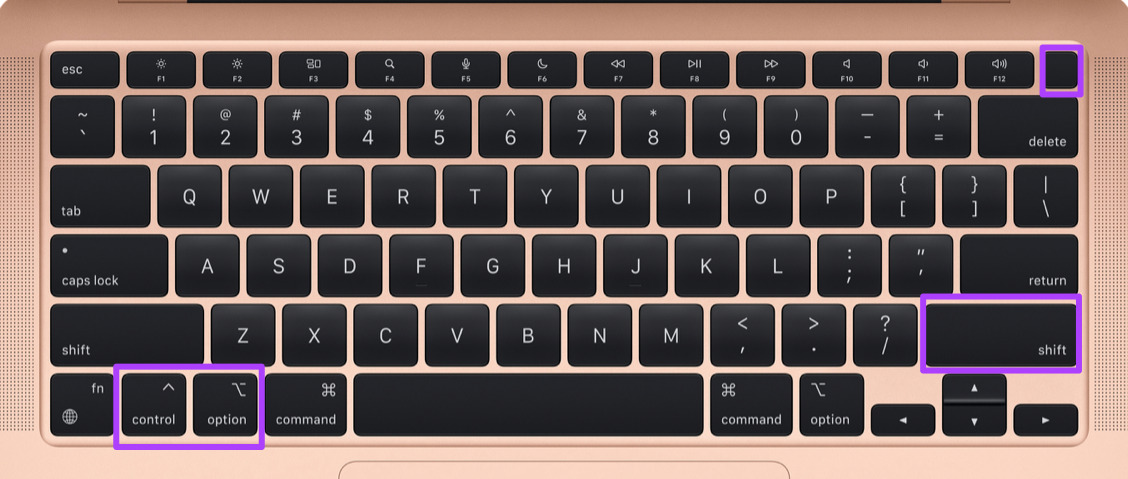
Step 2: Press and hold the right Shift + left Option + left Control key. Then press and hold the Power button as well.
Step 3: Keep pressing all the four keys together for another 7 seconds. If your MacBook Air has turned on, it will turn off again while you hold the keys. Step 4: Release all four keys and restart your system again. Follow these steps to reset SMC for users with 2017 and 2015 Intel MacBook Air. Step 1: Click on the Apple logo and select Shut Down.
Step 2: Press and hold the left Shift + left Control + left Option key + Power Button for 10 seconds.
Step 3: Release the keys and switch on your machine.
2. Reset NVRAM
Non-Volatile Random Access Memory or NVRAM stores settings related to sound volume, startup disk selection, and time zone. If this data gets corrupted, the charging process might work slowly or stop altogether. You can try resetting NVRAM to avoid charging issues on your MacBook. After following this process, you will have to adjust these settings again on your MacBook Air by opening System Preferences. Follow these steps. Step 1: Shut Down your Mac. Step 2: Turn it on again. Step 3: Press and hold Option + Command + P + R for 20 seconds when it switches on.
Step 4: Release the keys after the Apple logo appears and disappears for the second time. The system will now restart. You have successfully reset the NVRAM of your MacBook Air.
For MacBook Air Models With Type-C Charging
If your MacBook Air comes with Type-C charging, follow these steps. Step 1: Clean the Type C Charging Cable Ends.
USB Type-C ports tend to collect dirt over some time. This can hinder the process of charging your MacBook Air. You can use cotton buds and alcohol to clean the end of the Type-C cable. Please ensure that you only do this after removing the cable from both the adapter and charging port. You can also check the Type-C charging port on your system and clean that using cotton buds and alcohol. Wait for some time, and then try charging your MacBook again. Step 2: Check Voltage Supply of Type-C Cable. If cleaning the Type-C charging port doesn’t help, then the Type-C cable might not be supplying enough current. Connect the charger using a different Type-C cable. If your MacBook Air is charging with that spare cable, you need to get rid of that original Type-C cable and buy a new one.
For MacBook Air Models With MagSafe Charging
Before Apple switched to Type-C, MagSafe took care of charging almost every MacBook. This magnetic charging solution still feels quite fascinating if you think about it. But then it came with its pros and cons. Try these solutions if your MacBook supports MagSafe charging.
1. Clean the MagSafe Charging Port and Connector
Like Type-C, the MagSafe charging port and connector get dirty after excessive use. There are high chances of debris getting collected in the port and connector. This debris can consist of small metal items like staples that obstruct the charging process.
If your Mac is two-three years old, you should clean the MagSafe port and connector using a toothpick. Using cotton buds can help, but some tiny strands can get collected near the magnets. If you find any burn marks on the connector, replace the MagSafe connector immediately.
2. Use a Higher Voltage MagSafe Charger
If you do consider buying a new MagSafe charger, we recommend you get the one with a higher voltage. Apple uses the same IC chip or Integrated Circuit chip on the logic board for models launched between 2008 to 2015. So you can get a new charger with a higher voltage to improve the charging capability of your MacBook Air.
If these solutions don’t help you, we recommend you visit your nearest Apple store as a last resort.
Fix MacBook Air Charging Issues
We have tried our best to provide a detailed list of solutions to fix MacBook Air not charging issue. We hope that these solutions will fix the problem and you won’t be required to visit the Apple store. If your MacBook Air has completed three-four years, we suggest you try switching to a new one. The above article may contain affiliate links which help support Guiding Tech. However, it does not affect our editorial integrity. The content remains unbiased and authentic.

![]()

![]()


![]()